
Small, hands-on classes led by local artists.
Learn something new or get back into a practice you’ve missed.
Browse upcoming classes and choose something you’d like to make.
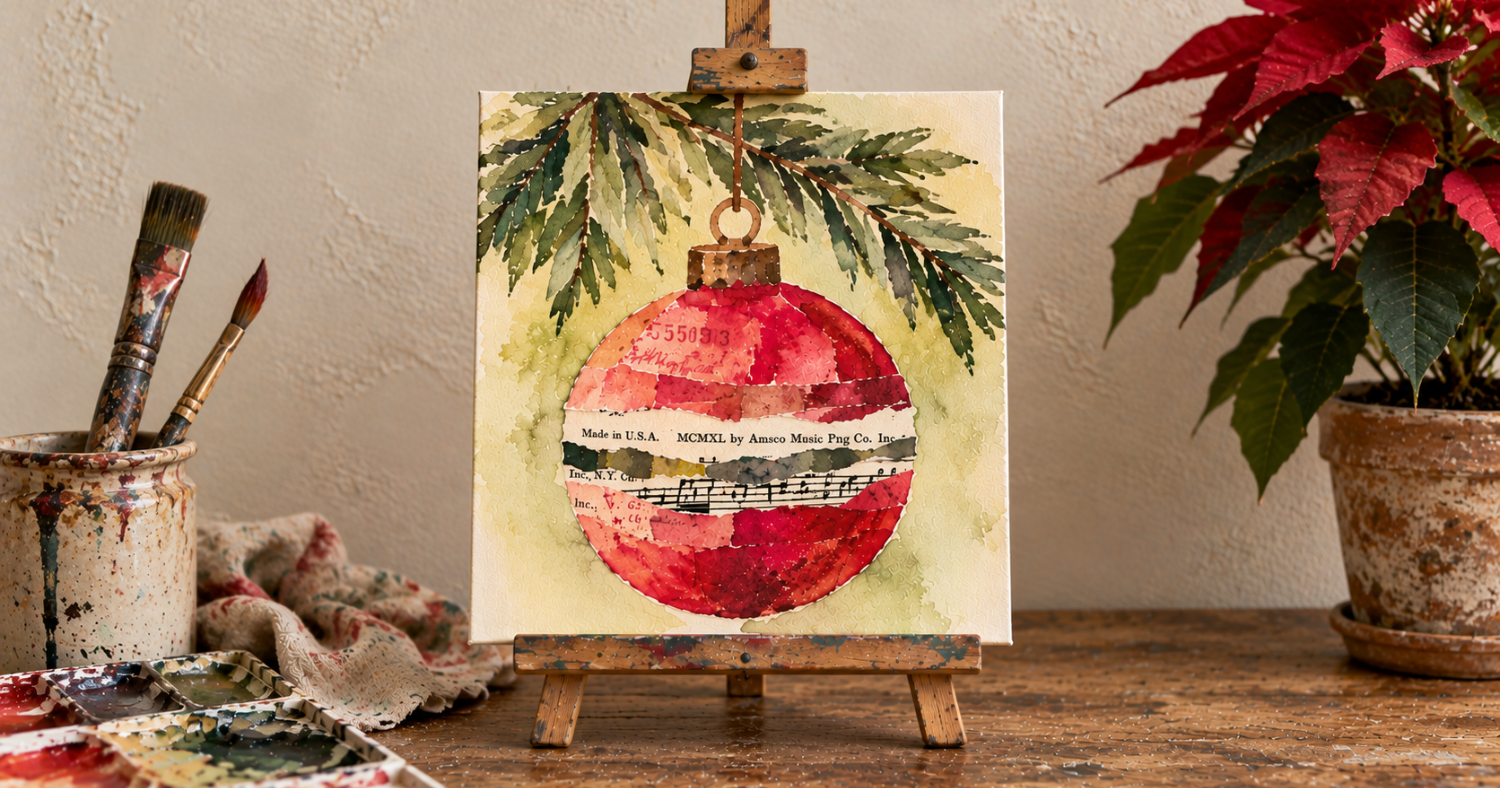
Tuesday, November 10 – 9:30–11:00 AM and
Thursday, November 12 – 9:30–11:00 AM
Create festive watercolor and mixed-media pieces inspired by poinsettias and Christmas ornaments, with the option to turn your finished artwork into a holiday card.
What you’ll do
Across two sessions, you’ll paint a poinsettia and holiday ornaments while exploring both watercolor and paper-texturing techniques. You’ll also experiment with mixed-media elements like collage paper, music sheets, book pages, and napkins to add texture and visual interest.
Your finished work can stand on its own or be used as the basis for a handmade holiday card.
What you’ll learn
How to paint poinsettias and holiday ornaments in watercolor
How to combine watercolor with mixed-media techniques
How to add texture using paper and collage materials
How to use watercolor pencils and other tools to build detail and dimension
How to develop a holiday-themed painting that can also work as a card design
Great for: Anyone who wants to learn more about watercolor painting and paper texturing.
Instructor: Rita Carpenter is a watercolor artist and photographer drawn to the balance between loose color and careful control. Her classes are thoughtful, encouraging, and designed to help students build confidence while becoming more comfortable with watercolor.
Schedule
This is one class held over two dates. Registration includes both sessions.
Tuesday, November 10 – 9:30–11:00 AM
Thursday, November 12 – 9:30–11:00 AM
Cost: $78
What to bring:
140 lb. cold-press watercolor paper, around 15 × 15 inches or another size you prefer
Watercolor paints and brushes
Water containers
Fine-mist spray bottle
Watercolor pencils
Sandpaper
Paper towels and tissue
Music paper, collage paper, napkins, or book pages
Circle stencil or round container for tracing
YES Paste
Brush for glue
Salt
Cancellation policy:
If your plans change, please cancel more than 24 hours before class begins to receive credit toward another class at Depot Hill Creative. Cancellations made 24 hours or less before class are non-refundable and not eligible for class credit.
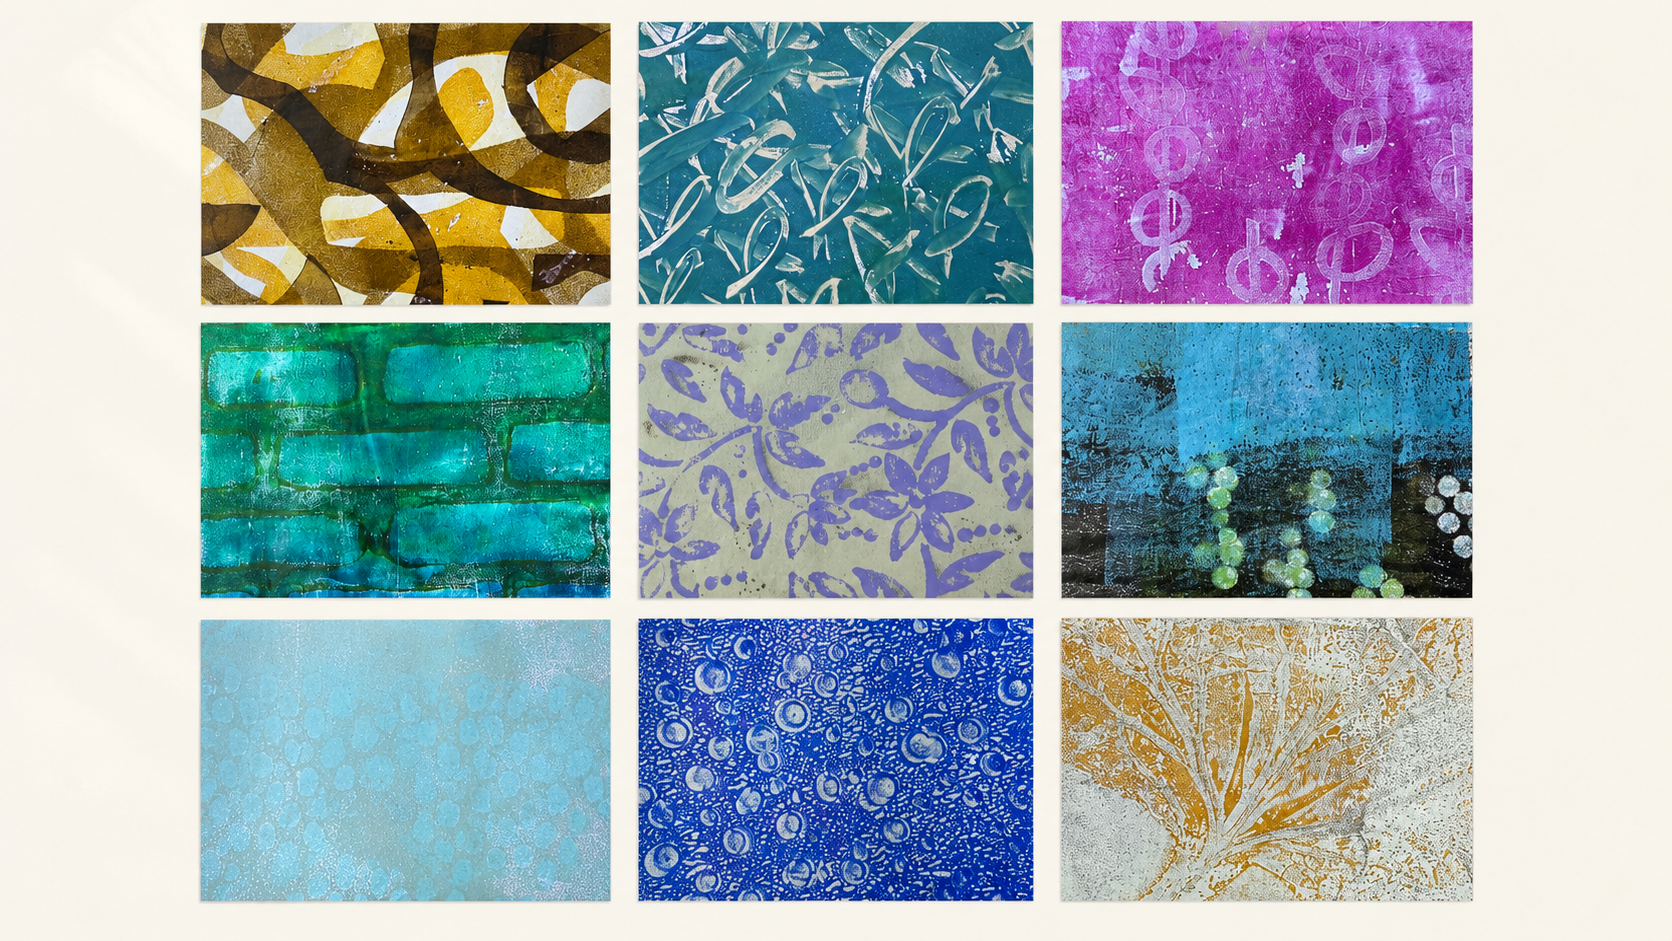
Friday, November 13, 5:30–8:00 PM
Description:
Discover how much color, texture, and surprise you can create with a single Gelli plate in this beginner-friendly introduction to monoprinting.
What you’ll do
Roll acrylic paint onto a soft gel printing plate with a brayer, then use stencils, masks, everyday objects, and mark-making tools to create texture before transferring your designs onto paper. You’ll experiment with color, layers, patterns, and different kinds of paper while making a collection of one-of-a-kind prints. You’ll also create ghost prints—second impressions made with the paint left on the plate—and see how unexpected results can lead to your next idea.
What you’ll learn
How to use a Gelli plate and brayer
How to apply and layer acrylic paint
How to create texture with everyday objects and mark-making tools
How to use stencils and masks to build patterns
How to create ghost prints
How different kinds of paper affect a print
Simple ways to build interesting layers and patterns
How to work with the unexpected results of monoprinting
Great for: Beginners, curious creatives, and anyone who enjoys experimenting with color, texture, and mixed media. No previous art or printmaking experience is needed.
Instructor: Alison Walker is an artist and instructor known for accessible, process-based workshops that help students build confidence through hands-on experience. Her classes are welcoming, supportive, and focused on curiosity, exploration, and skill-building.
Schedule
Friday, November 13, 5:30–8:00 PM
Cost: $65. All materials are included.
What to bring: All materials are provided. Wear clothing you don’t mind getting paint on.
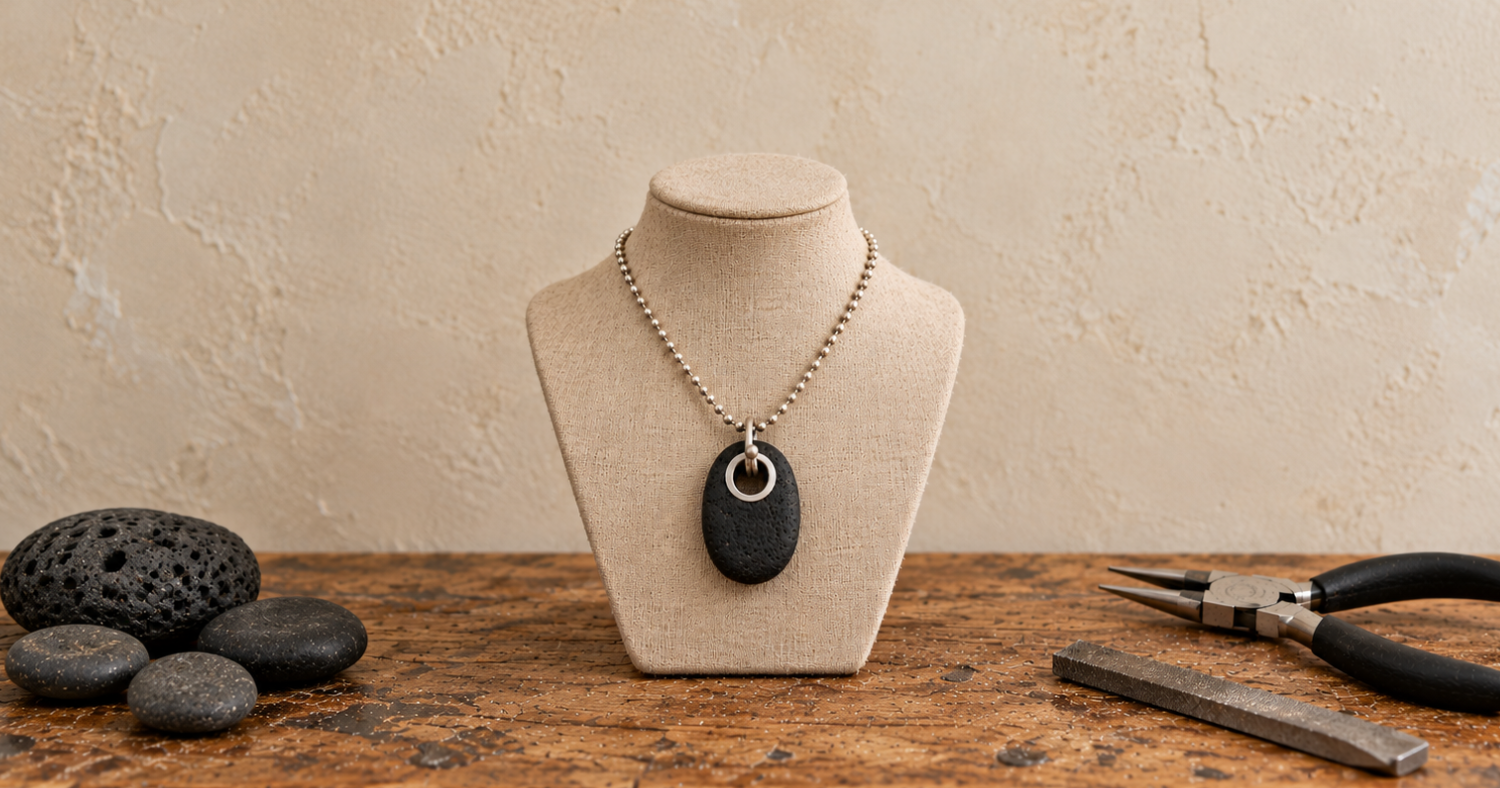
Saturday, November 14 10:00 AM–1:00 PM
Turn a Lake Superior riverstone into a one-of-a-kind pendant using sterling silver, hand tools, and traditional metalsmithing techniques.
What you’ll do
Choose a basalt stone collected along the shoreline of Lake Superior, then transform it into a finished pendant from start to finish.
You’ll drill directly through the stone, cut and set a sterling silver tube rivet, and use fine silver wire to create a coiled bail for hanging your pendant. Along the way, you’ll work with hammers, hand tools, a flex shaft, and a small butane torch to shape, secure, finish, and polish each component.
Most stones will measure approximately 1–2 inches long by about 1 inch wide, so every finished piece will have its own shape and character.
What you’ll learn
How to use a hollow-core drill bit and flex shaft to drill stone
How to cut silver tubing for a rivet
How to anneal silver with a butane torch
How to create a double-sided rivet in stone
How to finish and polish the rivet
How to ball fine silver wire with a butane torch
How to create a coiled pendant bail
Great for: Novices–no prior metalsmithing experience needed!
Instructor: Kay Rashka is a local metalsmithing instructor with more than 15 years of teaching experience, including at the Madison Bead Show and Milwaukee Bead & Button Show. She is also the author of Bead Meets Metal.
Schedule
Saturday, November 14 10:00 AM–1:00 PM
Cost: $125
Includes one basalt stone, 9.5 mm sterling silver tubing, 16-gauge fine silver wire for the bail, and written instructions. Necklace chain is not included.
What to bring: Wear old work clothes and closed-toe shoes. Long hair must be tied back. Safety glasses will be provided. Bring your own necklace chain or leather cord if you’d like to wear your finished pendant home.
Cancellation policy:
If your plans change, please cancel more than 24 hours before class begins to receive credit toward another class at Depot Hill Creative. Cancellations made 24 hours or less before class are non-refundable and not eligible for class credit.
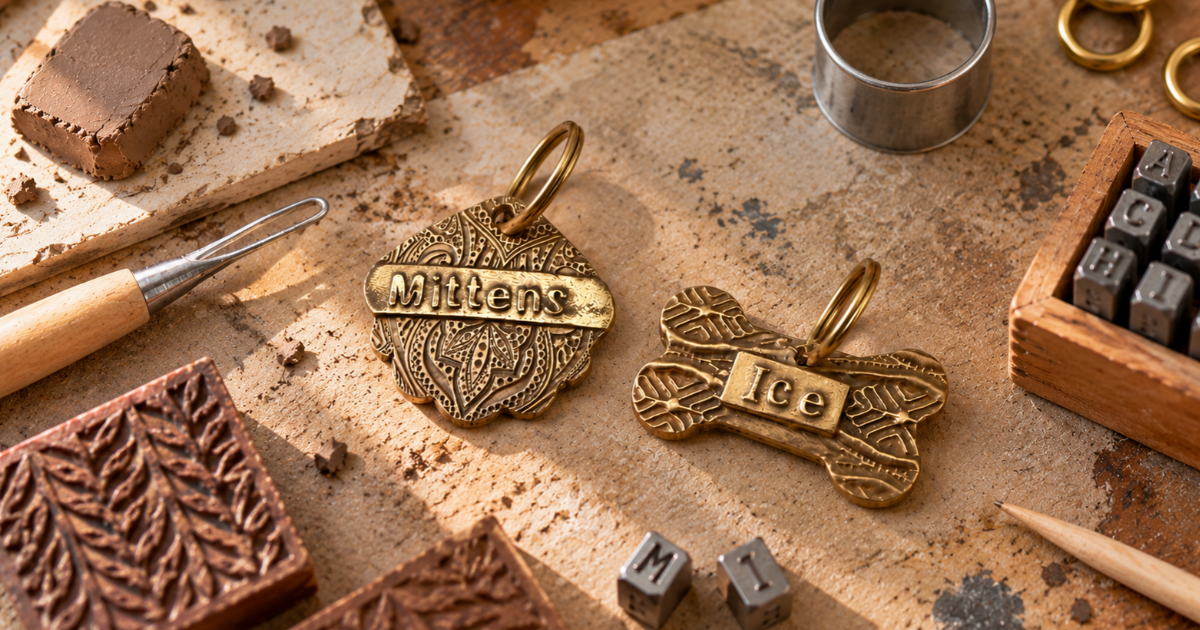
Schedule: Sunday, November 15, 1-4pm
Description:
Give your favorite companion a little handmade flair. Create a bronze pet tag with a name, texture and shape you choose yourself.
What you’ll do
Turn bronze metal clay into a personalized tag for your fur child. Choose your shape, play with patterns and textures, and add raised lettering to make the design your own. Make one for your pet’s collar or surprise another animal lover with a thoughtful handmade gift.
Karen Trexler will guide you through shaping, joining and refining your piece, with room to experiment along the way. Your tag will be fired overnight after the workshop and ready for pickup at Kismetic Studios on Main Street the following week.
Great for: Pet lovers, thoughtful gift-givers, and anyone curious about metal clay. Beginners are welcome!
Instructor: Karen Trexler is a metalsmith, enamelist, and metal clay jewelry artist with an MFA in metalsmithing and enameling from UW–Madison. She brings extensive experience working with and teaching metal clay, with a focus on making the material approachable for beginners.
Schedule: Sunday, November 15, 1-4pm
Cost: $72
What to bring: Just yourself! All materials and tools are provided.
Cancellation policy:
If your plans change, please cancel more than 24 hours before class begins to receive credit toward another class at Depot Hill Creative. Cancellations made 24 hours or less before class are non-refundable and not eligible for class credit.
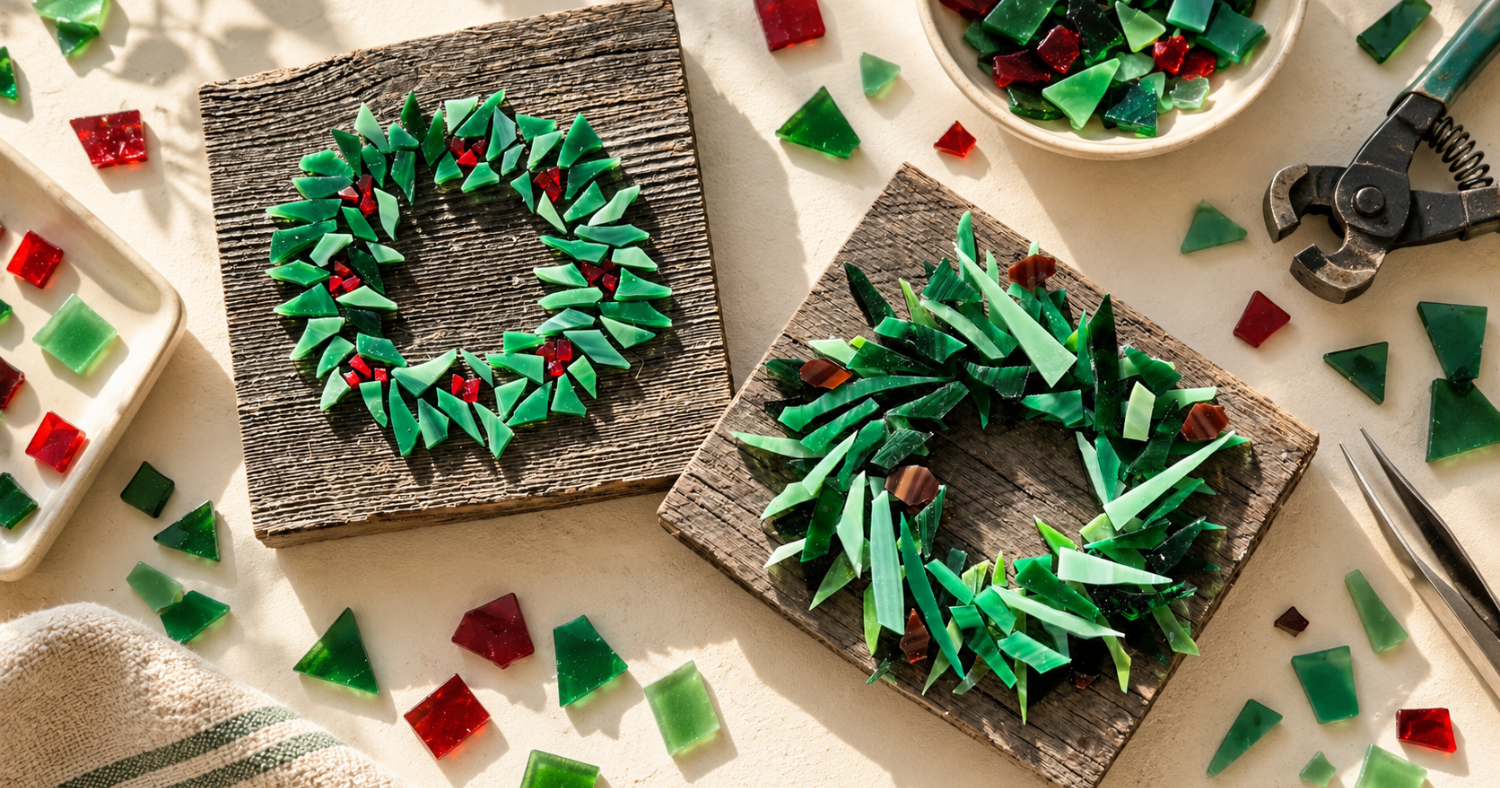
Saturday, November 21, 10:00 AM–12:00 PM
Create a colorful mosaic wreath on rustic barnwood for a one-of-a-kind piece you can display season after season.
What you’ll do
Build your wreath design directly onto a reclaimed wooden board using colorful glass or ceramic pieces. You’ll cut and shape your materials, arrange the pieces into a floral or holiday wreath pattern, and adhere everything to the barnwood to create a finished mosaic with plenty of texture and character.
By the end of class, you’ll have a permanent, weather-resistant piece of art ready to bring home and display.
What you’ll learn
How to cut and shape materials for mosaic work
How to plan and lay out a wreath design
How to arrange glass or ceramic pieces on barnwood
How to securely adhere mosaic materials to a wooden surface
How to finish a mosaic piece for display
Great for: All skill levels. No prior mosaic experience needed.
Instructor: Alexis Johnson is a stained glass and mosaic artist based in Edgerton, Wisconsin, where she operates Eagle Art. Her classes are hands-on and approachable, with plenty of room to experiment while learning the fundamentals of the craft.
Schedule
Saturday, November 21, 10:00 AM–12:00 PM
Cost: $48
What to bring: Just yourself — all tools and materials will be provided.
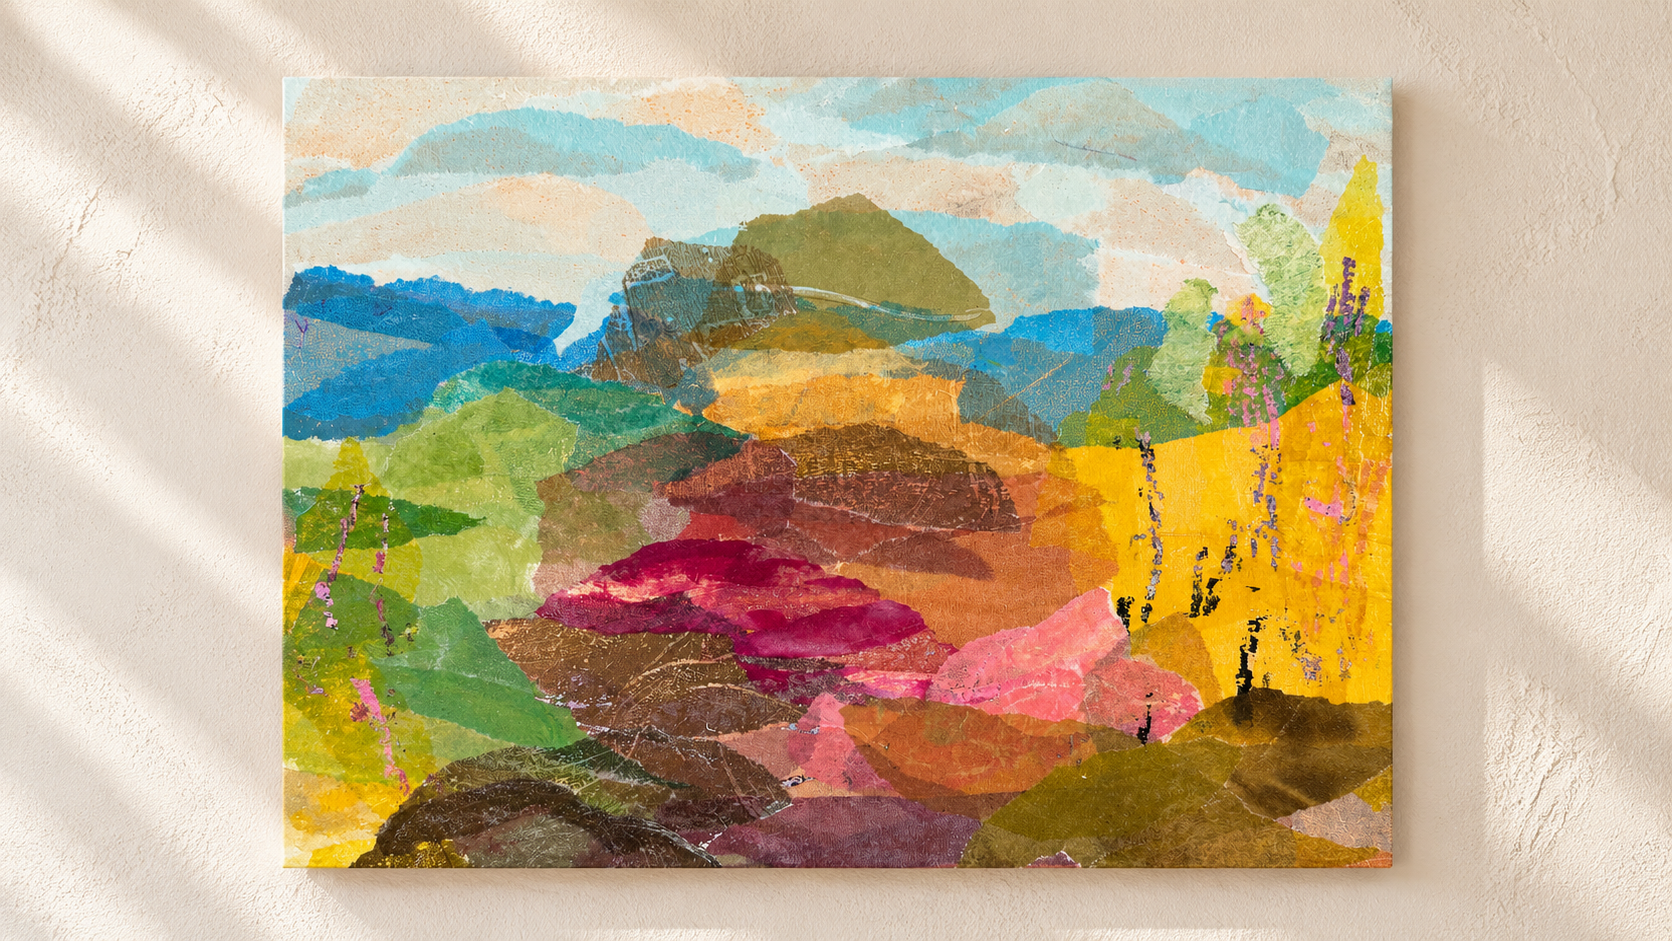
Friday, December 11, 5:30–8:30 PM
Description:
Make a collection of colorful, textured prints, then turn your favorites into a finished 8 × 8-inch collage on a wood panel.
What you’ll do
Explore Gelli plate printing, a process that uses a soft gel plate to transfer paint and patterns onto paper. You’ll experiment with layers of color, stencils, masks, and different papers, discovering new combinations as you pull each print. Then choose your favorite sections and try tearing, cutting, overlapping, and arranging them into a collage. See how a pattern or splash of color changes alongside another before adhering your composition to an 8 × 8-inch wood panel.
What you’ll learn
How to build layers of color and texture with a Gelli plate
How to combine stencils and masks to create patterns
How to work with transparent and opaque paint
How to create visual interest through repetition, contrast, and variation
How to print on a variety of papers
How to select and combine prints for collage
Techniques for tearing, cutting, layering, and adhering paper
How to create a balanced composition on a wood panel
Great for: Anyone ready to build on a beginner Gelli plate class, along with adventurous beginners who enjoy experimenting with color and texture. Previous Gelli plate experience is helpful but not required.
Instructor: Alison Walker is an artist and instructor known for accessible, process-based workshops that help students build confidence through hands-on experience. Her classes are welcoming, supportive, and focused on curiosity, exploration, and skill-building.
Schedule
Friday, December 11, 5:30–8:30 PM
Cost: $75. All materials are included.
What to bring: All materials are provided. Wear clothing you don’t mind getting paint or adhesive on.
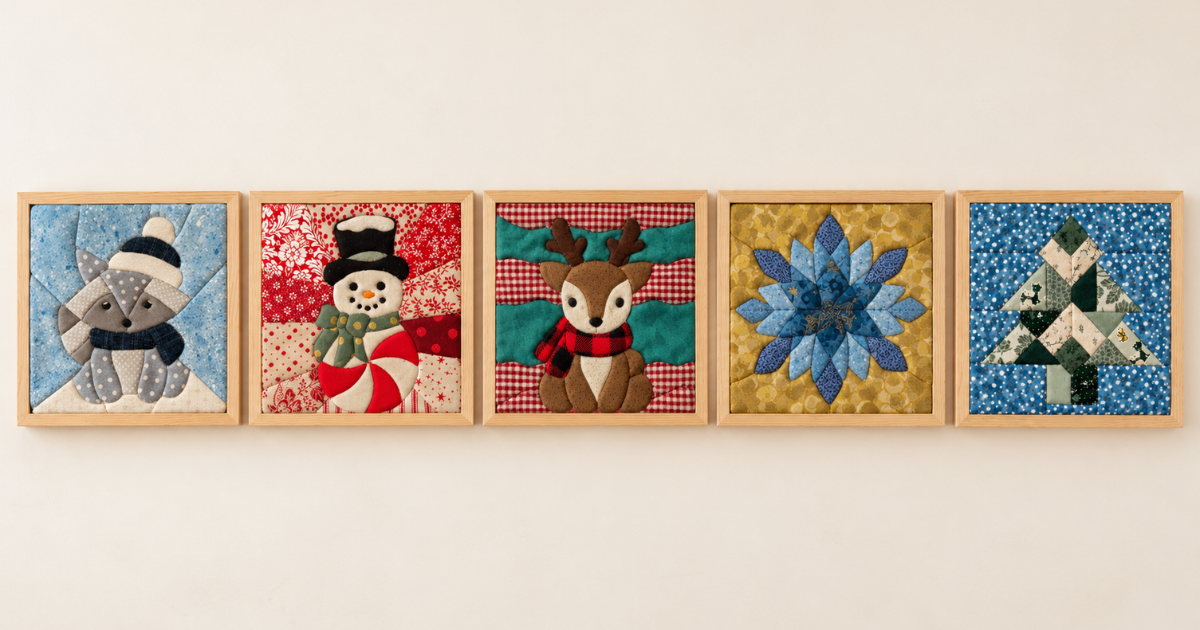
Saturday, December 12, 10:00 AM–12:00 PM
Create a richly textured winter fabric mosaic using kinusaiga, a Japanese art form from the 1980s that creates the look of stained glass or mosaic—no sewing required.
What you’ll do
You’ll transfer a winter-inspired design onto a foam board, cut shallow grooves into the surface, and carefully tuck selected pieces of fabric into place to build your image. As the layers come together, you’ll create a colorful, dimensional, stained-glass-like piece. At the end of class, you’ll mount your finished kinusaiga piece in a wooden frame or shadow box, ready to take home and display.
What you’ll learn
How to transfer a design onto foam board
How to build color, pattern, and texture with fabric
How to cut shallow grooves and seamlessly tuck fabric edges into the foam
How to mount your finished kinusaiga piece in a wooden frame or shadow box
Great for: All skill levels. No needles, thread, or sewing machines are needed.
Instructor: Alexis Johnson is a stained glass and mosaic artist based in Edgerton, Wisconsin, where she operates Eagle Art. Her classes are hands-on and approachable, with plenty of room to experiment while learning the fundamentals of the craft.
Schedule
Saturday, December 12, 10:00 AM–12:00 PM
Cost: $54. All materials are included.
What to bring: Nothing. Foam board, scissors, specialty tucking tools, an assortment of fabric, and a frame will be provided. Available designs and fabric selections will vary.
Sunday, November 8 – 1:00–3:00 PM
Turn loose, colorful wool into a one-of-a-kind folk-art bird using the simple, surprisingly satisfying technique of needle felting.
With a special felting needle, you’ll shape and sculpt the wool by hand, building your bird piece by piece from a soft bundle of fiber into a finished wool sculpture.
What you’ll do
Choose from a variety of wool colors, then use felting needles to sculpt a rounded bird body and build it piece by piece. You’ll create and attach a tail, wings, beak, eyes, and other details, blending and layering wool as you go to give your bird its own personality.
By the end of class, you’ll have a finished folk-art bird to bring home, along with the skills to keep experimenting with needle felting on your own.
What you’ll learn
How to choose the right wool and felting tools
How to safely and confidently use felting needles
Techniques for sculpting, shaping, and joining felted pieces
How to blend and layer wool colors for dimension and detail
How to add small features like eyes and beaks
Techniques for giving your finished piece a polished look
Great for: All skill levels. No prior needle-felting experience needed.
Instructor: Traci McLachlan is a maker and teaching artist in the Verona, Wisconsin area. As the founder of Make Creativity a Habit, she is passionate about making creativity a regular part of life. Traci has been on a creative journey to explore and learn as much as she can about different art techniques. Over the years Traci has realized the greatest satisfaction in making art comes from focusing on the process rather than product. With a deep belief in the power of creativity for wellness, Traci guides people through art workshops that encourage free expression and playfulness to help everyone make creativity a regular habit in their lives.
Schedule
Sunday, November 8 – 1:00–3:00 PM
Cost: $36
What to bring: Just yourself! All supplies will be provided.
Cancellation policy:
If your plans change, please cancel more than 24 hours before class begins to receive credit toward another class at Depot Hill Creative. Cancellations made 24 hours or less before class are non-refundable and not eligible for class credit.