Our Calendar
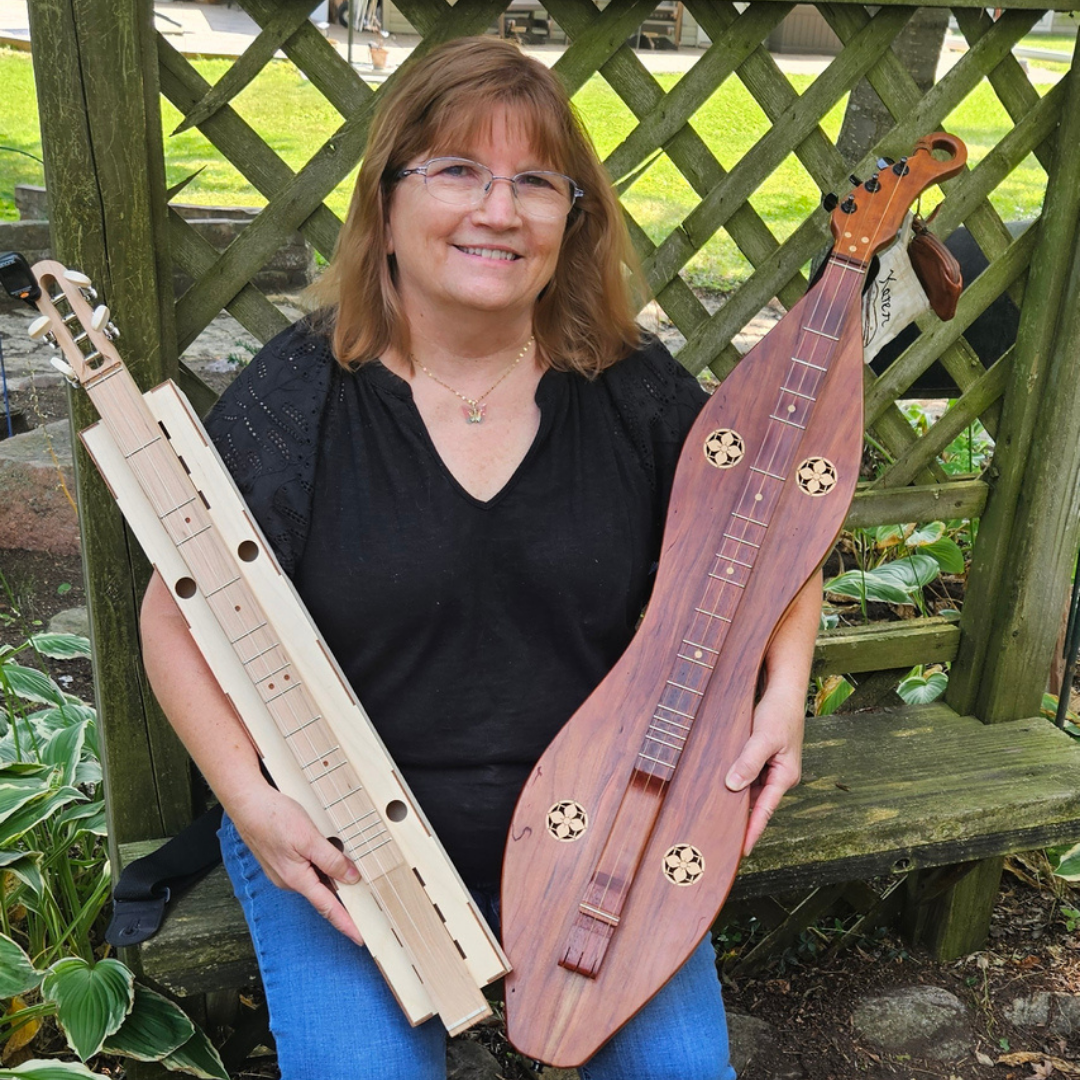
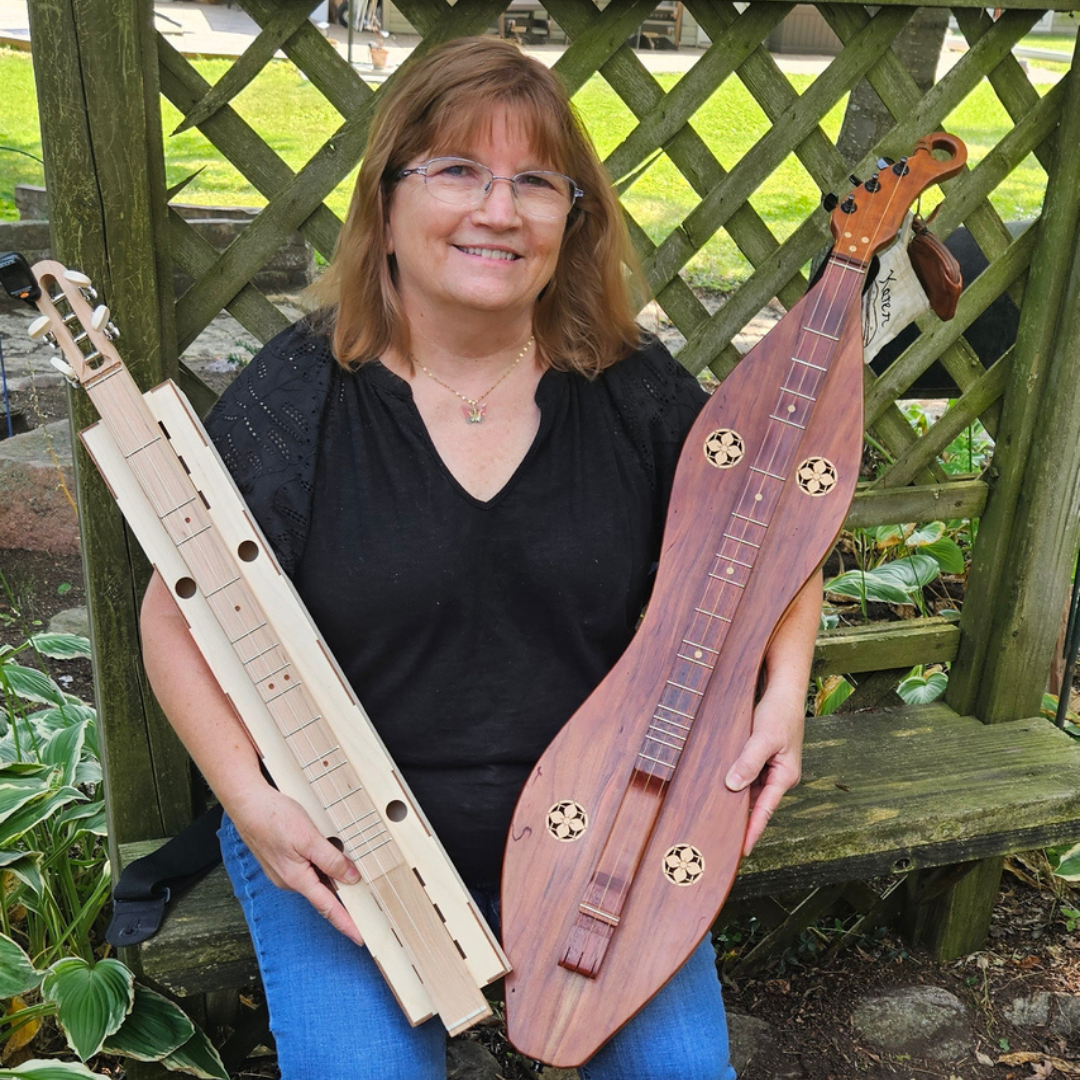
Build & Play a Mountain Dulcimer (Session 1)
This is a five-session series. Registration includes all five sessions.
Tuesday, October 13 – 6:30–8:30 PM
Tuesday, October 20 – 6:30–8:30 PM
Tuesday, October 27 – 6:30–8:30 PM
Tuesday, November 3 – 6:30–8:30 PM
Tuesday, November 10 – 6:30–8:30 PM
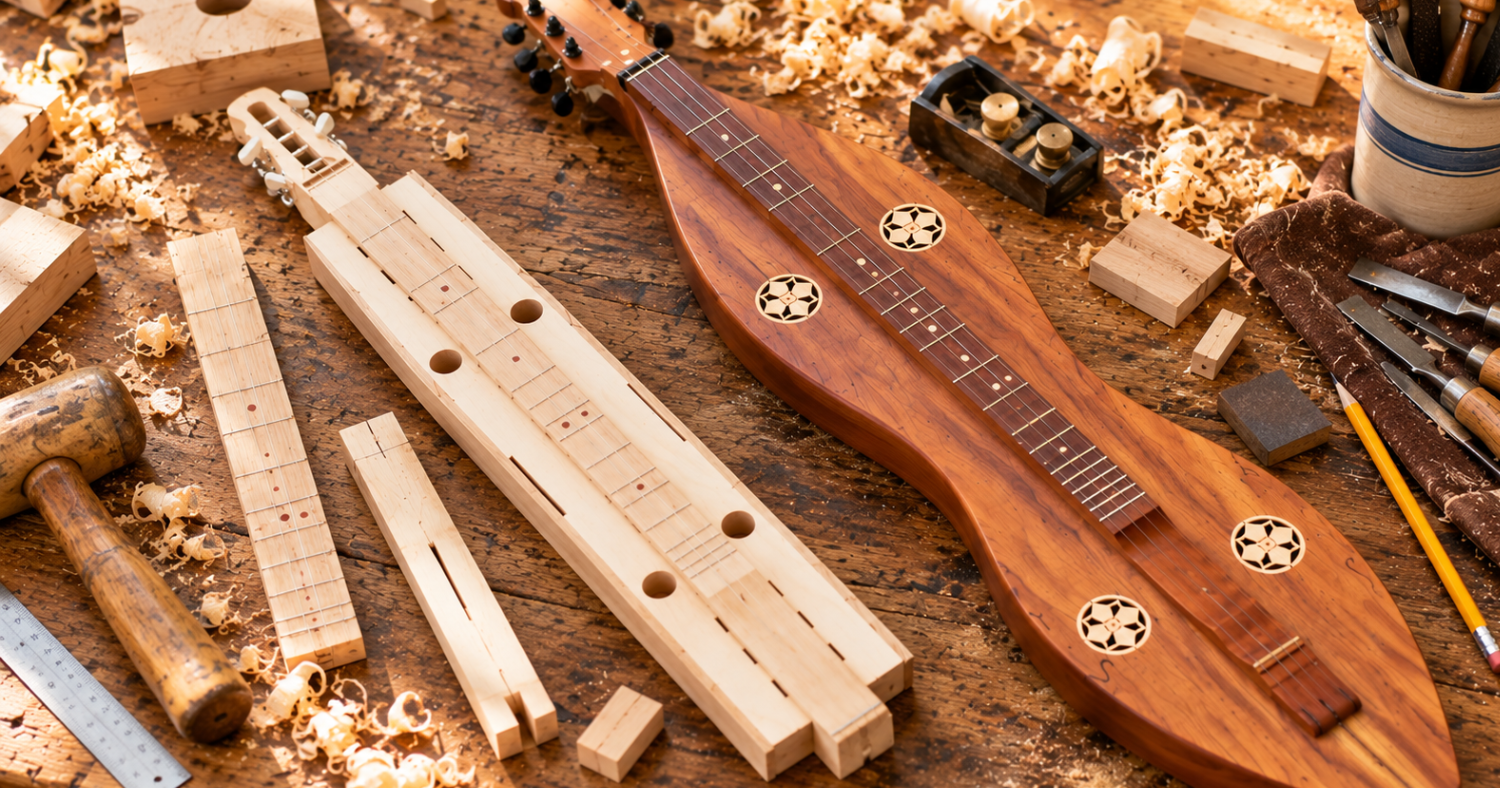
Build an instrument from a kit, then learn to tune, strum, and play simple songs—no music-reading experience needed.
A mountain dulcimer is a simple, approachable instrument that rests across your lap and can be strummed or fingerpicked to create a warm, folksy sound. You don’t need to read traditional music to play one, making it a great entry point for anyone who has always wanted to make music but felt intimidated by music theory or more complicated instruments.
Over five Tuesday evenings, you’ll build your own mountain dulcimer from a kit, then learn how to tune it, strum it, follow simple number-based tablature, and begin playing songs. You’ll leave with an instrument you built yourself and the skills to keep playing it at home!
What you’ll do
You’ll build a mountain dulcimer from a kit and learn how to play the instrument you created. Once your dulcimer is assembled, you’ll practice tuning, strumming, and following simple dulcimer tablature so you can begin playing songs during class.
What you’ll learn
How a mountain dulcimer is constructed
How to tune your instrument
How to strum and play basic songs
How to follow dulcimer tablature and number-based music
How to get comfortable making music without needing to read traditional notation
Great for: Anyone who has always wanted to play an instrument but has felt intimidated by music theory or reading music. The mountain dulcimer offers an approachable way to start making music, and you’ll leave with an instrument you built yourself to keep playing and sharing.
Instructor: Karen Warwick has been playing the mountain dulcimer for more than 35 years. Largely self-taught, she has spent thousands of hours studying the instrument and has continued her training with national champions and professional players at dulcimer festivals around the country. She loves sharing the mountain dulcimer with others and helping new players discover how approachable and enjoyable it can be.
Schedule
This is a five-session series. Registration includes all five sessions.
Tuesday, October 13 – 6:30–8:30 PM
Tuesday, October 20 – 6:30–8:30 PM
Tuesday, October 27 – 6:30–8:30 PM
Tuesday, November 3 – 6:30–8:30 PM
Tuesday, November 10 – 6:30–8:30 PM
Cost: $198
What to bring: Just yourself — everything you need to get started will be provided!
Cancellation policy:
If your plans change, please cancel more than 24 hours before class begins to receive credit toward another class at Depot Hill Creative. Cancellations made 24 hours or less before class are non-refundable and not eligible for class credit.
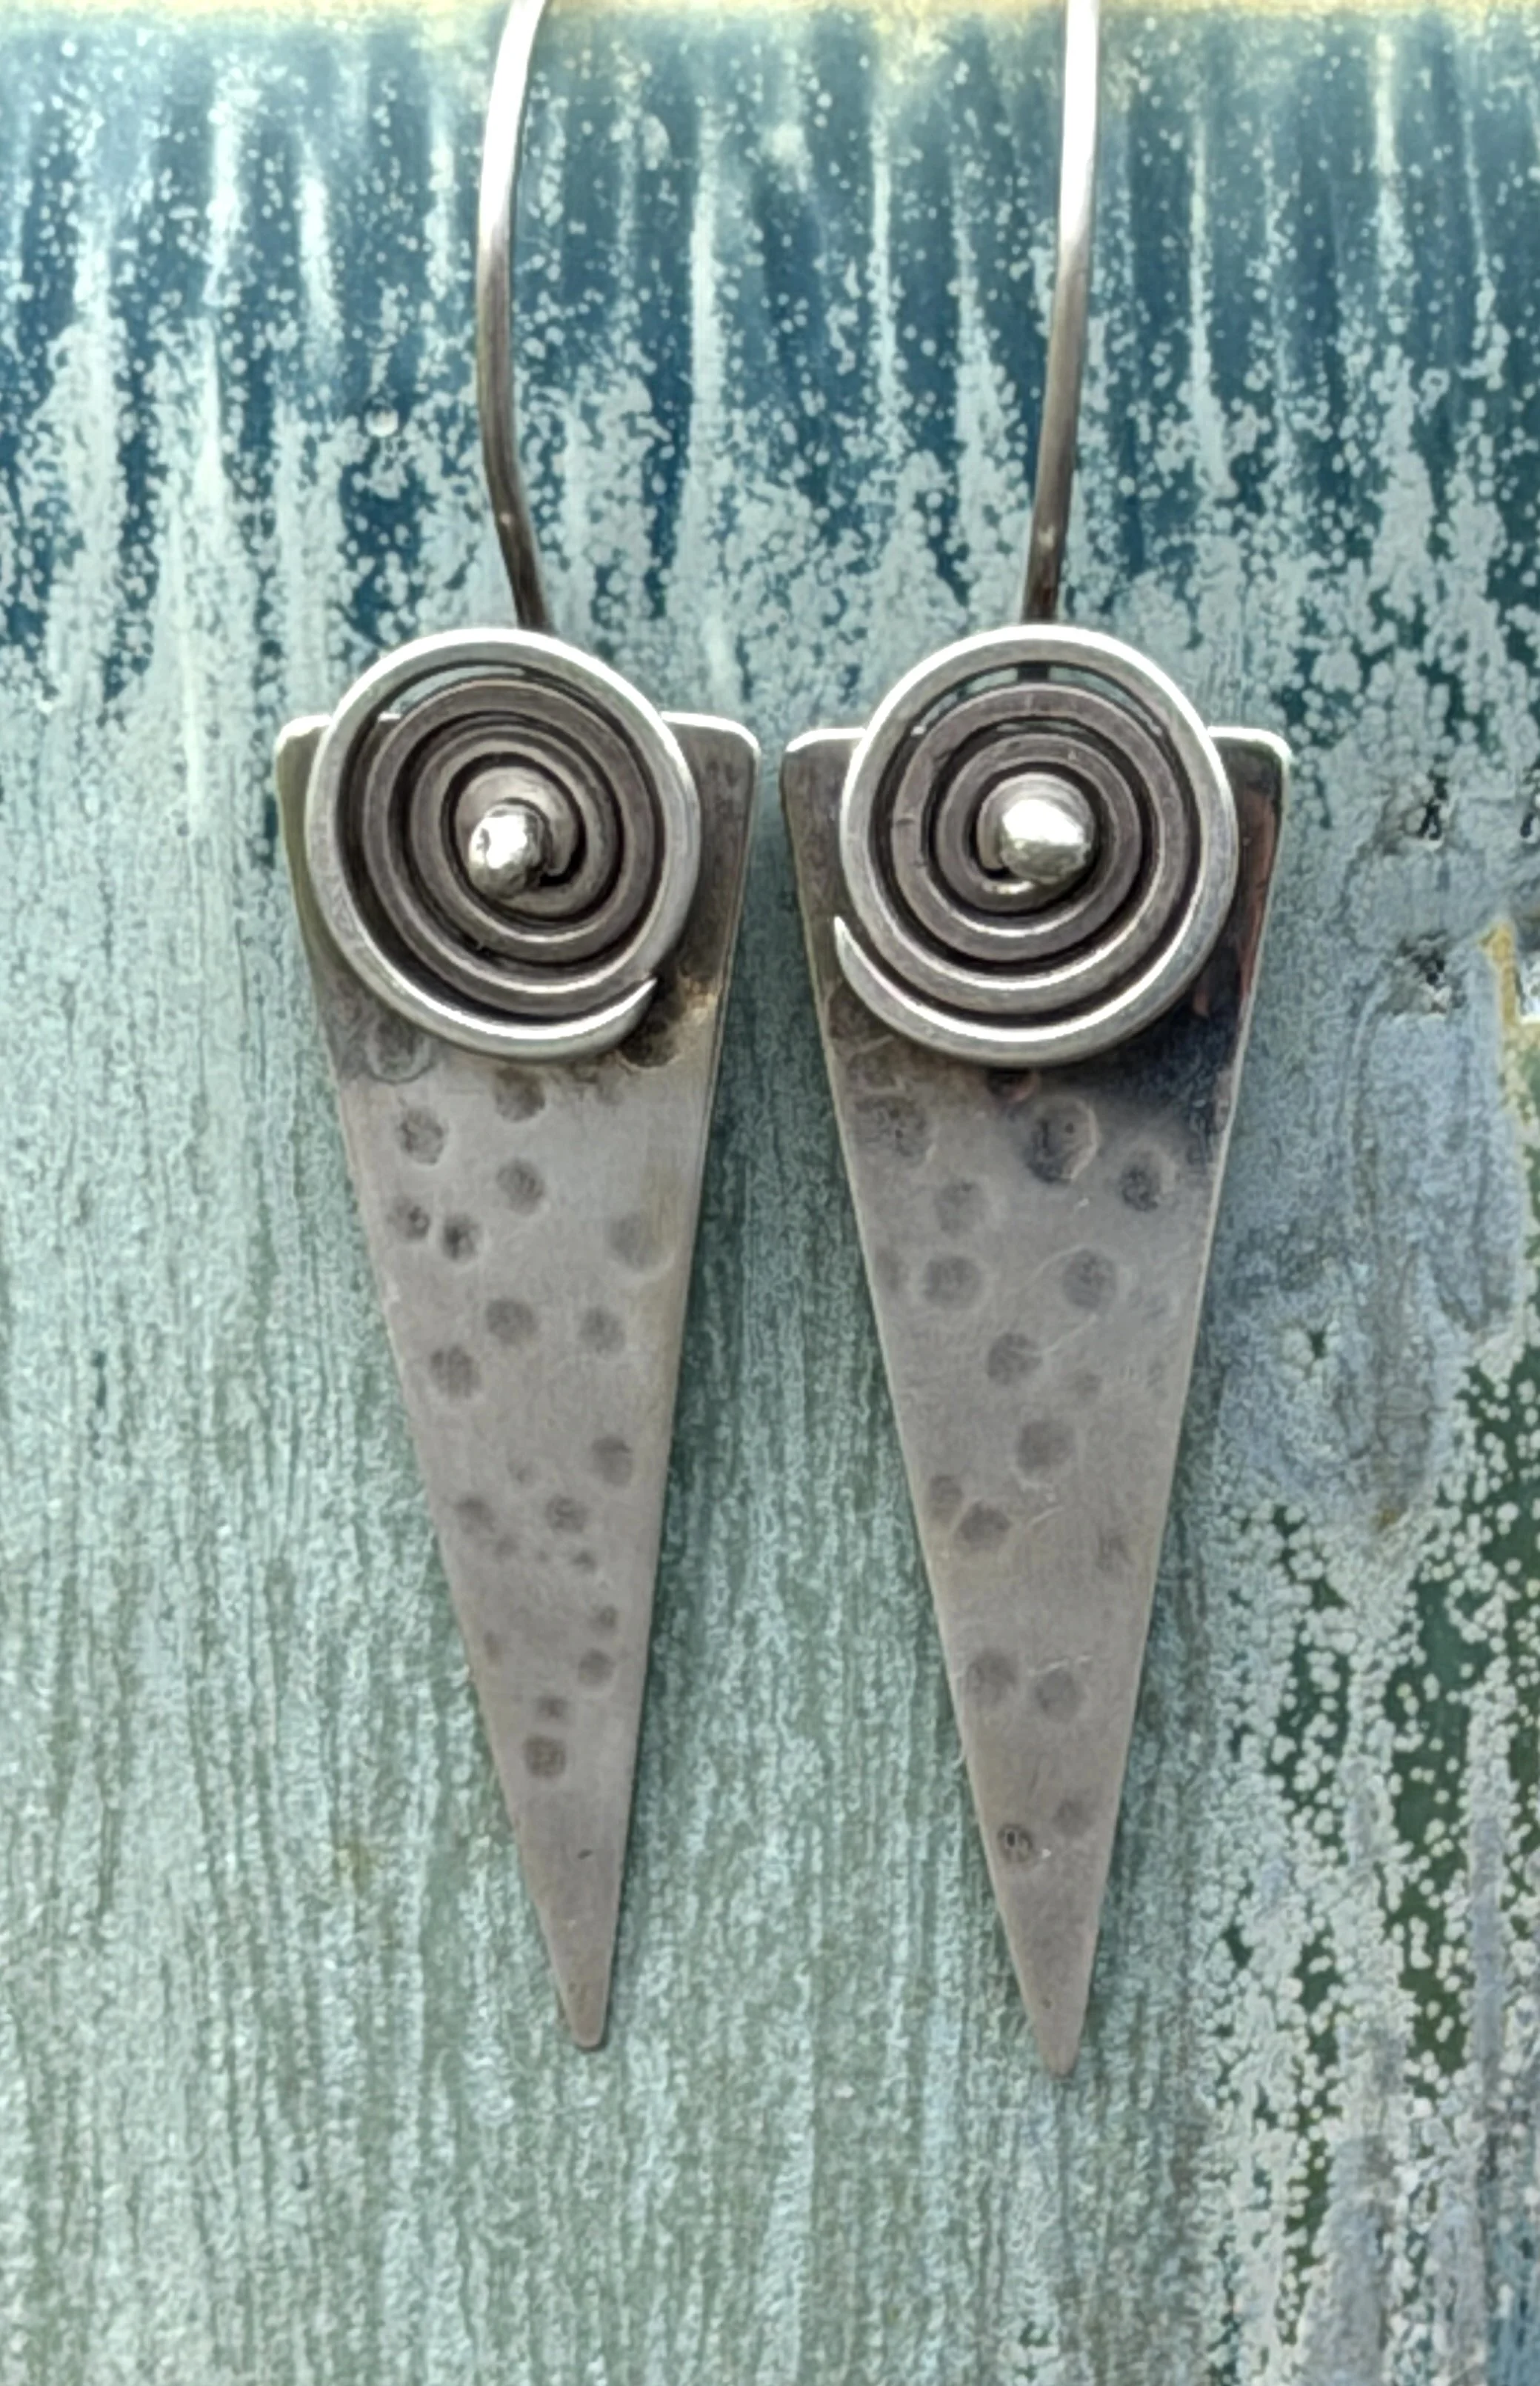
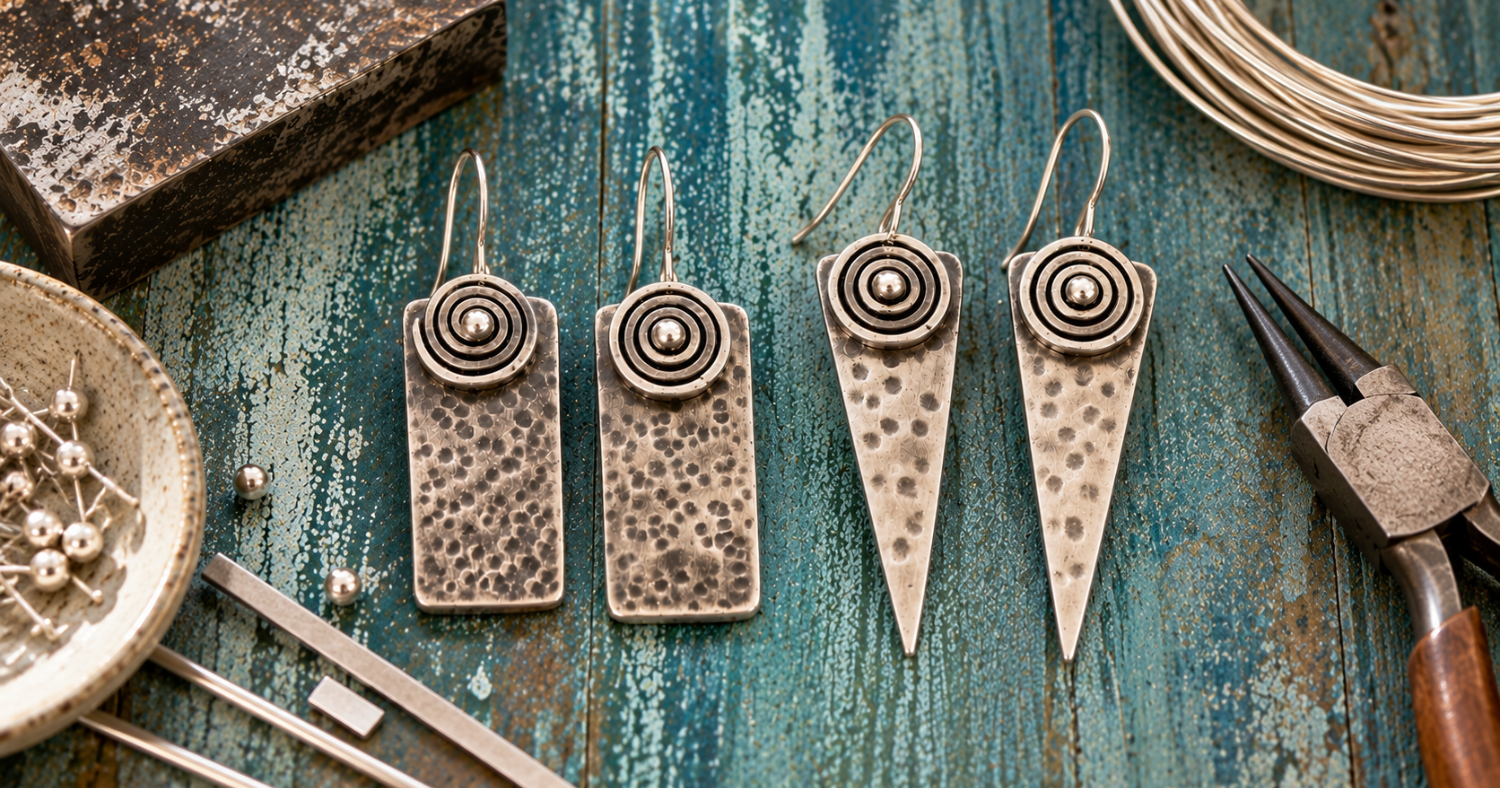
Sterling Silver Spiral Earrings
October 17, 10:00 AM–1:00 PM
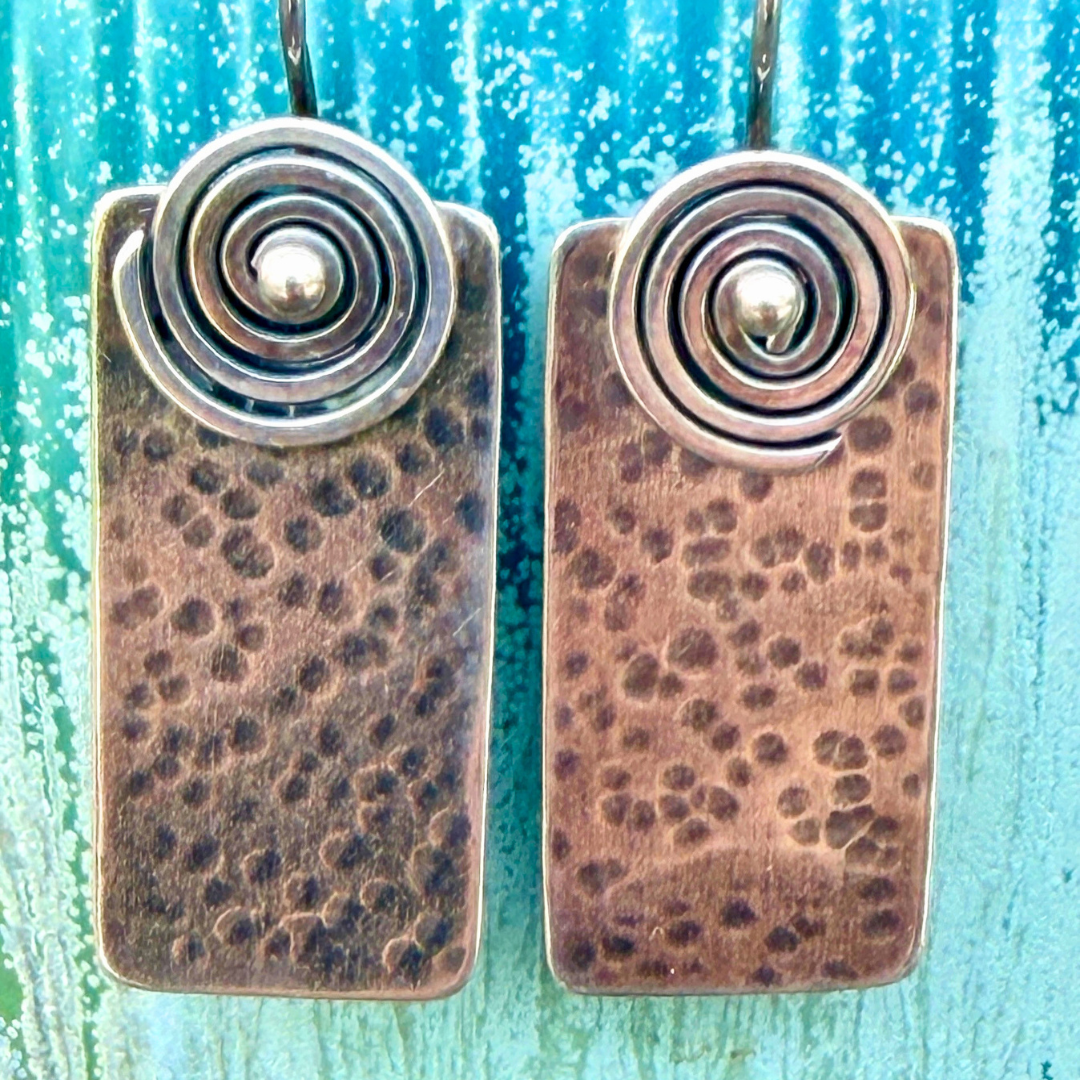
Create a one-of-a-kind pair of sterling silver earrings, complete with textured geometric shapes and a decorative spiral that moves as you wear it.
What you’ll do
Start with sterling silver sheet and wire, then shape, texture, and finish your own pair of earrings from scratch. Choose from a triangle, oval, or rectangle for the earring body, customize the proportions, and create a silver spiral detail that adds movement to the finished design.
You’ll cut and texture the silver, form the spirals and earring wires by hand, and use a small butane torch to create the balled tips. By the end of class, your earrings will be finished and ready to wear!
What you’ll learn
How to cut, shape, and sand sterling silver sheet
How to use hammers to texture the earring body
How to polish, finish, and stain the silver using Dremel rotary tools and other techniques
How to use pliers to form a decorative spiral
How to form an earring wire
How to use a butane torch to create a balled wire tip
How to work harden, polish, and finish earring wires
Great for: Novices–no prior metalsmithing experience needed!
Instructor: Kay Rashka is a local metalsmithing instructor with more than 15 years of teaching experience, including at the Madison Bead Show and Milwaukee Bead & Button Show. She is also the author of Bead Meets Metal.
Schedule
October 17, 10:00 AM–1:00 PM
Cost: $130
Includes sterling silver sheet, silver wire, and written instructions. Class minimum is 3 students; maximum is 6 students.
What to bring: Please wear cotton work clothes and/or an apron and closed-toe shoes. If you have long hair, it will need to be tied back; hair ties will be available from the instructor.
Cancellation policy:
If your plans change, please cancel more than 24 hours before class begins to receive credit toward another class at Depot Hill Creative. Cancellations made 24 hours or less before class are non-refundable and not eligible for class credit.
Build & Play a Mountain Dulcimer (Session 2)
This is a five-session series. Registration includes all five sessions.
Tuesday, October 13 – 6:30–8:30 PM
Tuesday, October 20 – 6:30–8:30 PM
Tuesday, October 27 – 6:30–8:30 PM
Tuesday, November 3 – 6:30–8:30 PM
Tuesday, November 10 – 6:30–8:30 PM
Build an instrument from a kit, then learn to tune, strum, and play simple songs—no music-reading experience needed.
A mountain dulcimer is a simple, approachable instrument that rests across your lap and can be strummed or fingerpicked to create a warm, folksy sound. You don’t need to read traditional music to play one, making it a great entry point for anyone who has always wanted to make music but felt intimidated by music theory or more complicated instruments.
Over five Tuesday evenings, you’ll build your own mountain dulcimer from a kit, then learn how to tune it, strum it, follow simple number-based tablature, and begin playing songs. You’ll leave with an instrument you built yourself and the skills to keep playing it at home!
What you’ll do
You’ll build a mountain dulcimer from a kit and learn how to play the instrument you created. Once your dulcimer is assembled, you’ll practice tuning, strumming, and following simple dulcimer tablature so you can begin playing songs during class.
What you’ll learn
How a mountain dulcimer is constructed
How to tune your instrument
How to strum and play basic songs
How to follow dulcimer tablature and number-based music
How to get comfortable making music without needing to read traditional notation
Great for: Anyone who has always wanted to play an instrument but has felt intimidated by music theory or reading music. The mountain dulcimer offers an approachable way to start making music, and you’ll leave with an instrument you built yourself to keep playing and sharing.
Instructor: Karen Warwick has been playing the mountain dulcimer for more than 35 years. Largely self-taught, she has spent thousands of hours studying the instrument and has continued her training with national champions and professional players at dulcimer festivals around the country. She loves sharing the mountain dulcimer with others and helping new players discover how approachable and enjoyable it can be.
Schedule
This is a five-session series. Registration includes all five sessions.
Tuesday, October 13 – 6:30–8:30 PM
Tuesday, October 20 – 6:30–8:30 PM
Tuesday, October 27 – 6:30–8:30 PM
Tuesday, November 3 – 6:30–8:30 PM
Tuesday, November 10 – 6:30–8:30 PM
Cost: $198
What to bring: Just yourself — everything you need to get started will be provided!
Cancellation policy:
If your plans change, please cancel more than 24 hours before class begins to receive credit toward another class at Depot Hill Creative. Cancellations made 24 hours or less before class are non-refundable and not eligible for class credit.
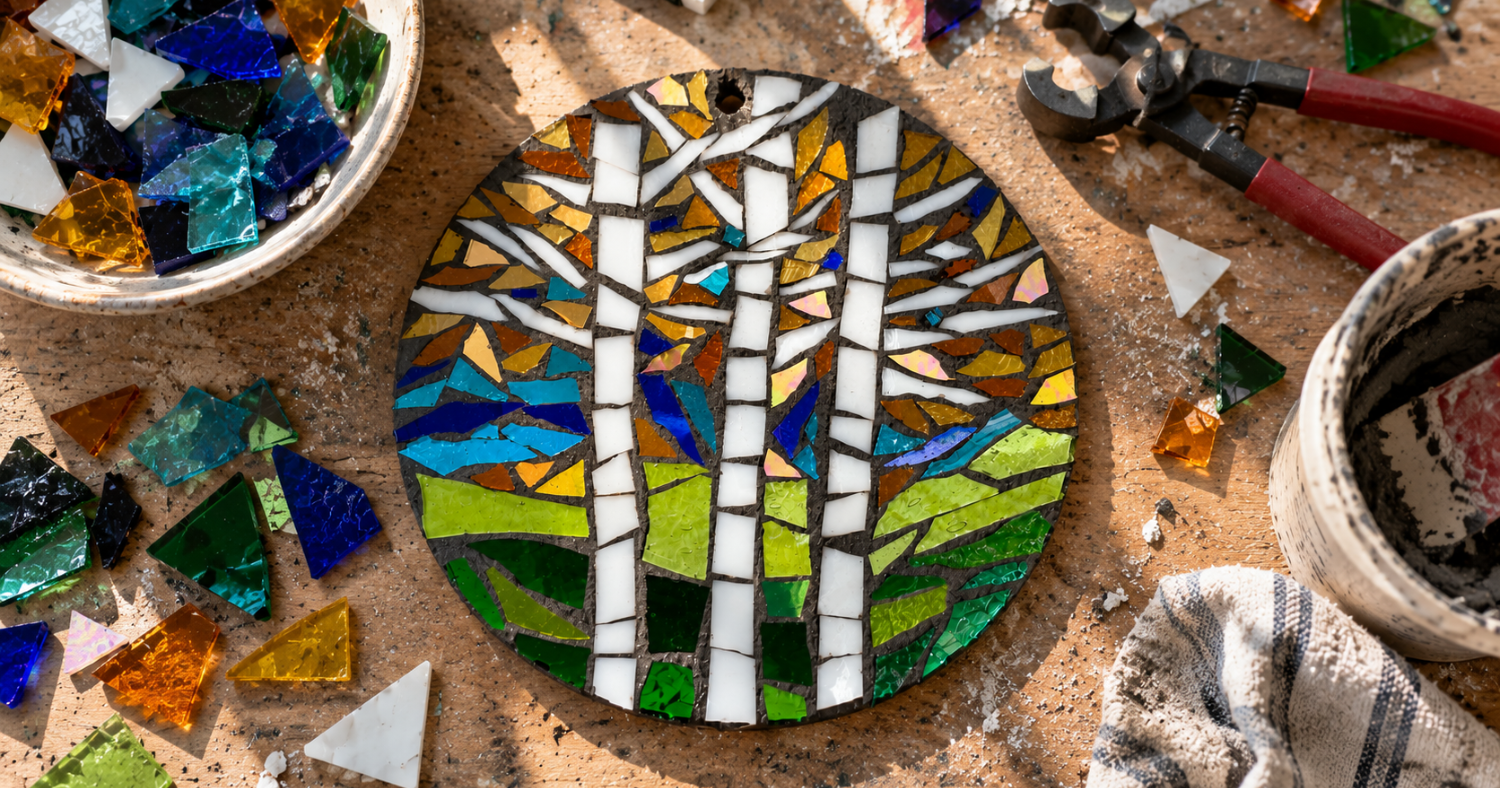
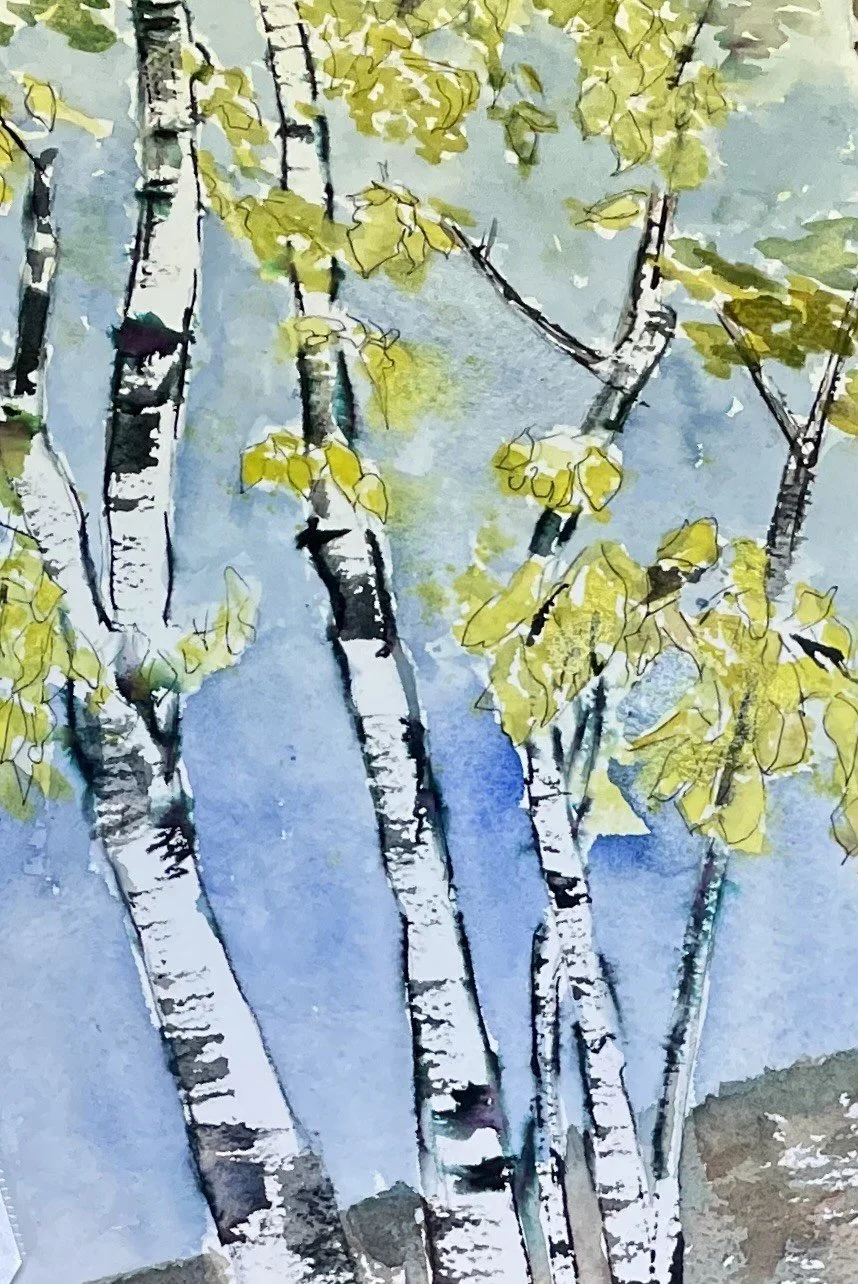
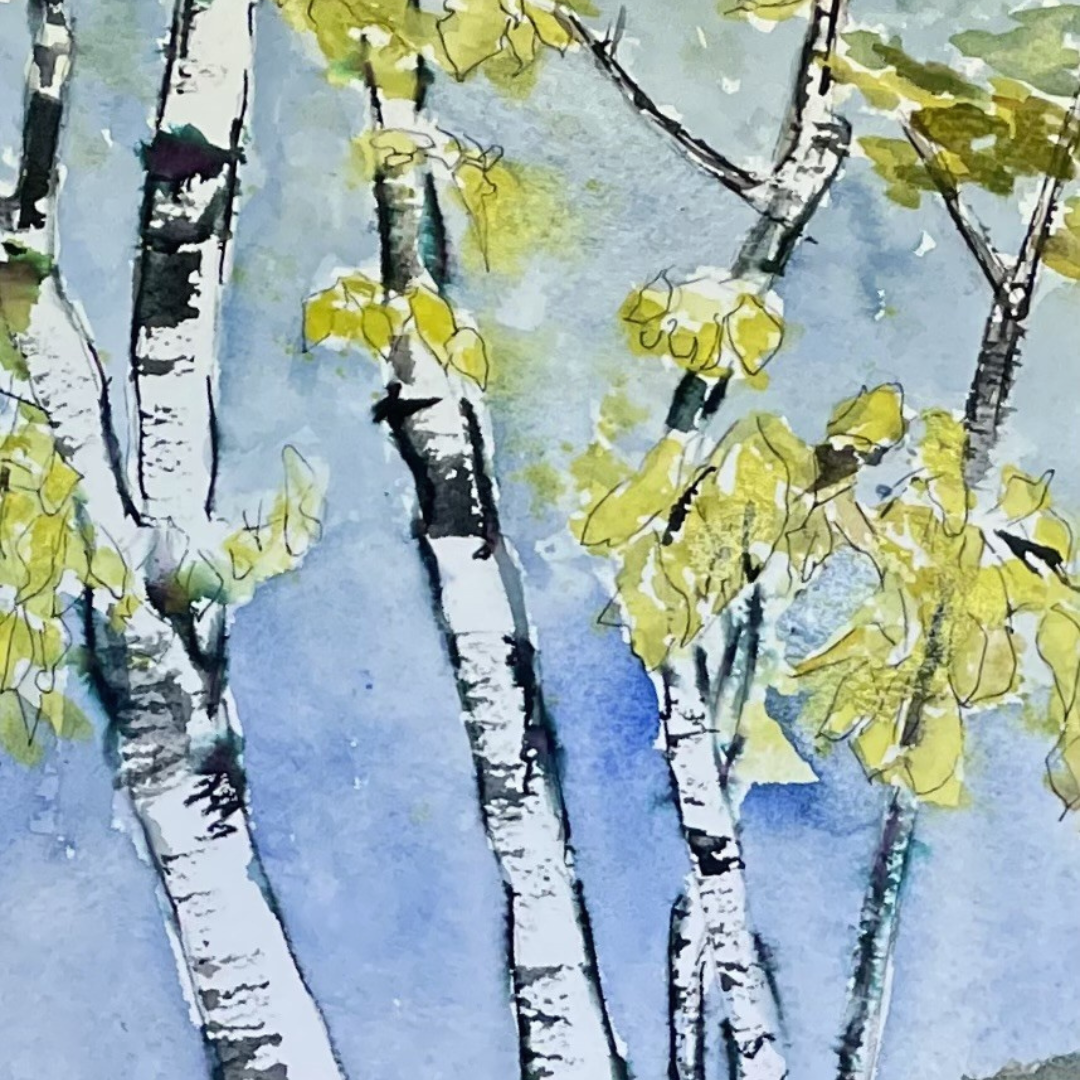
Mosaic Birch Suncatcher
Saturday, October 24, 10:00 AM–12:00 PM and
Sunday, October 25, 10:00 AM–12:00 PM
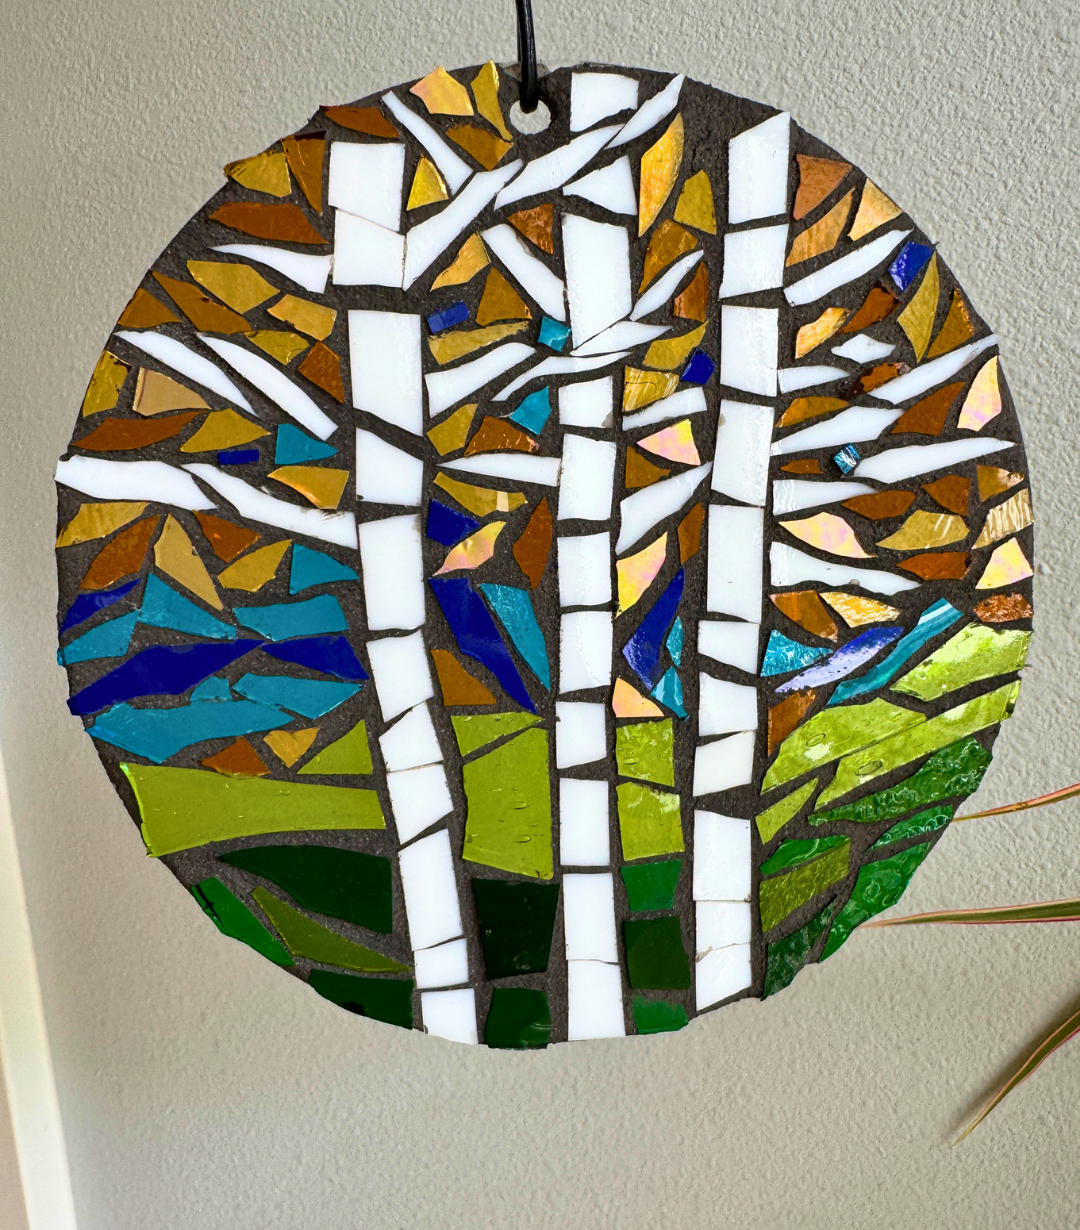
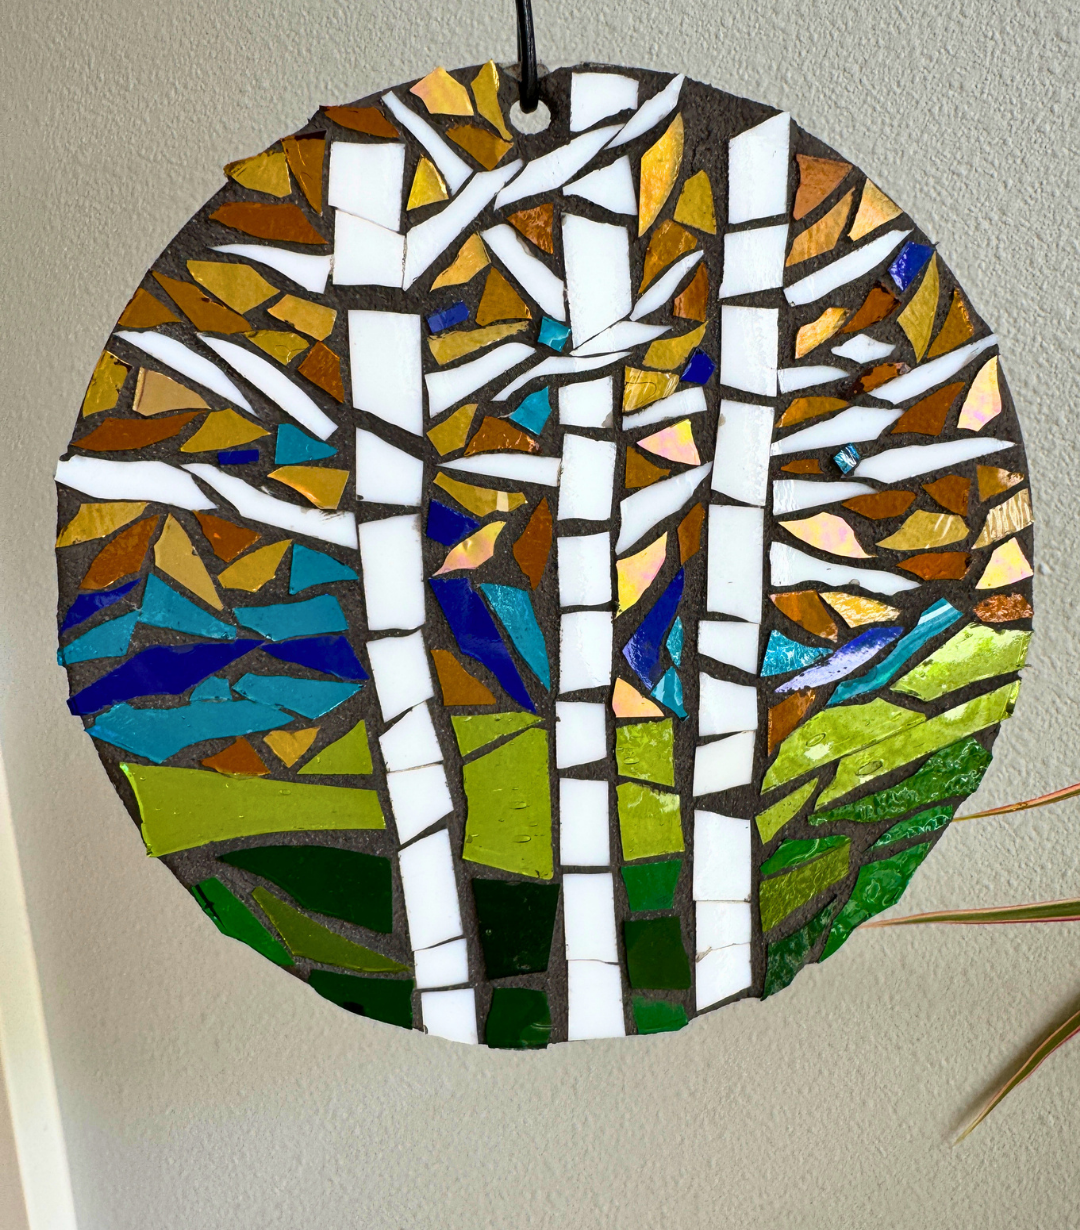
Create a glowing birch tree sun-catcher using layered glass, bold color, and classic mosaic techniques.
What you’ll do
Design your own birch tree scene using white glass for the trunks and colorful translucent glass for the background. You’ll cut and shape the glass, arrange and layer the pieces to build your composition, adhere everything to the surface, then grout and clean the finished piece.
By the end of the workshop, you’ll have a finished sun-catcher designed to catch the light and bring a little color to your window.
What you’ll learn
How to plan a glass mosaic composition
How to cut and shape glass safely
How to layer glass to create depth and contrast
How to adhere glass to a surface
How to grout, clean, and finish a mosaic piece
Great for: All skill levels. No prior mosaic experience needed.
Instructor: Alexis Johnson is a stained glass and mosaic artist based in Edgerton, Wisconsin, where she operates Eagle Art. Her classes are hands-on and approachable, with plenty of room to experiment while learning the fundamentals of the craft.
Schedule
This is one class held over two dates. Registration includes both sessions.
Saturday, October 24, 10:00 AM–12:00 PM and
Sunday, October 25, 10:00 AM–12:00 PM
Cost: $65
What to bring: Just yourself — all tools and materials will be provided.
Cancellation policy:
If your plans change, please cancel more than 24 hours before class begins to receive credit toward another class at Depot Hill Creative. Cancellations made 24 hours or less before class are non-refundable and not eligible for class credit.
Mosaic Birch Suncatcher (Session 2)
Saturday, October 24, 10:00 AM–12:00 PM and
Sunday, October 25, 10:00 AM–12:00 PM
Create a glowing birch tree sun-catcher using layered glass, bold color, and classic mosaic techniques.
What you’ll do
Design your own birch tree scene using white glass for the trunks and colorful translucent glass for the background. You’ll cut and shape the glass, arrange and layer the pieces to build your composition, adhere everything to the surface, then grout and clean the finished piece.
By the end of the workshop, you’ll have a finished sun-catcher designed to catch the light and bring a little color to your window.
What you’ll learn
How to plan a glass mosaic composition
How to cut and shape glass safely
How to layer glass to create depth and contrast
How to adhere glass to a surface
How to grout, clean, and finish a mosaic piece
Great for: All skill levels. No prior mosaic experience needed.
Instructor: Alexis Johnson is a stained glass and mosaic artist based in Edgerton, Wisconsin, where she operates Eagle Art. Her classes are hands-on and approachable, with plenty of room to experiment while learning the fundamentals of the craft.
Schedule
This is one class held over two dates. Registration includes both sessions.
Saturday, October 24, 10:00 AM–12:00 PM and
Sunday, October 25, 10:00 AM–12:00 PM
Cost: $65
What to bring: Just yourself — all tools and materials will be provided.
Cancellation policy:
If your plans change, please cancel more than 24 hours before class begins to receive credit toward another class at Depot Hill Creative. Cancellations made 24 hours or less before class are non-refundable and not eligible for class credit.
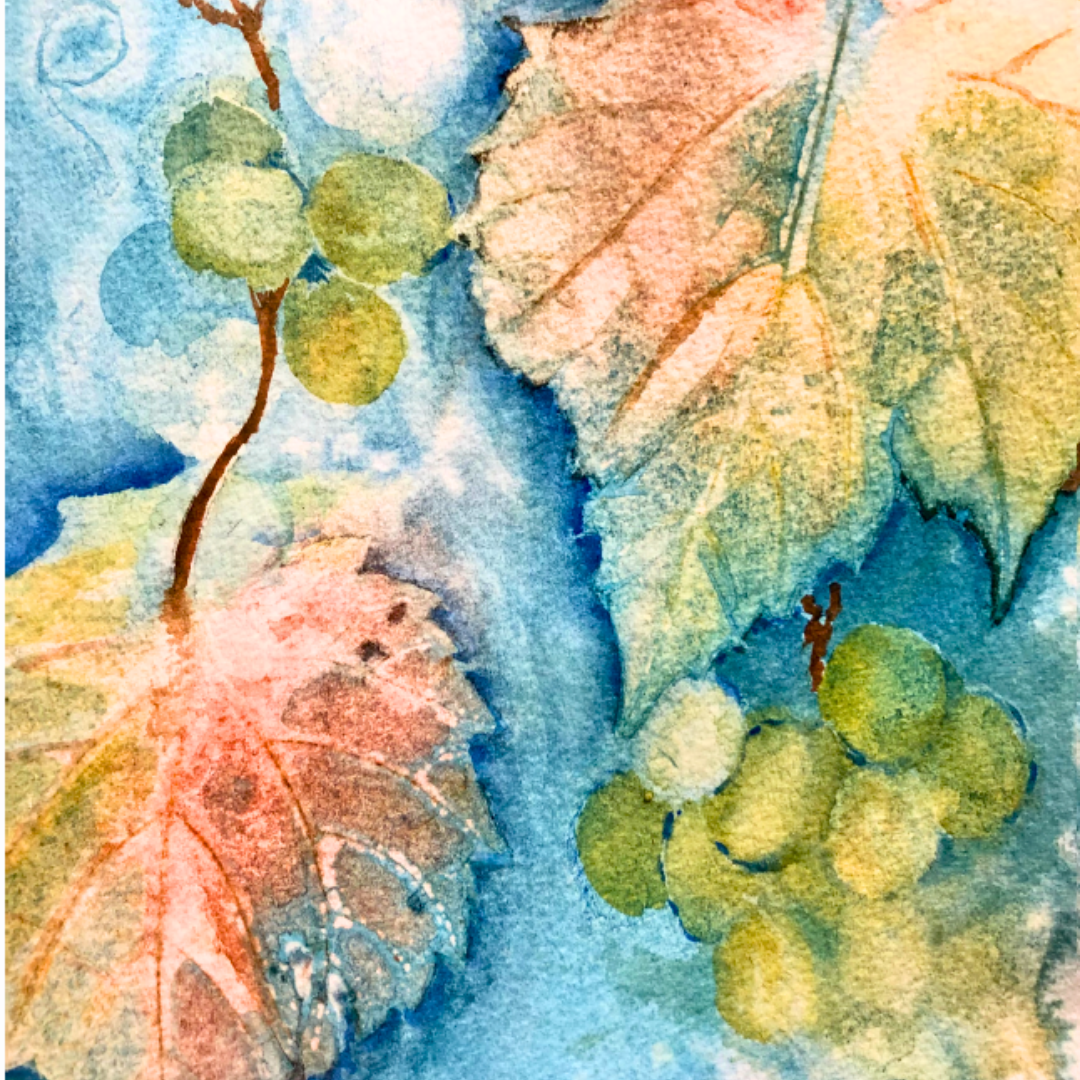
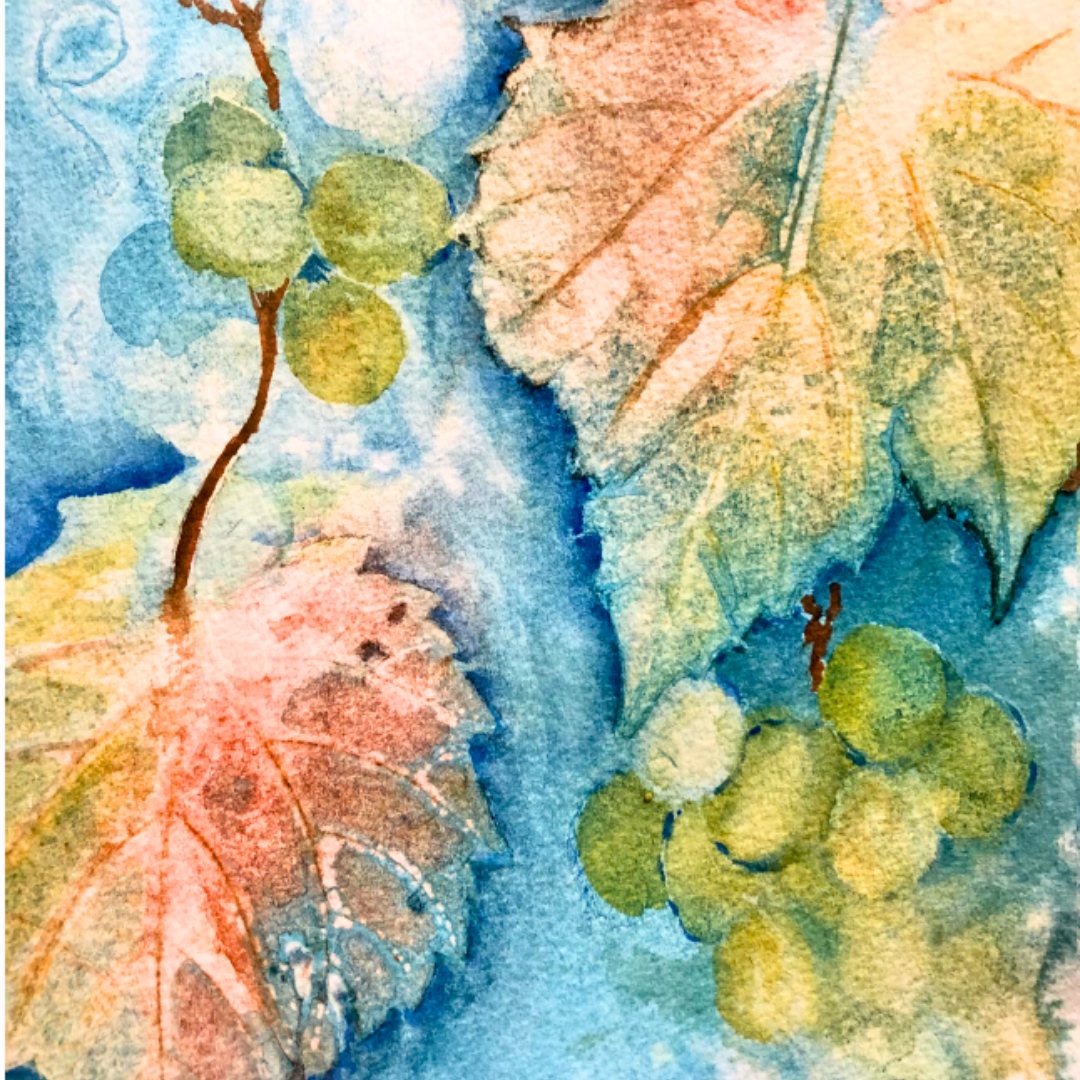
Basics & Beyond in Watercolor: Grape Leaves

Tuesday, October 27 – 9:30–11:00 AM and
Thursday, October 29 – 9:30–11:00 AM
Explore watercolor through a grape leaf study while building your skills in composition, design, and foundational painting techniques.
What you’ll do
Using real grape leaves as your reference, you’ll plan and paint an 11 × 15-inch watercolor from start to finish. You’ll work through basic design and composition while practicing a range of watercolor techniques along the way.
By the end of the two sessions, you should be able to complete a finished grape leaf painting while gaining more confidence with the fundamentals of watercolor.
What you’ll learn
How to approach basic design and composition in watercolor
How to use a variety of foundational watercolor techniques
How to work from real leaves as reference
How to develop a composition into a finished 11 × 15-inch painting
Great for: Anyone who wants to learn more about watercolor painting.
Instructor: Rita Carpenter is a watercolor artist and photographer drawn to the balance between loose color and careful control. Her classes are thoughtful, encouraging, and designed to help students build confidence while becoming more comfortable with watercolor.
Schedule
This is one class held over two dates. Registration includes both sessions.
Tuesday, October 27 – 9:30–11:00 AM
Thursday, October 29 – 9:30–11:00 AM
Cost: $78
What to bring:
Watercolor palette
One 11 × 15-inch sheet of Arches 140 lb. cold-press watercolor paper
Two synthetic round watercolor brushes, sizes 6 and 10
Two small water containers
Rag for your wet brush
5–7 grape leaves in different sizes and shapes
Please collect your grape leaves ahead of time while they’re still available. They can be layered, sealed in a bag, and frozen until class. Bring them with you to the first session.
Cancellation policy:
If your plans change, please cancel more than 24 hours before class begins to receive credit toward another class at Depot Hill Creative. Cancellations made 24 hours or less before class are non-refundable and not eligible for class credit.
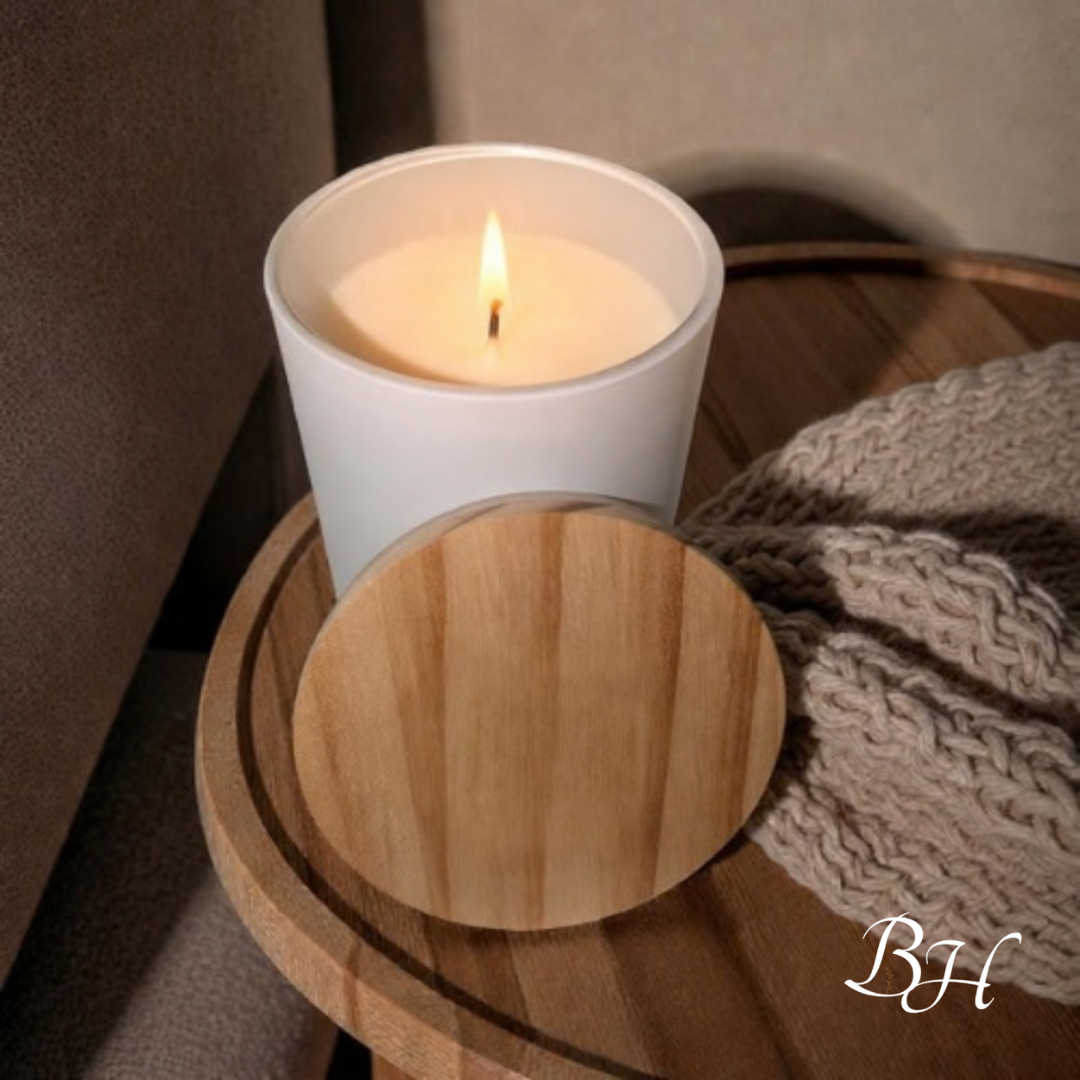
Pour a Soy Candle and Blend Your Own Perfume
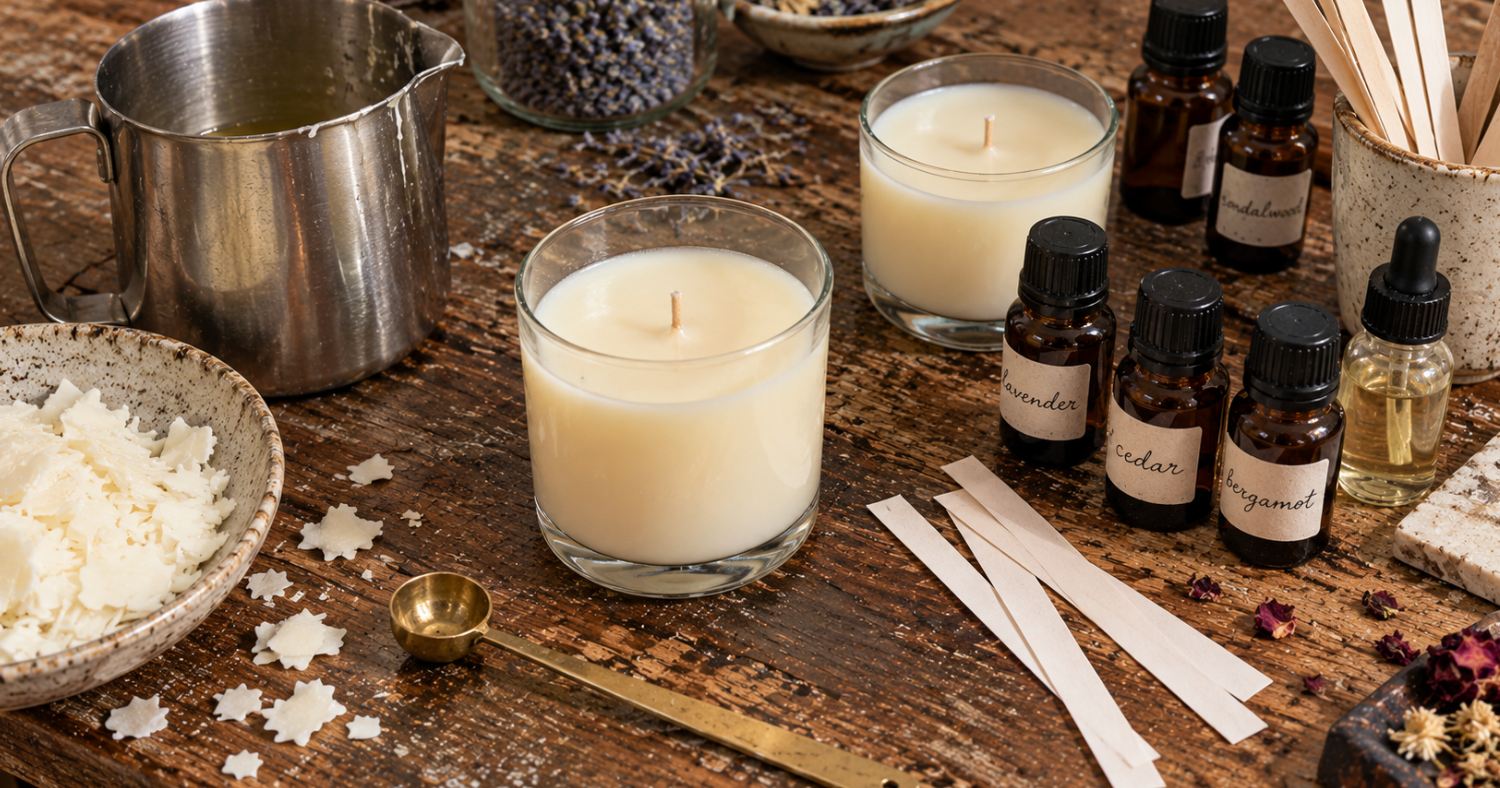
Tuesday, October 27, 1:00–3:00 PM
Find your favorite balance of citrus, spice, and earthy scents, then turn it into a hand-poured soy candle and a matching perfume oil.
What you’ll do
Explore sweet orange, clove bud, cinnamon leaf, and patchouli as you create a scented pair—one for your home and one to wear. You’ll choose a jar, secure a cotton wick, and measure, melt, and pour pure soy wax into an 8-ounce vessel. While your candle cools, blend a matching rollerball perfume with essential oils and a jojoba oil base. Finish with custom labels and a protective cover for your candle, making the pair your own to keep or give as a gift. There’ll also be light refreshments and time for questions while the wax sets.
What you’ll learn
How wick selection, pouring temperature, and melted wax affect a candle’s burn
How to balance citrus, spice, and earthy fragrance notes
How to dilute essential oils in a carrier oil for perfume
Great for: Beginners and anyone curious about scent, candle making, or creating handmade gifts.
Instructor: Laura Dedrick creates small-batch botanical goods for home and body through BrimkaHaus, including candles, perfumes, soaps, balms, and room sprays.
Schedule
Tuesday, October 27, 1:00–3:00 PM
Cost: $48. All materials, tools, and safety gear are included.
What to bring: Yourself! All materials will be provided.
Cancellation policy:
If your plans change, please cancel more than 24 hours before class begins to receive credit toward another class at Depot Hill Creative. Cancellations made 24 hours or less before class are non-refundable and not eligible for class credit.
Build & Play a Mountain Dulcimer (Session 3)
This is a five-session series. Registration includes all five sessions.
Tuesday, October 13 – 6:30–8:30 PM
Tuesday, October 20 – 6:30–8:30 PM
Tuesday, October 27 – 6:30–8:30 PM
Tuesday, November 3 – 6:30–8:30 PM
Tuesday, November 10 – 6:30–8:30 PM
Build an instrument from a kit, then learn to tune, strum, and play simple songs—no music-reading experience needed.
A mountain dulcimer is a simple, approachable instrument that rests across your lap and can be strummed or fingerpicked to create a warm, folksy sound. You don’t need to read traditional music to play one, making it a great entry point for anyone who has always wanted to make music but felt intimidated by music theory or more complicated instruments.
Over five Tuesday evenings, you’ll build your own mountain dulcimer from a kit, then learn how to tune it, strum it, follow simple number-based tablature, and begin playing songs. You’ll leave with an instrument you built yourself and the skills to keep playing it at home!
What you’ll do
You’ll build a mountain dulcimer from a kit and learn how to play the instrument you created. Once your dulcimer is assembled, you’ll practice tuning, strumming, and following simple dulcimer tablature so you can begin playing songs during class.
What you’ll learn
How a mountain dulcimer is constructed
How to tune your instrument
How to strum and play basic songs
How to follow dulcimer tablature and number-based music
How to get comfortable making music without needing to read traditional notation
Great for: Anyone who has always wanted to play an instrument but has felt intimidated by music theory or reading music. The mountain dulcimer offers an approachable way to start making music, and you’ll leave with an instrument you built yourself to keep playing and sharing.
Instructor: Karen Warwick has been playing the mountain dulcimer for more than 35 years. Largely self-taught, she has spent thousands of hours studying the instrument and has continued her training with national champions and professional players at dulcimer festivals around the country. She loves sharing the mountain dulcimer with others and helping new players discover how approachable and enjoyable it can be.
Schedule
This is a five-session series. Registration includes all five sessions.
Tuesday, October 13 – 6:30–8:30 PM
Tuesday, October 20 – 6:30–8:30 PM
Tuesday, October 27 – 6:30–8:30 PM
Tuesday, November 3 – 6:30–8:30 PM
Tuesday, November 10 – 6:30–8:30 PM
Cost: $198
What to bring: Just yourself — everything you need to get started will be provided!
Cancellation policy:
If your plans change, please cancel more than 24 hours before class begins to receive credit toward another class at Depot Hill Creative. Cancellations made 24 hours or less before class are non-refundable and not eligible for class credit.
Basics & Beyond in Watercolor: Grape Leaves (Session 2)
Tuesday, October 27 – 9:30–11:00 AM and
Thursday, October 29 – 9:30–11:00 AM
Explore watercolor through a grape leaf study while building your skills in composition, design, and foundational painting techniques.
What you’ll do
Using real grape leaves as your reference, you’ll plan and paint an 11 × 15-inch watercolor from start to finish. You’ll work through basic design and composition while practicing a range of watercolor techniques along the way.
By the end of the two sessions, you should be able to complete a finished grape leaf painting while gaining more confidence with the fundamentals of watercolor.
What you’ll learn
How to approach basic design and composition in watercolor
How to use a variety of foundational watercolor techniques
How to work from real leaves as reference
How to develop a composition into a finished 11 × 15-inch painting
Great for: Anyone who wants to learn more about watercolor painting.
Instructor: Rita Carpenter is a watercolor artist and photographer drawn to the balance between loose color and careful control. Her classes are thoughtful, encouraging, and designed to help students build confidence while becoming more comfortable with watercolor.
Schedule
This is one class held over two dates. Registration includes both sessions.
Tuesday, October 27 – 9:30–11:00 AM
Thursday, October 29 – 9:30–11:00 AM
Cost: $78
What to bring:
Watercolor palette
One 11 × 15-inch sheet of Arches 140 lb. cold-press watercolor paper
Two synthetic round watercolor brushes, sizes 6 and 10
Two small water containers
Rag for your wet brush
5–7 grape leaves in different sizes and shapes
Please collect your grape leaves ahead of time while they’re still available. They can be layered, sealed in a bag, and frozen until class. Bring them with you to the first session.
Cancellation policy:
If your plans change, please cancel more than 24 hours before class begins to receive credit toward another class at Depot Hill Creative. Cancellations made 24 hours or less before class are non-refundable and not eligible for class credit.
Mandala Dot Painting for Beginners
Thursday, October 29, 6–9 PM
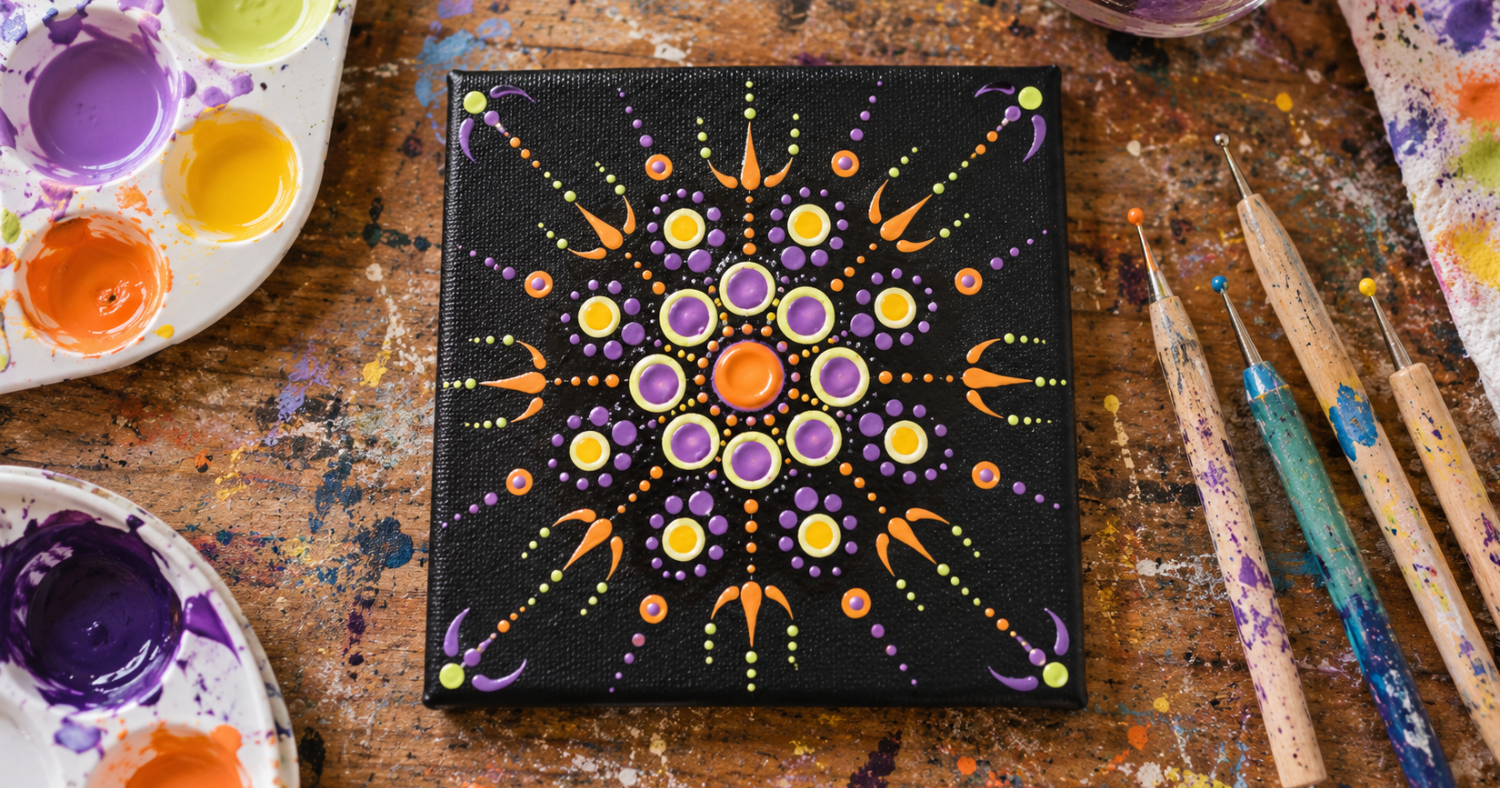
A few simple dots can become a surprisingly intricate design. Learn the basics of mandala dot painting with Francine Tompkins, then create your own colorful pattern on a small canvas. No experience needed!
What you’ll do
Choose your paint colors and look through photos for inspiration, combining elements to make a design of your own. After a demonstration and guided practice, you’ll have time to paint, with Francine nearby to answer questions and help along the way.
We’ll finish with a mini-gallery show, displaying everyone’s work on small easels. You’ll take home your painted 4 × 4-inch canvas and a wooden easel.
What you’ll learn
How to make even, symmetrical dots using dotting tools.
How to layer dots on dots for texture and contrast.
How to add curved “swooshes” for variety in your design.
Great for: Beginners. No prior experience needed.
Instructor: Francine Tompkins, PhD is an acrylic artist whose work ranges from fluid abstract paintings to hand-painted dot designs inspired by mandalas and traditional quilt patterns. She creates her designs freehand, using dotting tools and measured guidelines.
Schedule: Thursday, October 29 – 6:00–9:00 PM
Cost: $45
Includes use of all tools and materials, a 4 × 4-inch canvas, and a wooden easel to take home.
What to bring: Wear comfortable clothing and bring an old shirt to protect against paint spills. All tools and materials are provided. You’ll also receive a materials list and resources if you’d like to keep dot painting at home!
Cancellation policy:
If your plans change, please cancel more than 24 hours before class begins to receive credit toward another class at Depot Hill Creative. Cancellations made 24 hours or less before class are non-refundable and not eligible for class credit.
Build & Play a Mountain Dulcimer (Session 4)
This is a five-session series. Registration includes all five sessions.
Tuesday, October 13 – 6:30–8:30 PM
Tuesday, October 20 – 6:30–8:30 PM
Tuesday, October 27 – 6:30–8:30 PM
Tuesday, November 3 – 6:30–8:30 PM
Tuesday, November 10 – 6:30–8:30 PM
Build an instrument from a kit, then learn to tune, strum, and play simple songs—no music-reading experience needed.
A mountain dulcimer is a simple, approachable instrument that rests across your lap and can be strummed or fingerpicked to create a warm, folksy sound. You don’t need to read traditional music to play one, making it a great entry point for anyone who has always wanted to make music but felt intimidated by music theory or more complicated instruments.
Over five Tuesday evenings, you’ll build your own mountain dulcimer from a kit, then learn how to tune it, strum it, follow simple number-based tablature, and begin playing songs. You’ll leave with an instrument you built yourself and the skills to keep playing it at home!
What you’ll do
You’ll build a mountain dulcimer from a kit and learn how to play the instrument you created. Once your dulcimer is assembled, you’ll practice tuning, strumming, and following simple dulcimer tablature so you can begin playing songs during class.
What you’ll learn
How a mountain dulcimer is constructed
How to tune your instrument
How to strum and play basic songs
How to follow dulcimer tablature and number-based music
How to get comfortable making music without needing to read traditional notation
Great for: Anyone who has always wanted to play an instrument but has felt intimidated by music theory or reading music. The mountain dulcimer offers an approachable way to start making music, and you’ll leave with an instrument you built yourself to keep playing and sharing.
Instructor: Karen Warwick has been playing the mountain dulcimer for more than 35 years. Largely self-taught, she has spent thousands of hours studying the instrument and has continued her training with national champions and professional players at dulcimer festivals around the country. She loves sharing the mountain dulcimer with others and helping new players discover how approachable and enjoyable it can be.
Schedule
This is a five-session series. Registration includes all five sessions.
Tuesday, October 13 – 6:30–8:30 PM
Tuesday, October 20 – 6:30–8:30 PM
Tuesday, October 27 – 6:30–8:30 PM
Tuesday, November 3 – 6:30–8:30 PM
Tuesday, November 10 – 6:30–8:30 PM
Cost: $198
What to bring: Just yourself — everything you need to get started will be provided!
Cancellation policy:
If your plans change, please cancel more than 24 hours before class begins to receive credit toward another class at Depot Hill Creative. Cancellations made 24 hours or less before class are non-refundable and not eligible for class credit.
Depot Hill Creative Grand Opening
Come for the clay. Stay for the music, food, and a first look at what’s next.
Saturday, November 7, 2026
10:00 AM–3:00 PM
Join us for a day of art, music, and food across our three locations, all within walking distance.
Get your hands in clay, sample coffee and baked goods from Firefly Coffeehouse, and spend some time at the depot enjoying live music and art activities. Along the way, you’ll get a first look at the spaces and creative experiences coming to the neighborhood.
Make a clay ornament in our new pottery studio
209 S. 6th St.
Step inside the new studio and help us celebrate its opening by making a clay ornament! Meet the team, take a look around, and learn about upcoming classes.
If you’ve been curious about working with clay, this is a chance to explore the space and find out where you might start.
Get a taste of what’s coming
Café & Artist Studios · 500 E. Main St.
Sample coffee and baked goods from Firefly Coffeehouse while getting a sneak peek at our future café and artist studios.
Take a look at drawings showing the future café out front and artist studios in back. This is your chance to see the plans before those spaces open.
Join the festivities at the depot
532 E. Main St.
The Depot will keep the party going with live music, food trucks, and art activities. Grab a bite, listen for a while, and try making something as you explore the three locations.
If you haven’t visited before, it’s a welcoming way to get to know Depot Hill Creative and the creative experiences happening here.
Plan your visit
The celebration runs from 10:00 AM to 3:00 PM on Saturday, November 7. All three locations are within walking distance, so you can explore each as part of your visit.
The Pottery Studio: 209 S. 6th St.
Café & Artist Studios: 500 E. Main St.
The Depot: 532 E. Main St.
Bring a friend and come celebrate with us.
Questions about the grand opening?
Contact Kara Kasten-Olson.

Needle Felted Birds: Sculpting with Wool


Sunday, November 8 – 1:00–3:00 PM
Turn loose, colorful wool into a one-of-a-kind folk-art bird using the simple, surprisingly satisfying technique of needle felting.
With a special felting needle, you’ll shape and sculpt the wool by hand, building your bird piece by piece from a soft bundle of fiber into a finished wool sculpture.
What you’ll do
Choose from a variety of wool colors, then use felting needles to sculpt a rounded bird body and build it piece by piece. You’ll create and attach a tail, wings, beak, eyes, and other details, blending and layering wool as you go to give your bird its own personality.
By the end of class, you’ll have a finished folk-art bird to bring home, along with the skills to keep experimenting with needle felting on your own.
What you’ll learn
How to choose the right wool and felting tools
How to safely and confidently use felting needles
Techniques for sculpting, shaping, and joining felted pieces
How to blend and layer wool colors for dimension and detail
How to add small features like eyes and beaks
Techniques for giving your finished piece a polished look
Great for: All skill levels. No prior needle-felting experience needed.
Instructor: Traci McLachlan is a maker and teaching artist in the Verona, Wisconsin area. As the founder of Make Creativity a Habit, she is passionate about making creativity a regular part of life. Traci has been on a creative journey to explore and learn as much as she can about different art techniques. Over the years Traci has realized the greatest satisfaction in making art comes from focusing on the process rather than product. With a deep belief in the power of creativity for wellness, Traci guides people through art workshops that encourage free expression and playfulness to help everyone make creativity a regular habit in their lives.
Schedule
Sunday, November 8 – 1:00–3:00 PM
Cost: $36
What to bring: Just yourself! All supplies will be provided.
Cancellation policy:
If your plans change, please cancel more than 24 hours before class begins to receive credit toward another class at Depot Hill Creative. Cancellations made 24 hours or less before class are non-refundable and not eligible for class credit.
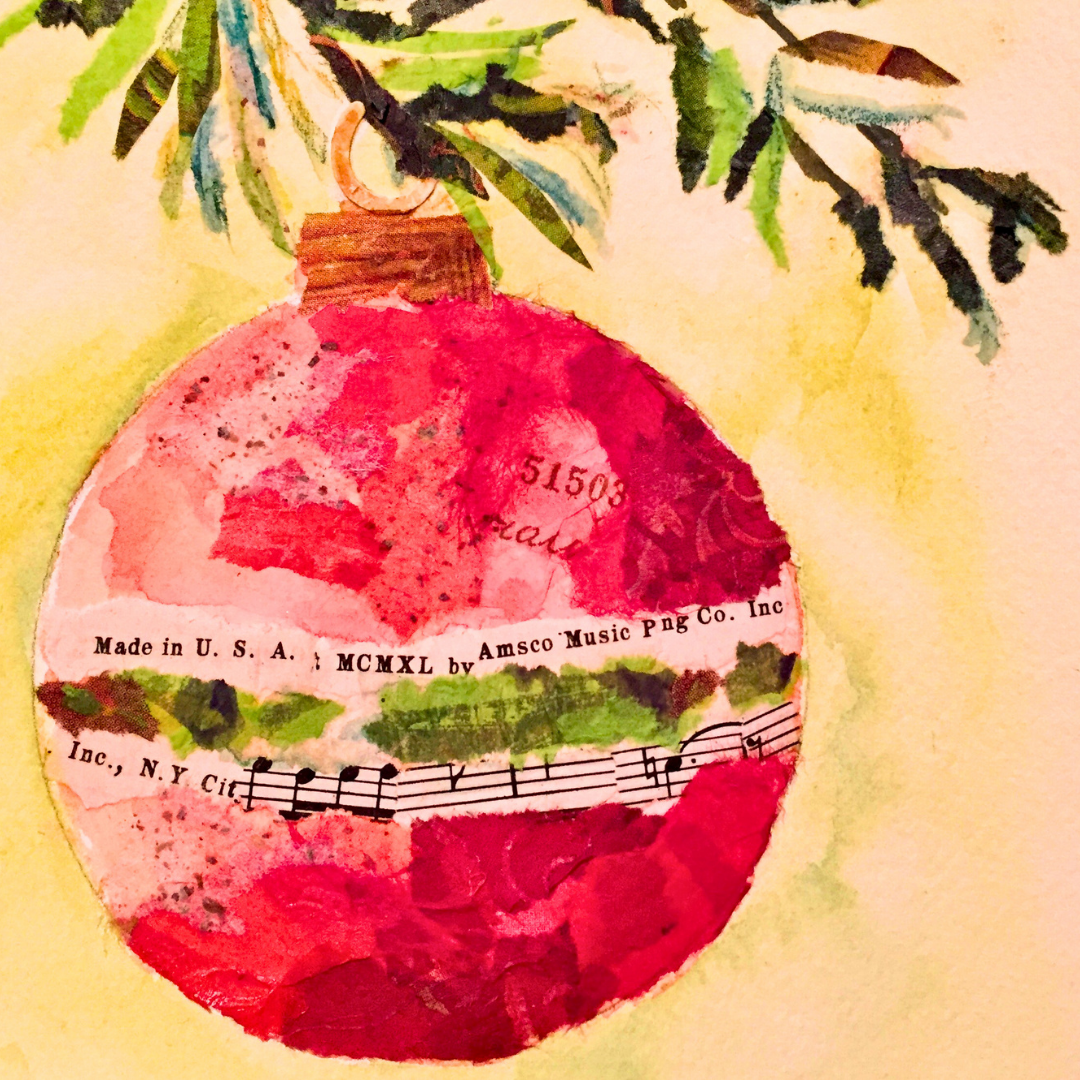
Basics & Beyond in Watercolor: Holiday Ornament & Poinsettia
Tuesday, November 10 – 9:30–11:00 AM and
Thursday, November 12 – 9:30–11:00 AM
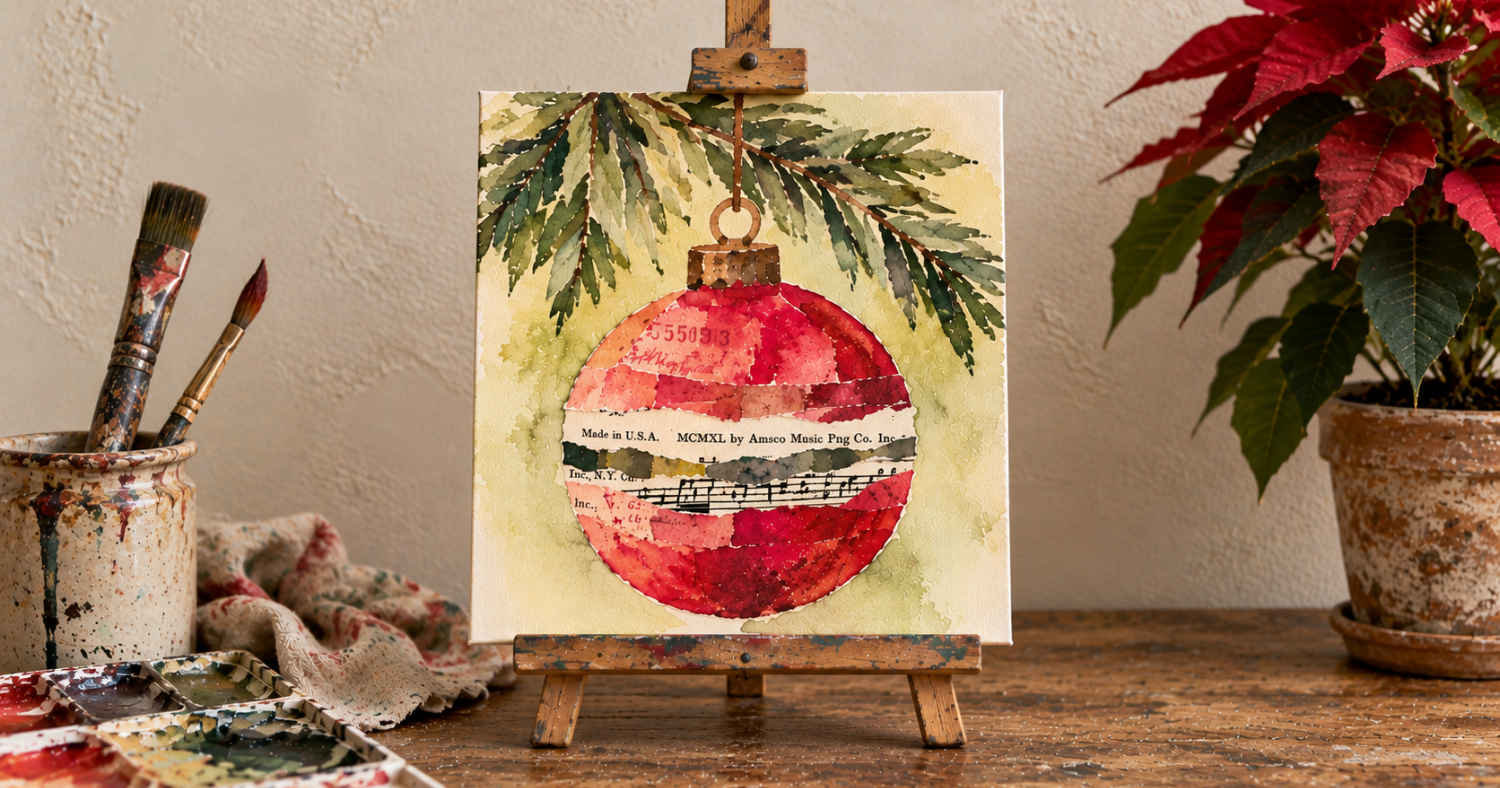
Create festive watercolor and mixed-media pieces inspired by poinsettias and Christmas ornaments, with the option to turn your finished artwork into a holiday card.
What you’ll do
Across two sessions, you’ll paint a poinsettia and holiday ornaments while exploring both watercolor and paper-texturing techniques. You’ll also experiment with mixed-media elements like collage paper, music sheets, book pages, and napkins to add texture and visual interest.
Your finished work can stand on its own or be used as the basis for a handmade holiday card.
What you’ll learn
How to paint poinsettias and holiday ornaments in watercolor
How to combine watercolor with mixed-media techniques
How to add texture using paper and collage materials
How to use watercolor pencils and other tools to build detail and dimension
How to develop a holiday-themed painting that can also work as a card design
Great for: Anyone who wants to learn more about watercolor painting and paper texturing.
Instructor: Rita Carpenter is a watercolor artist and photographer drawn to the balance between loose color and careful control. Her classes are thoughtful, encouraging, and designed to help students build confidence while becoming more comfortable with watercolor.
Schedule
This is one class held over two dates. Registration includes both sessions.
Tuesday, November 10 – 9:30–11:00 AM
Thursday, November 12 – 9:30–11:00 AM
Cost: $78
What to bring:
140 lb. cold-press watercolor paper, around 15 × 15 inches or another size you prefer
Watercolor paints and brushes
Water containers
Fine-mist spray bottle
Watercolor pencils
Sandpaper
Paper towels and tissue
Music paper, collage paper, napkins, or book pages
Circle stencil or round container for tracing
YES Paste
Brush for glue
Salt
Cancellation policy:
If your plans change, please cancel more than 24 hours before class begins to receive credit toward another class at Depot Hill Creative. Cancellations made 24 hours or less before class are non-refundable and not eligible for class credit.
Build & Play a Mountain Dulcimer (Session 5)
This is a five-session series. Registration includes all five sessions.
Tuesday, October 13 – 6:30–8:30 PM
Tuesday, October 20 – 6:30–8:30 PM
Tuesday, October 27 – 6:30–8:30 PM
Tuesday, November 3 – 6:30–8:30 PM
Tuesday, November 10 – 6:30–8:30 PM
Build an instrument from a kit, then learn to tune, strum, and play simple songs—no music-reading experience needed.
A mountain dulcimer is a simple, approachable instrument that rests across your lap and can be strummed or fingerpicked to create a warm, folksy sound. You don’t need to read traditional music to play one, making it a great entry point for anyone who has always wanted to make music but felt intimidated by music theory or more complicated instruments.
Over five Tuesday evenings, you’ll build your own mountain dulcimer from a kit, then learn how to tune it, strum it, follow simple number-based tablature, and begin playing songs. You’ll leave with an instrument you built yourself and the skills to keep playing it at home!
What you’ll do
You’ll build a mountain dulcimer from a kit and learn how to play the instrument you created. Once your dulcimer is assembled, you’ll practice tuning, strumming, and following simple dulcimer tablature so you can begin playing songs during class.
What you’ll learn
How a mountain dulcimer is constructed
How to tune your instrument
How to strum and play basic songs
How to follow dulcimer tablature and number-based music
How to get comfortable making music without needing to read traditional notation
Great for: Anyone who has always wanted to play an instrument but has felt intimidated by music theory or reading music. The mountain dulcimer offers an approachable way to start making music, and you’ll leave with an instrument you built yourself to keep playing and sharing.
Instructor: Karen Warwick has been playing the mountain dulcimer for more than 35 years. Largely self-taught, she has spent thousands of hours studying the instrument and has continued her training with national champions and professional players at dulcimer festivals around the country. She loves sharing the mountain dulcimer with others and helping new players discover how approachable and enjoyable it can be.
Schedule
This is a five-session series. Registration includes all five sessions.
Tuesday, October 13 – 6:30–8:30 PM
Tuesday, October 20 – 6:30–8:30 PM
Tuesday, October 27 – 6:30–8:30 PM
Tuesday, November 3 – 6:30–8:30 PM
Tuesday, November 10 – 6:30–8:30 PM
Cost: $198
What to bring: Just yourself — everything you need to get started will be provided!
Cancellation policy:
If your plans change, please cancel more than 24 hours before class begins to receive credit toward another class at Depot Hill Creative. Cancellations made 24 hours or less before class are non-refundable and not eligible for class credit.
Basics & Beyond in Watercolor: Holiday Ornament & Poinsettia (Session 2)
Tuesday, November 10 – 9:30–11:00 AM and
Thursday, November 12 – 9:30–11:00 AM
Create festive watercolor and mixed-media pieces inspired by poinsettias and Christmas ornaments, with the option to turn your finished artwork into a holiday card.
What you’ll do
Across two sessions, you’ll paint a poinsettia and holiday ornaments while exploring both watercolor and paper-texturing techniques. You’ll also experiment with mixed-media elements like collage paper, music sheets, book pages, and napkins to add texture and visual interest.
Your finished work can stand on its own or be used as the basis for a handmade holiday card.
What you’ll learn
How to paint poinsettias and holiday ornaments in watercolor
How to combine watercolor with mixed-media techniques
How to add texture using paper and collage materials
How to use watercolor pencils and other tools to build detail and dimension
How to develop a holiday-themed painting that can also work as a card design
Great for: Anyone who wants to learn more about watercolor painting and paper texturing.
Instructor: Rita Carpenter is a watercolor artist and photographer drawn to the balance between loose color and careful control. Her classes are thoughtful, encouraging, and designed to help students build confidence while becoming more comfortable with watercolor.
Schedule
This is one class held over two dates. Registration includes both sessions.
Tuesday, November 10 – 9:30–11:00 AM
Thursday, November 12 – 9:30–11:00 AM
Cost: $78
What to bring:
140 lb. cold-press watercolor paper, around 15 × 15 inches or another size you prefer
Watercolor paints and brushes
Water containers
Fine-mist spray bottle
Watercolor pencils
Sandpaper
Paper towels and tissue
Music paper, collage paper, napkins, or book pages
Circle stencil or round container for tracing
YES Paste
Brush for glue
Salt
Cancellation policy:
If your plans change, please cancel more than 24 hours before class begins to receive credit toward another class at Depot Hill Creative. Cancellations made 24 hours or less before class are non-refundable and not eligible for class credit.
Riveted Riverstone Pendant
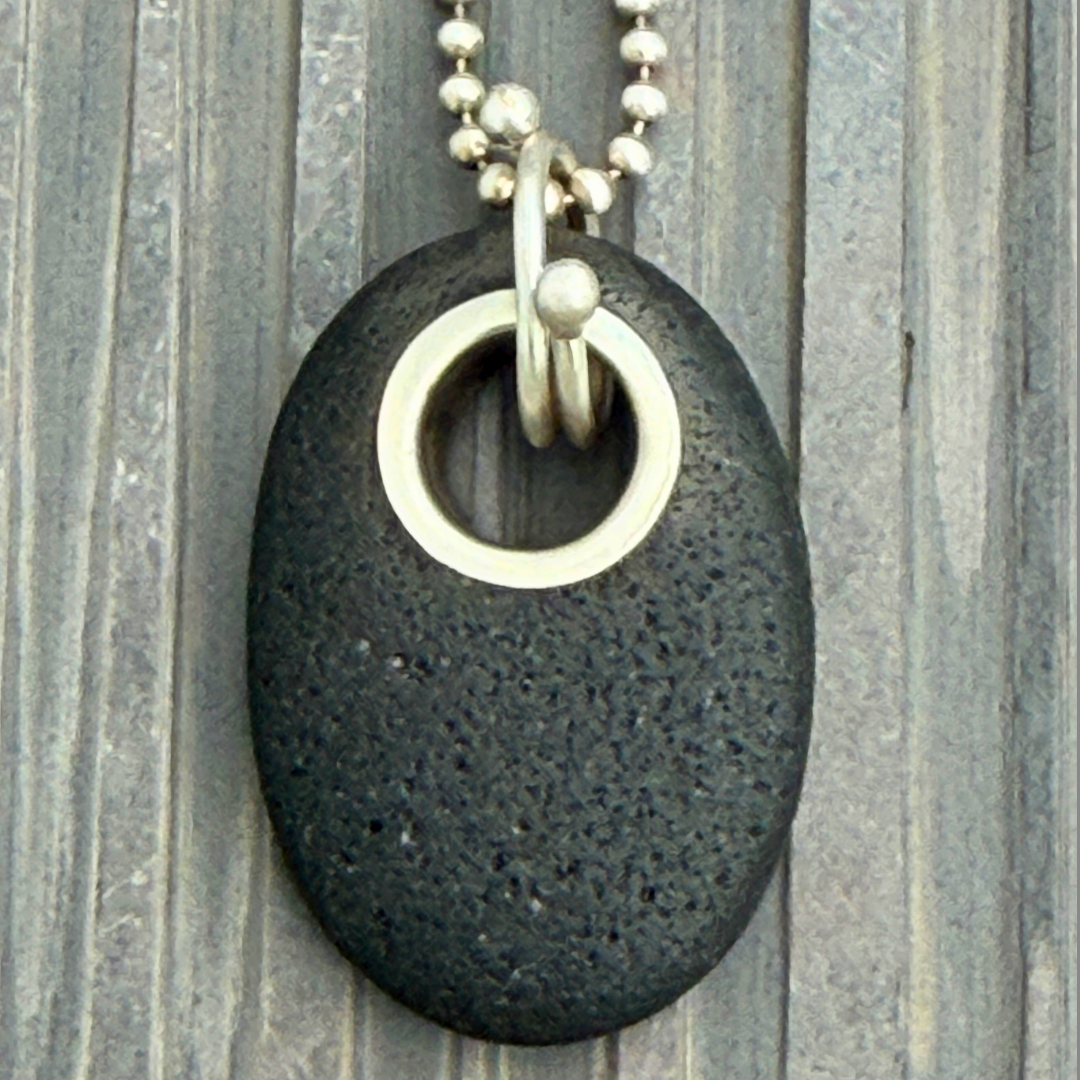
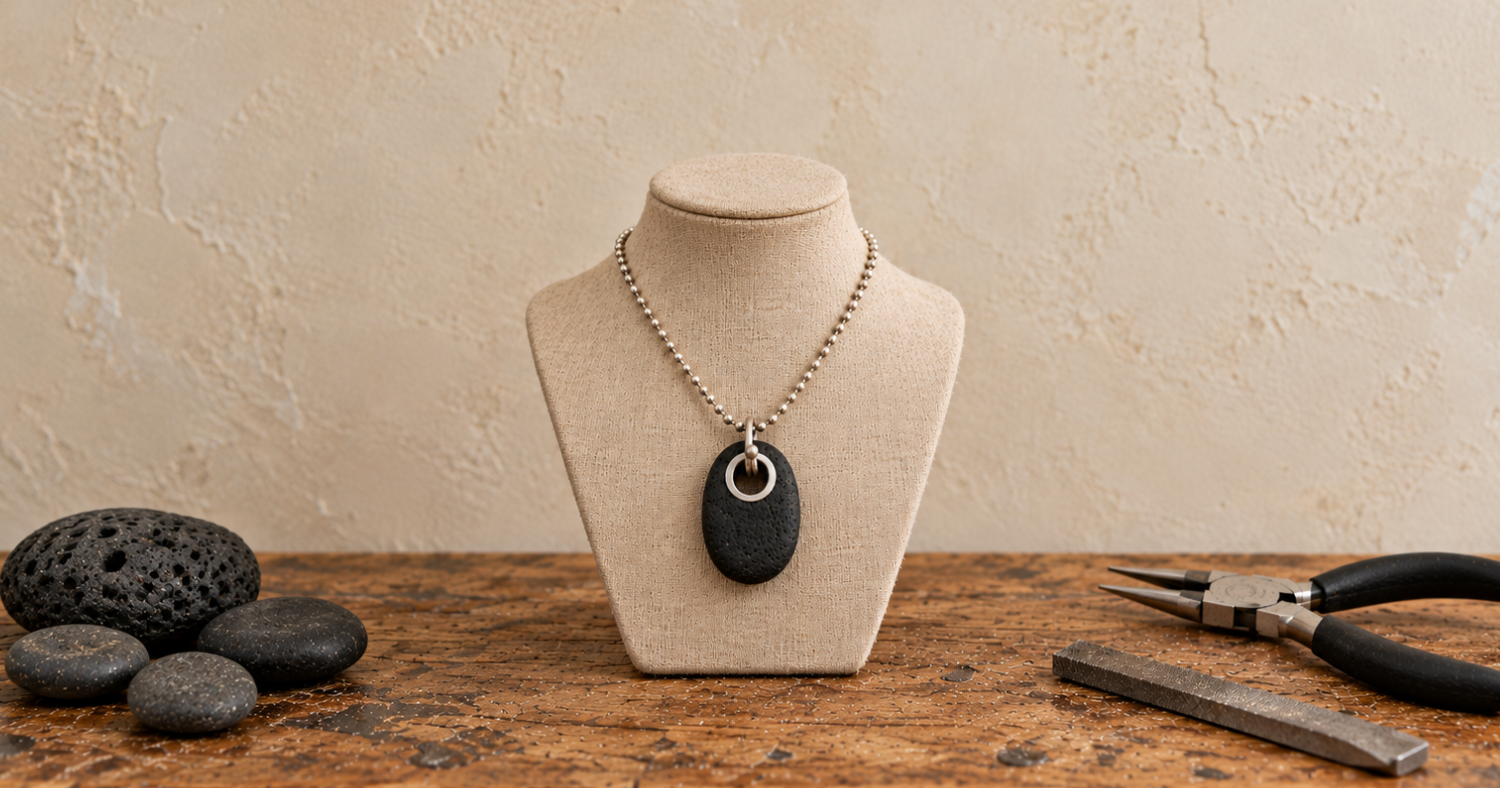
Saturday, November 14 10:00 AM–1:00 PM
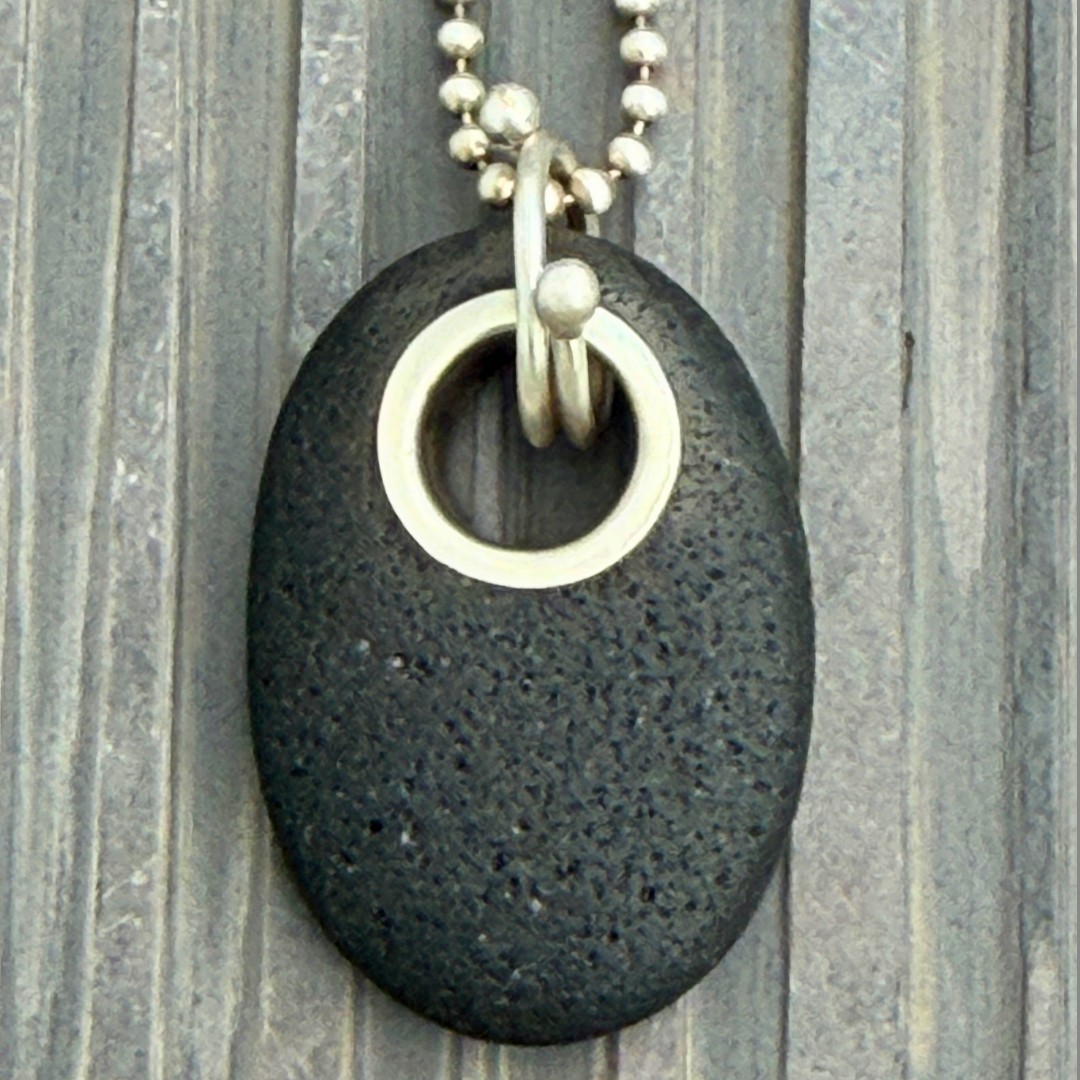
Turn a Lake Superior riverstone into a one-of-a-kind pendant using sterling silver, hand tools, and traditional metalsmithing techniques.
What you’ll do
Choose a basalt stone collected along the shoreline of Lake Superior, then transform it into a finished pendant from start to finish.
You’ll drill directly through the stone, cut and set a sterling silver tube rivet, and use fine silver wire to create a coiled bail for hanging your pendant. Along the way, you’ll work with hammers, hand tools, a flex shaft, and a small butane torch to shape, secure, finish, and polish each component.
Most stones will measure approximately 1–2 inches long by about 1 inch wide, so every finished piece will have its own shape and character.
What you’ll learn
How to use a hollow-core drill bit and flex shaft to drill stone
How to cut silver tubing for a rivet
How to anneal silver with a butane torch
How to create a double-sided rivet in stone
How to finish and polish the rivet
How to ball fine silver wire with a butane torch
How to create a coiled pendant bail
Great for: Novices–no prior metalsmithing experience needed!
Instructor: Kay Rashka is a local metalsmithing instructor with more than 15 years of teaching experience, including at the Madison Bead Show and Milwaukee Bead & Button Show. She is also the author of Bead Meets Metal.
Schedule
Saturday, November 14 10:00 AM–1:00 PM
Cost: $125
Includes one basalt stone, 9.5 mm sterling silver tubing, 16-gauge fine silver wire for the bail, and written instructions. Necklace chain is not included.
What to bring: Wear old work clothes and closed-toe shoes. Long hair must be tied back. Safety glasses will be provided. Bring your own necklace chain or leather cord if you’d like to wear your finished pendant home.
Cancellation policy:
If your plans change, please cancel more than 24 hours before class begins to receive credit toward another class at Depot Hill Creative. Cancellations made 24 hours or less before class are non-refundable and not eligible for class credit.
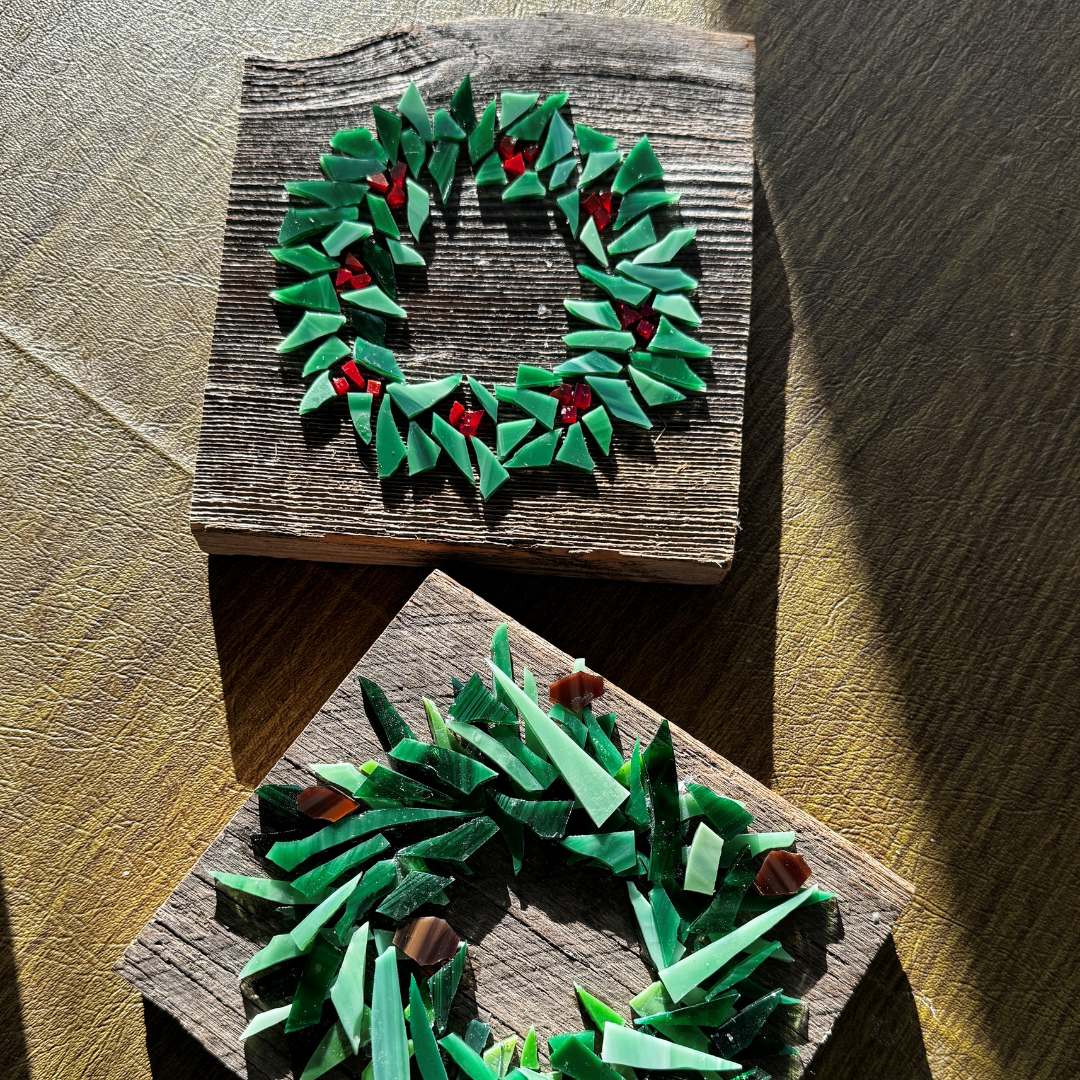
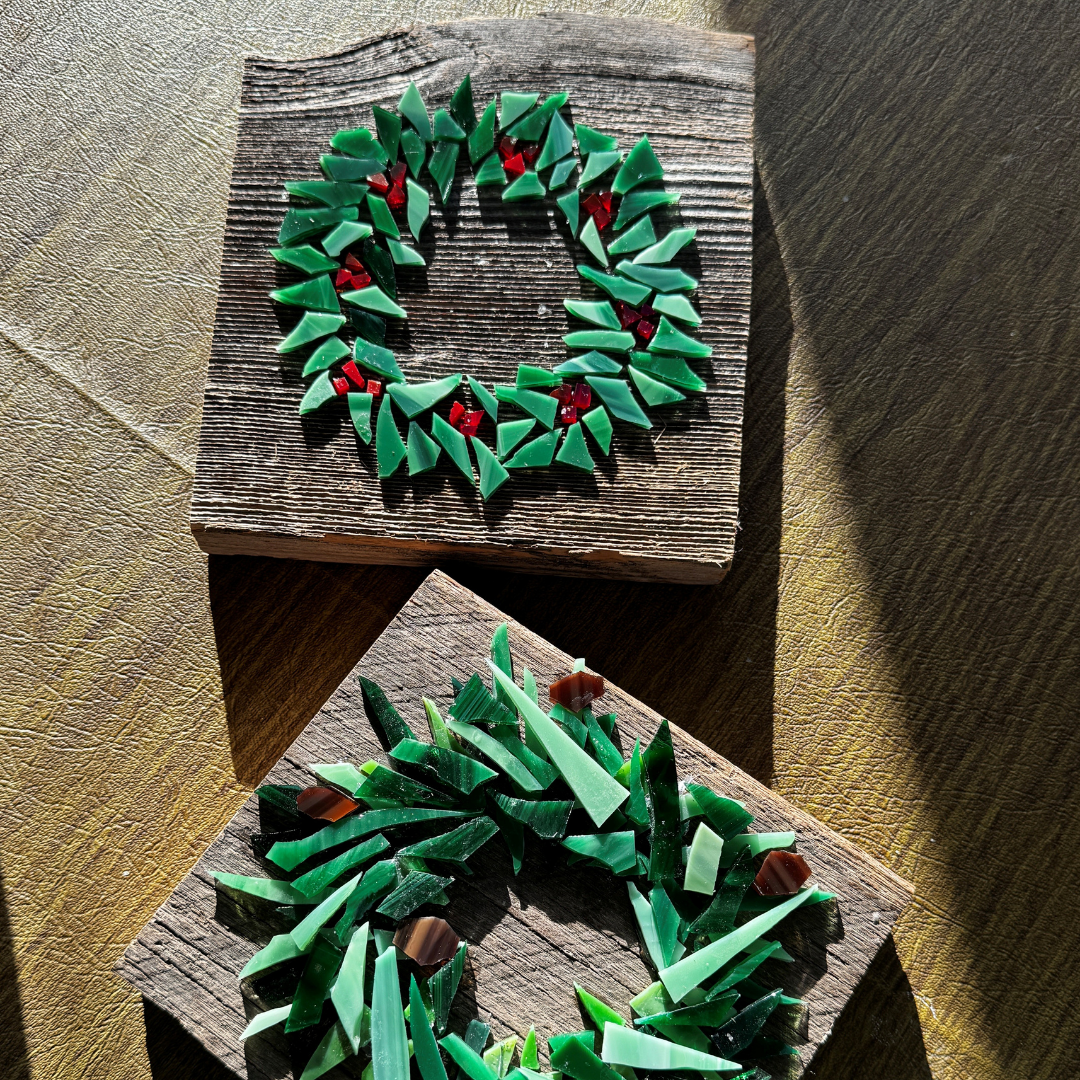
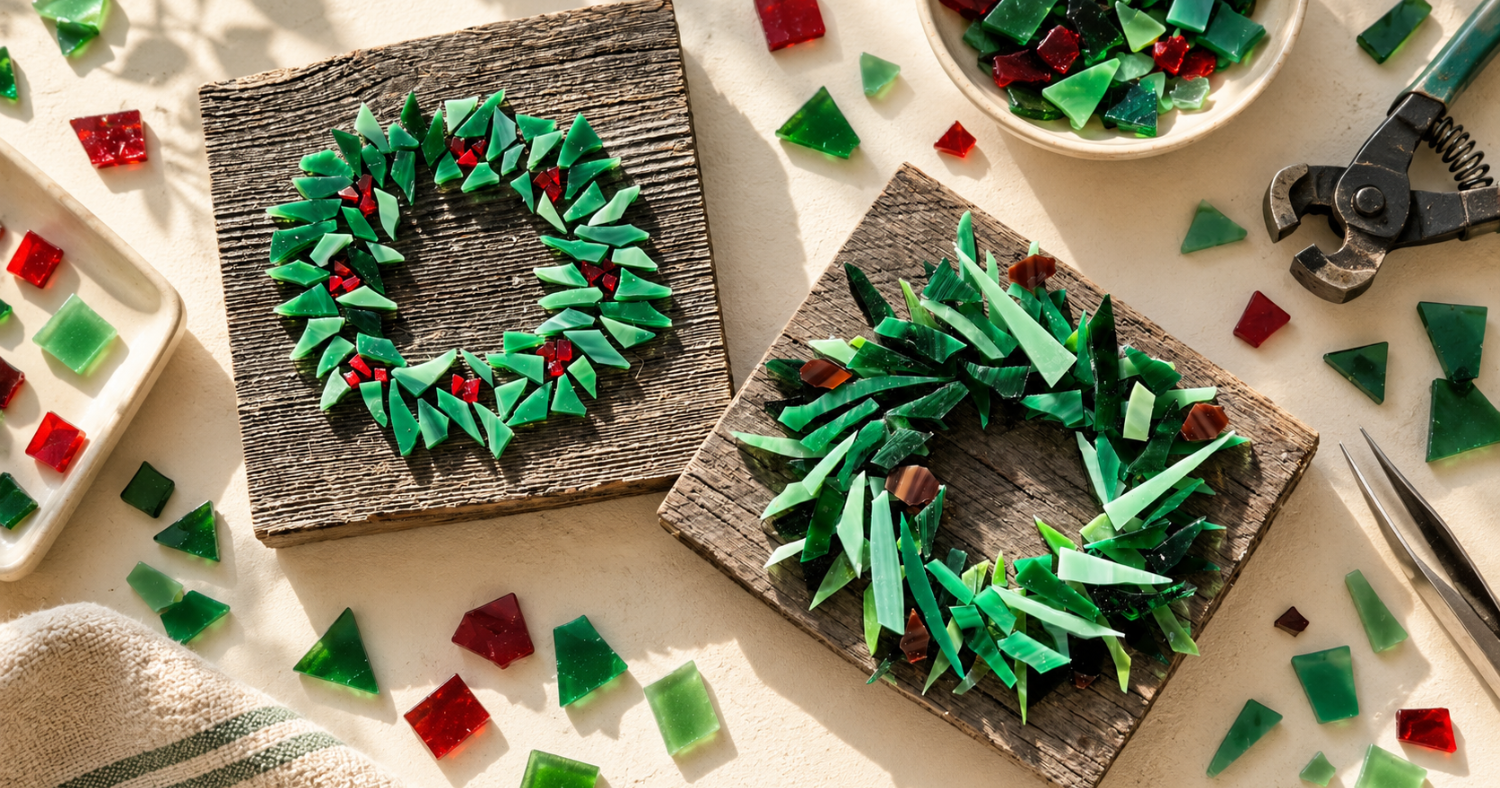
Mosaic Wreath on Barnwood
Saturday, November 21, 10:00 AM–12:00 PM
Create a colorful mosaic wreath on rustic barnwood for a one-of-a-kind piece you can display season after season.
What you’ll do
Build your wreath design directly onto a reclaimed wooden board using colorful glass or ceramic pieces. You’ll cut and shape your materials, arrange the pieces into a floral or holiday wreath pattern, and adhere everything to the barnwood to create a finished mosaic with plenty of texture and character.
By the end of class, you’ll have a permanent, weather-resistant piece of art ready to bring home and display.
What you’ll learn
How to cut and shape materials for mosaic work
How to plan and lay out a wreath design
How to arrange glass or ceramic pieces on barnwood
How to securely adhere mosaic materials to a wooden surface
How to finish a mosaic piece for display
Great for: All skill levels. No prior mosaic experience needed.
Instructor: Alexis Johnson is a stained glass and mosaic artist based in Edgerton, Wisconsin, where she operates Eagle Art. Her classes are hands-on and approachable, with plenty of room to experiment while learning the fundamentals of the craft.
Schedule
Saturday, November 21, 10:00 AM–12:00 PM
Cost: $48
What to bring: Just yourself — all tools and materials will be provided.
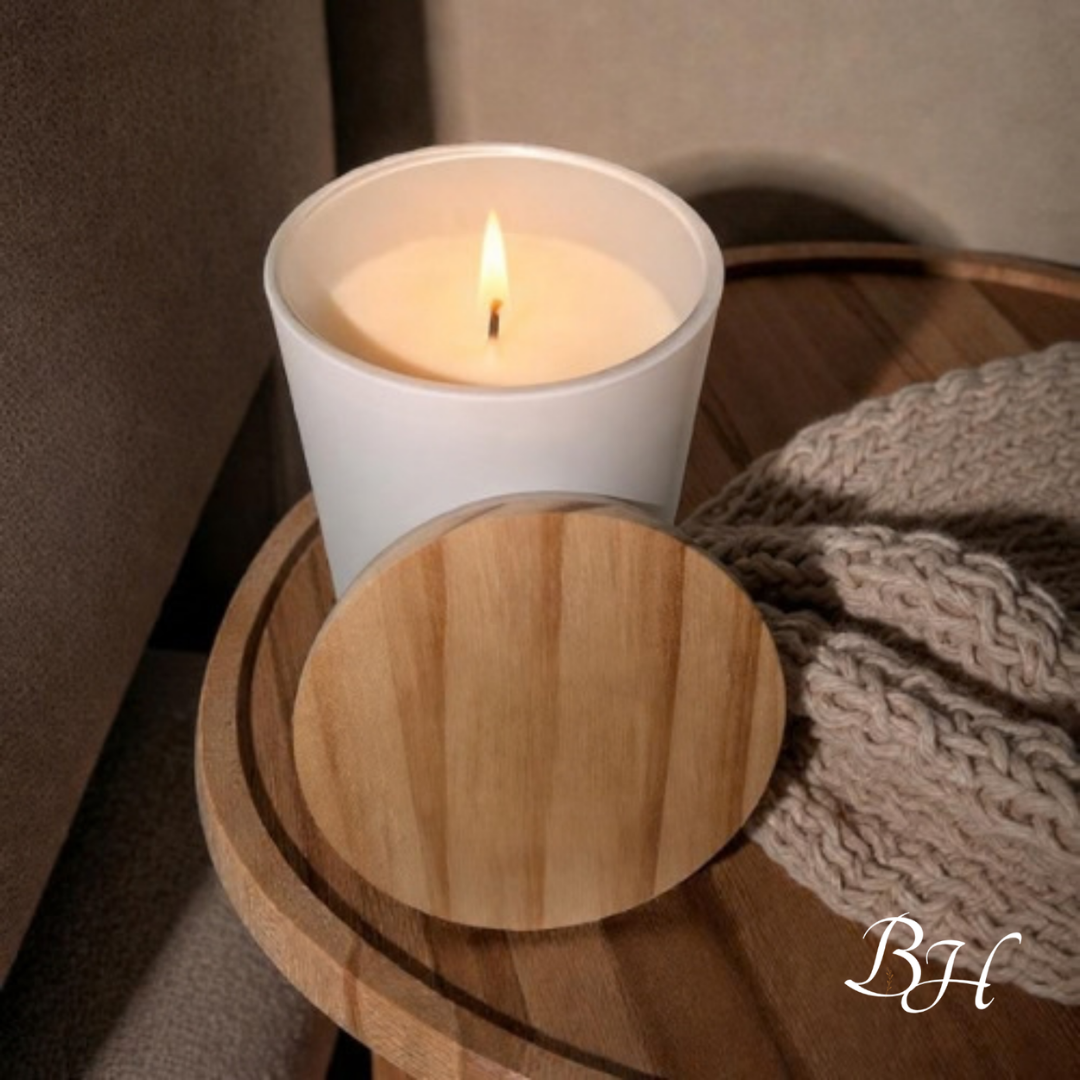
Pour a Soy Candle and Blend Your Own Perfume
Sunday, November 22, 1:00–3:00 PM
Find your favorite balance of citrus, spice, and earthy scents, then turn it into a hand-poured soy candle and a matching perfume oil.
What you’ll do
Explore sweet orange, clove bud, cinnamon leaf, and patchouli as you create a scented pair—one for your home and one to wear. You’ll choose a jar, secure a cotton wick, and measure, melt, and pour pure soy wax into an 8-ounce vessel. While your candle cools, blend a matching rollerball perfume with essential oils and a jojoba oil base. Finish with custom labels and a protective cover for your candle, making the pair your own to keep or give as a gift. There’ll also be light refreshments and time for questions while the wax sets.
What you’ll learn
How wick selection, pouring temperature, and melted wax affect a candle’s burn
How to balance citrus, spice, and earthy fragrance notes
How to dilute essential oils in a carrier oil for perfume
Great for: Beginners and anyone curious about scent, candle making, or creating handmade gifts.
Instructor: Laura Dedrick creates small-batch botanical goods for home and body through BrimkaHaus, including candles, perfumes, soaps, balms, and room sprays.
Schedule
Sunday, November 22, 1:00–3:00 PM
Cost: $48. All materials, tools, and safety gear are included.
What to bring: Yourself! All materials will be provided.
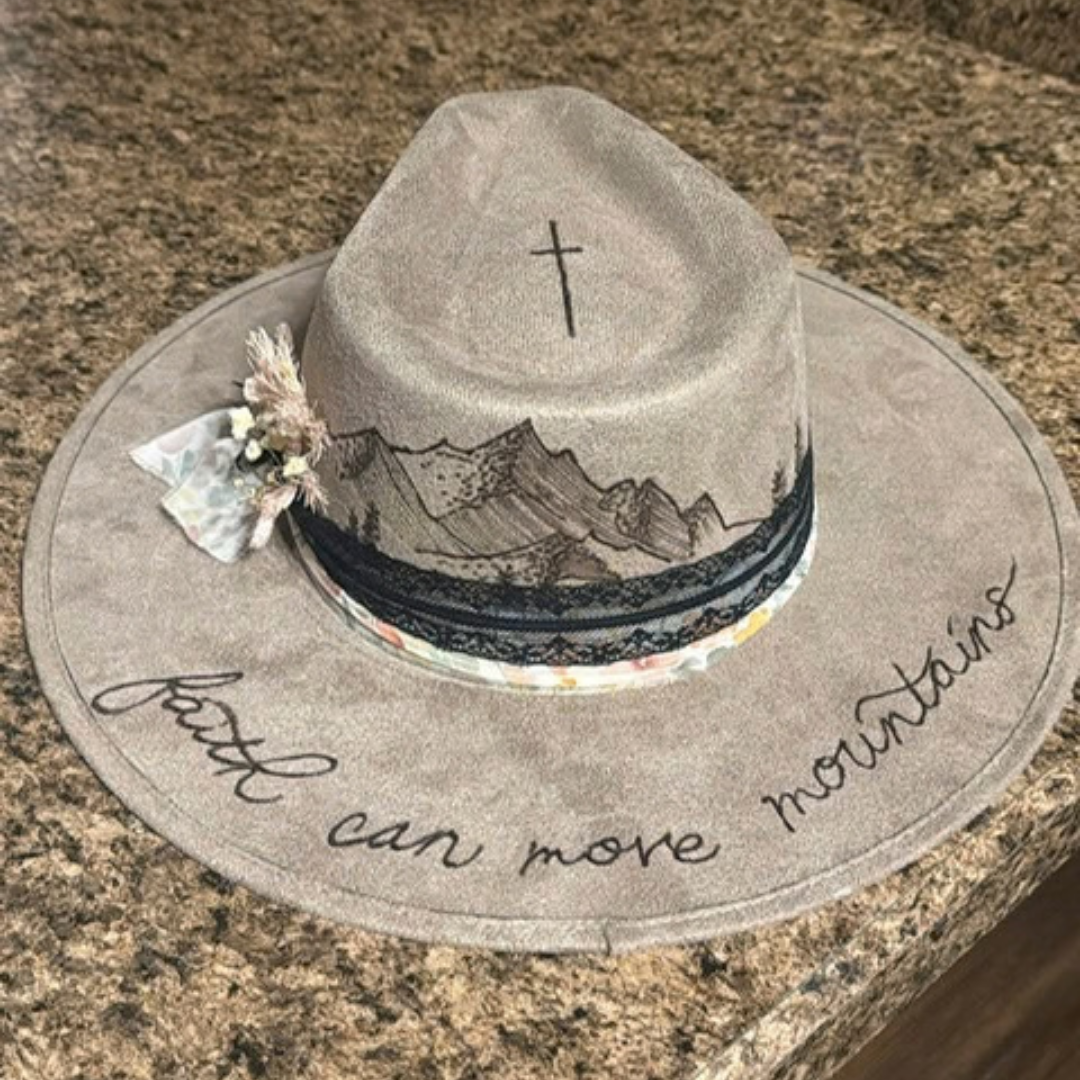
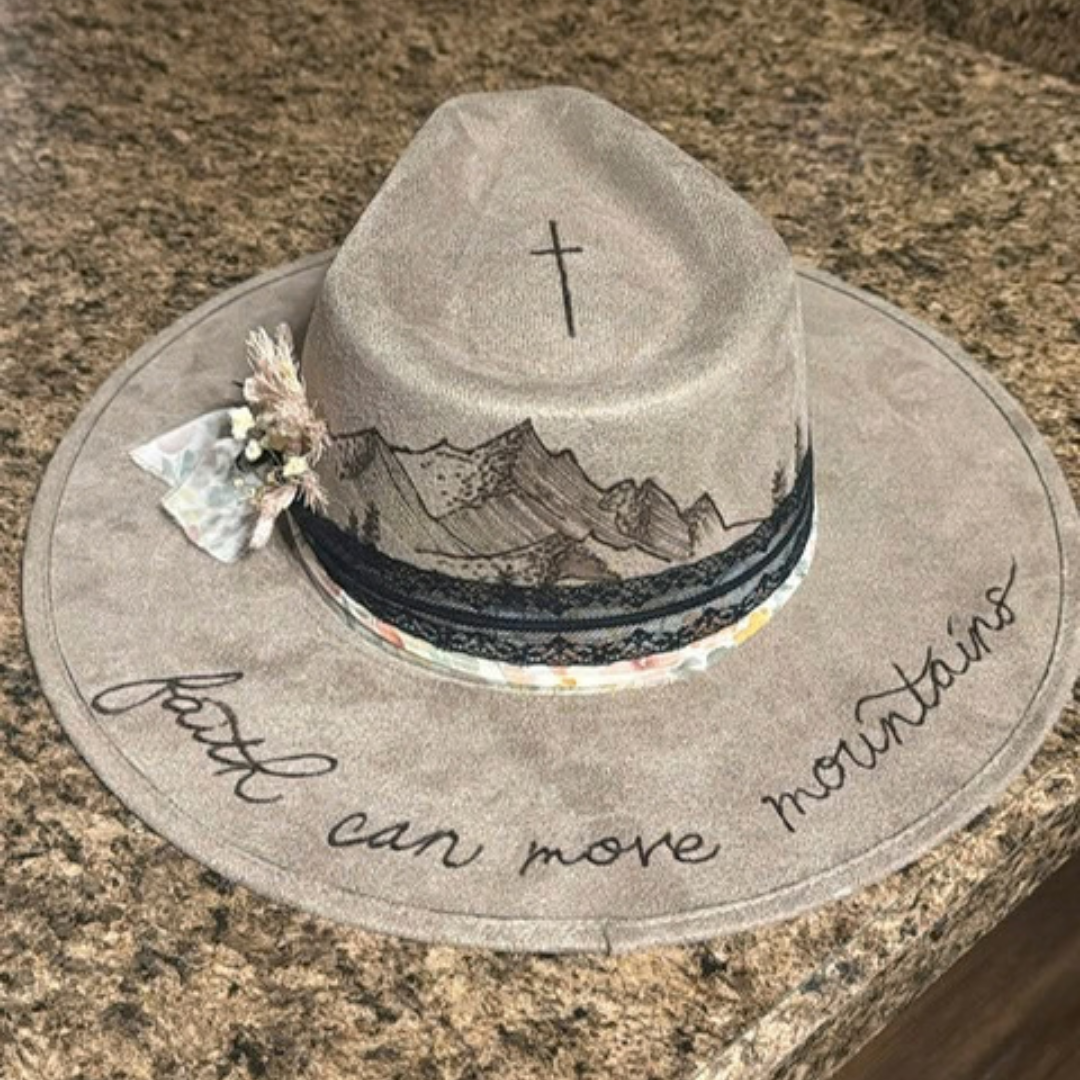
Design Your Own Western Hat: Hat Burning Workshop
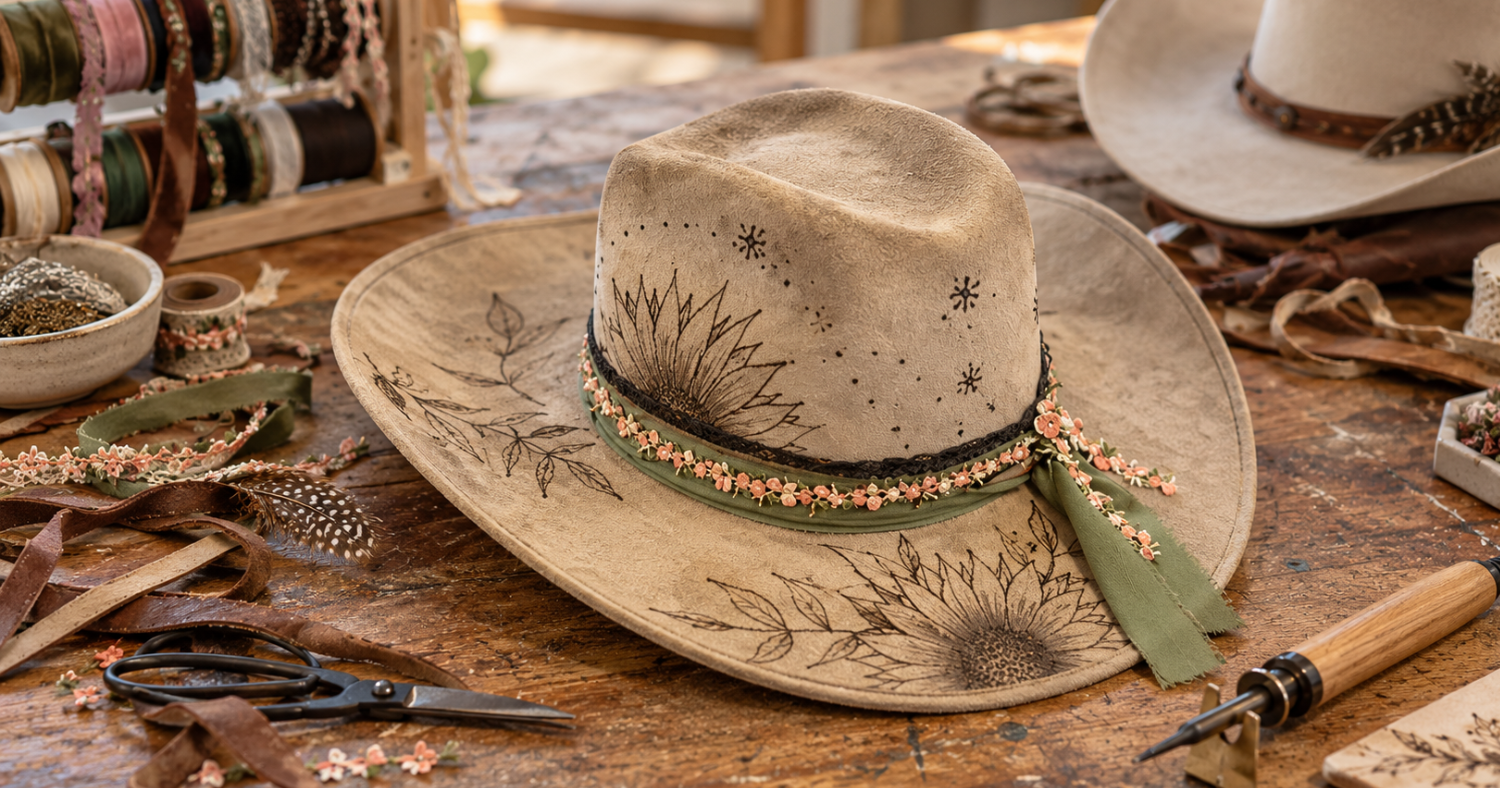
Saturday, November 28, 1:00–5:00 PM
Put your own mark on a western hat with hand-burned artwork and a custom-decorated hat band.
What you’ll do
Choose a design you’d love to wear, with stencils and templates available to help you get started. Callie and Nicole will guide you through using a pyrography pen—a heated tool that burns lines and patterns into the suede surface of your hat. Then explore ribbon, leather, lace, feathers, and other finishing touches to decorate your hat band and complete the look. You’ll leave with a finished hat to wear yourself or give as a gift.
What you’ll learn
How to operate a pyrography pen
How to burn a design into suede
How to combine decorative materials to personalize a hat band
Great for: People who love western style, collect hats, or want to spend an afternoon making something with friends.
Instructors: Callie Sagen and Nicole Niemeier are longtime friends from Stoughton who share a love of horses, western style, and making things by hand. Callie handcrafts clay earrings, and Nicole designs custom tees and drinkware. Together, they bring those creative backgrounds—and plenty of time in the saddle—to Wildfire Wildflower Hat Co.’s hat workshops.
Schedule
Saturday, November 28, 1:00–5:00 PM
Cost: $125 per person, including one hat and use of burning tools, design templates, and decorative materials.
What to bring: Yourself and your design ideas.
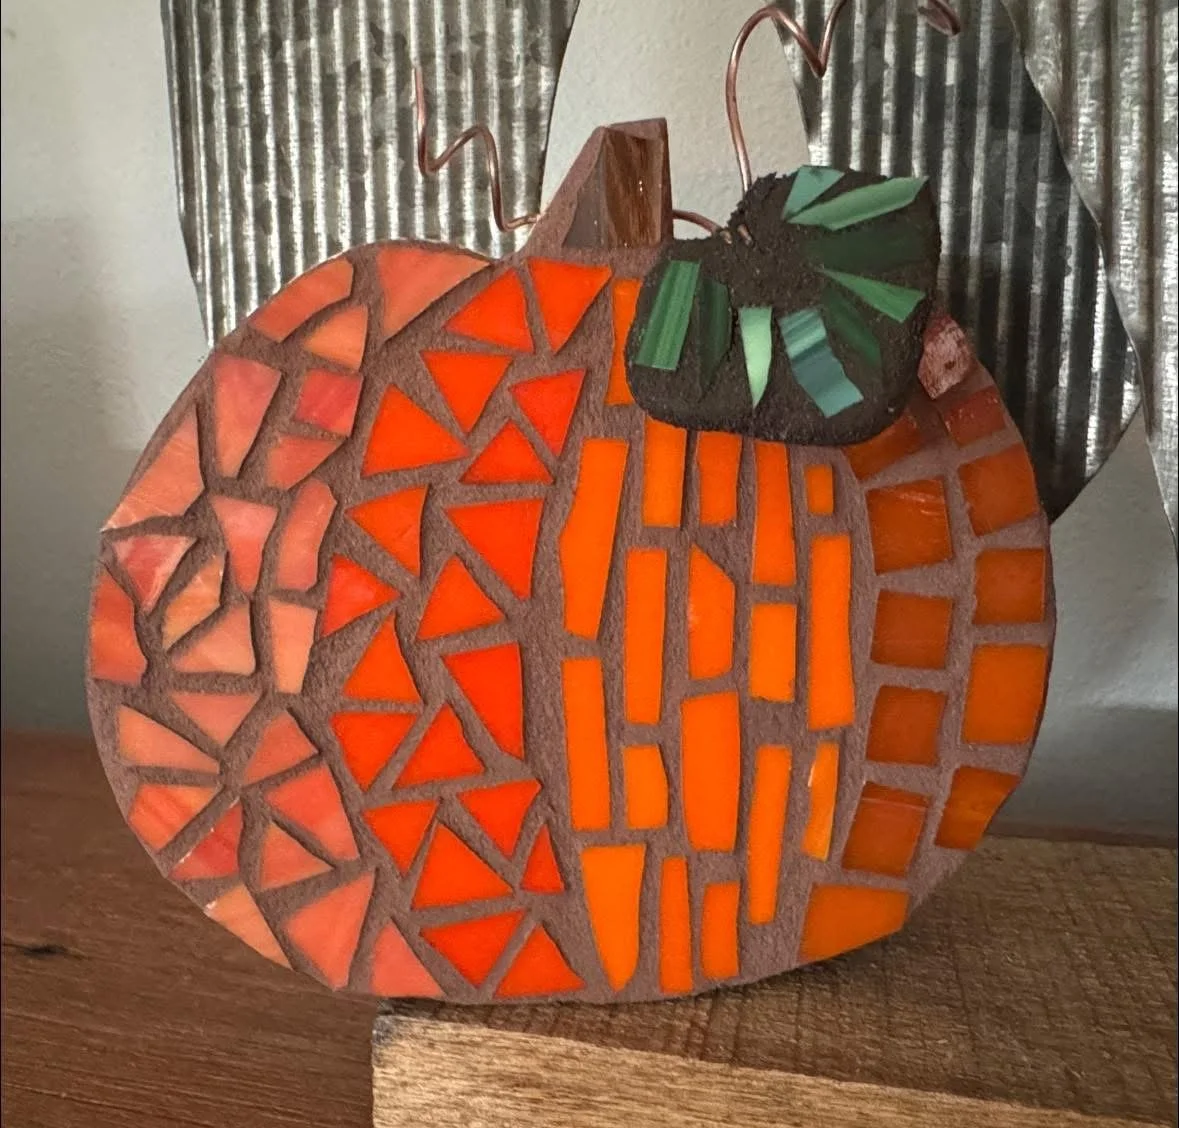
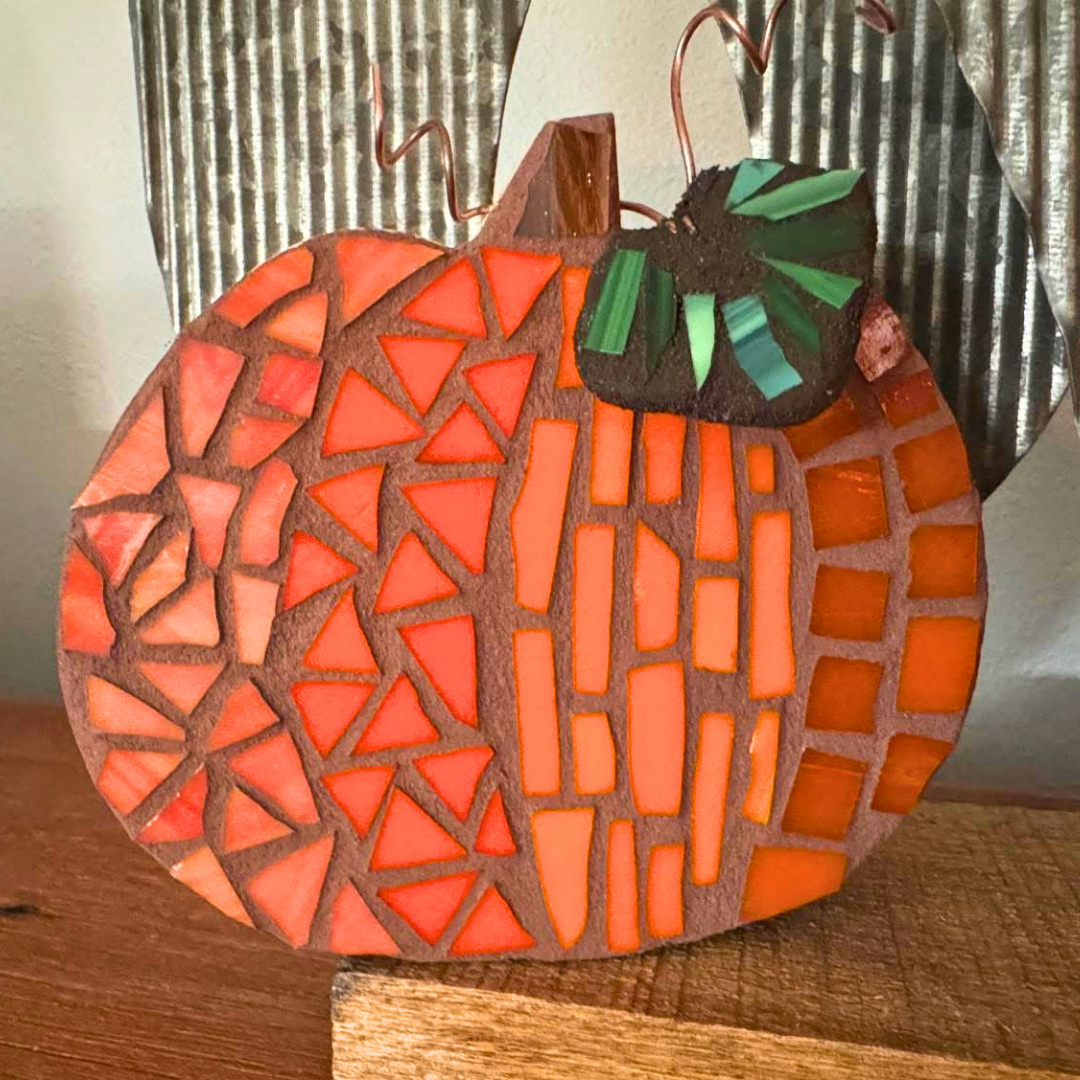
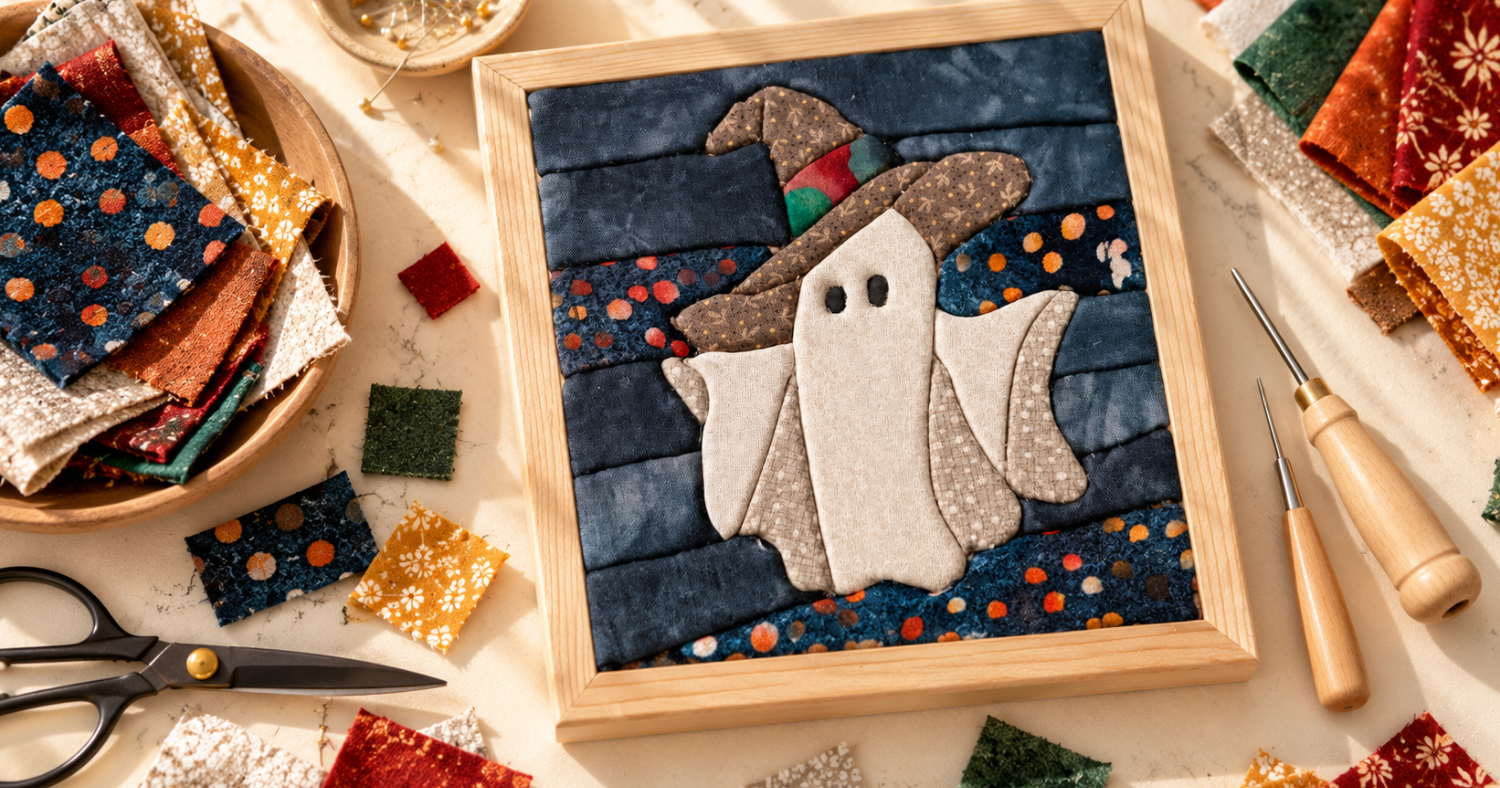
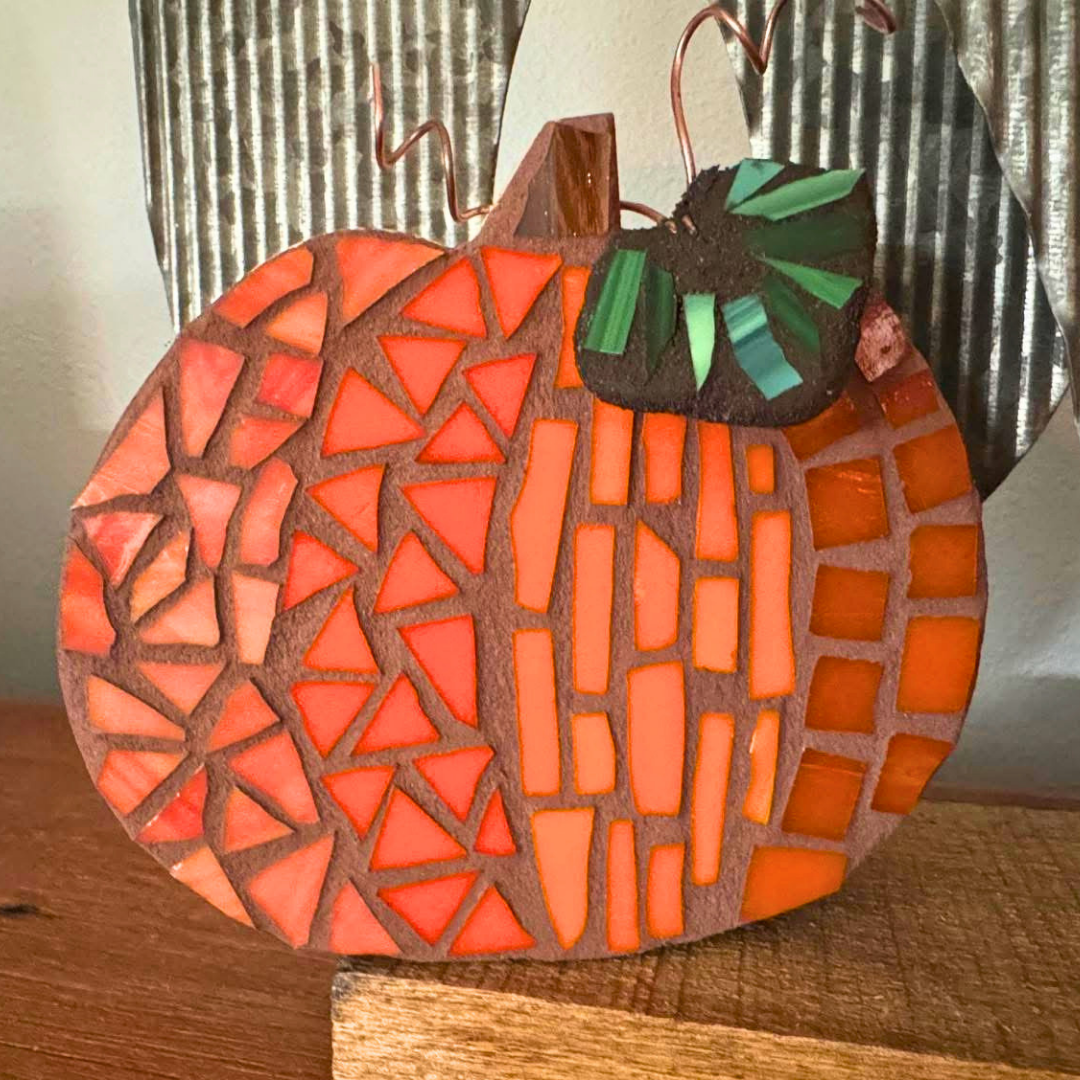
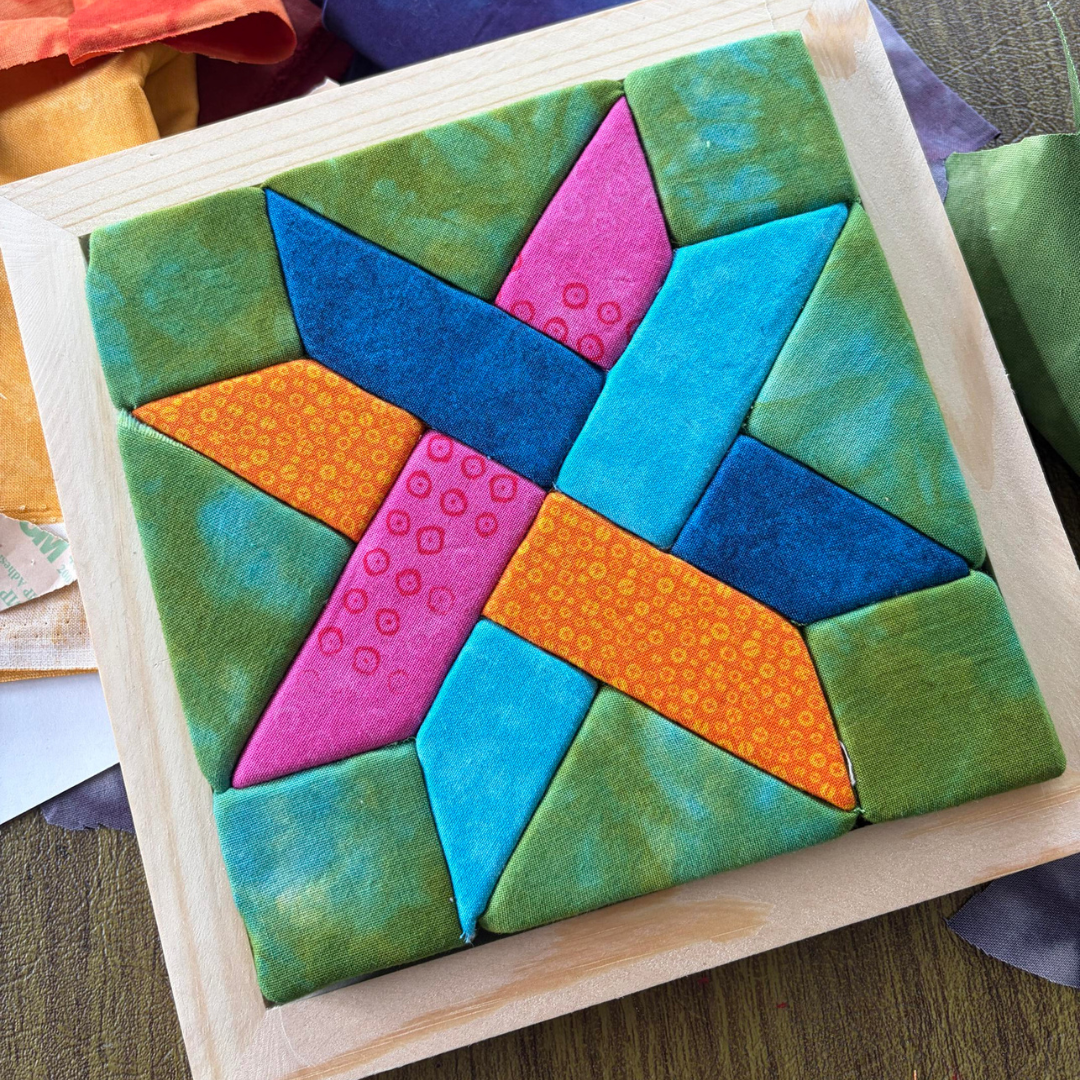
Fall Kinusaiga: No-Sew Fabric Mosaic
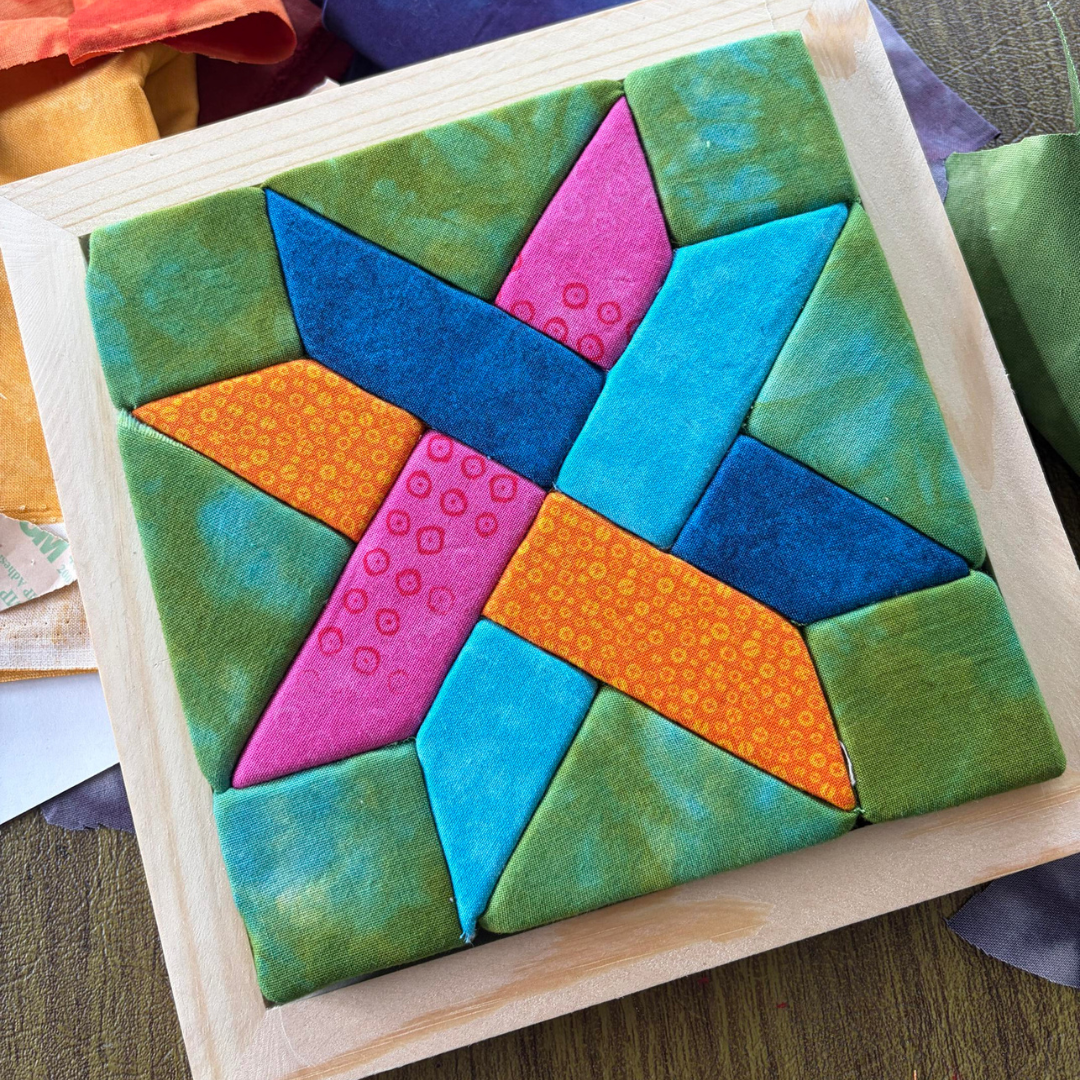
Create a richly-textured fall fabric mosaic using kinusaiga, a Japanese art form from the 1980’s that creates the look of stained glass or mosaic - no sewing required.
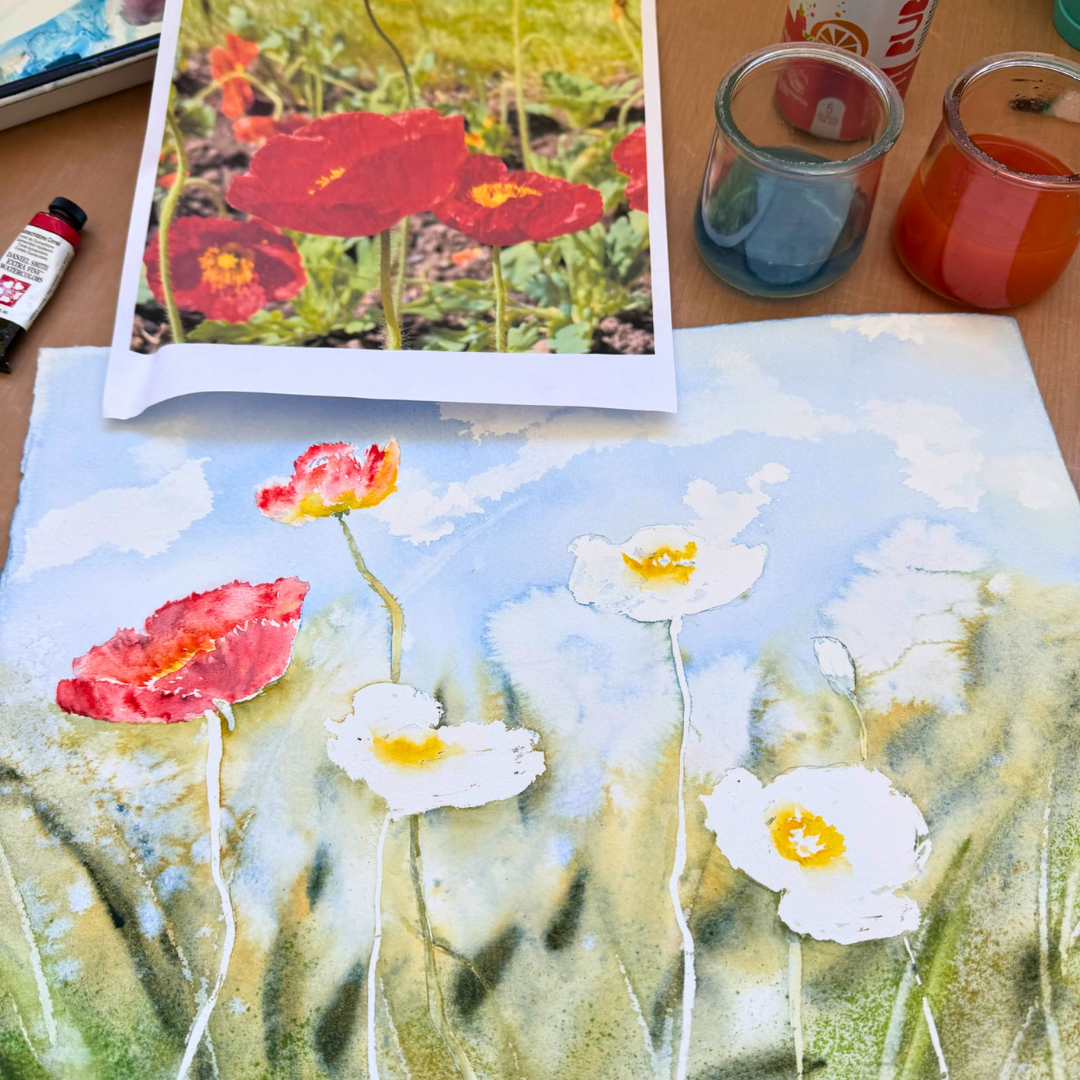
Let's Paint Poppies (Session 2)
Registration for this class has passed, but browse future classes at Adult Art Classes in Stoughton, WI | Depot Hill Creative — depot hill creative.



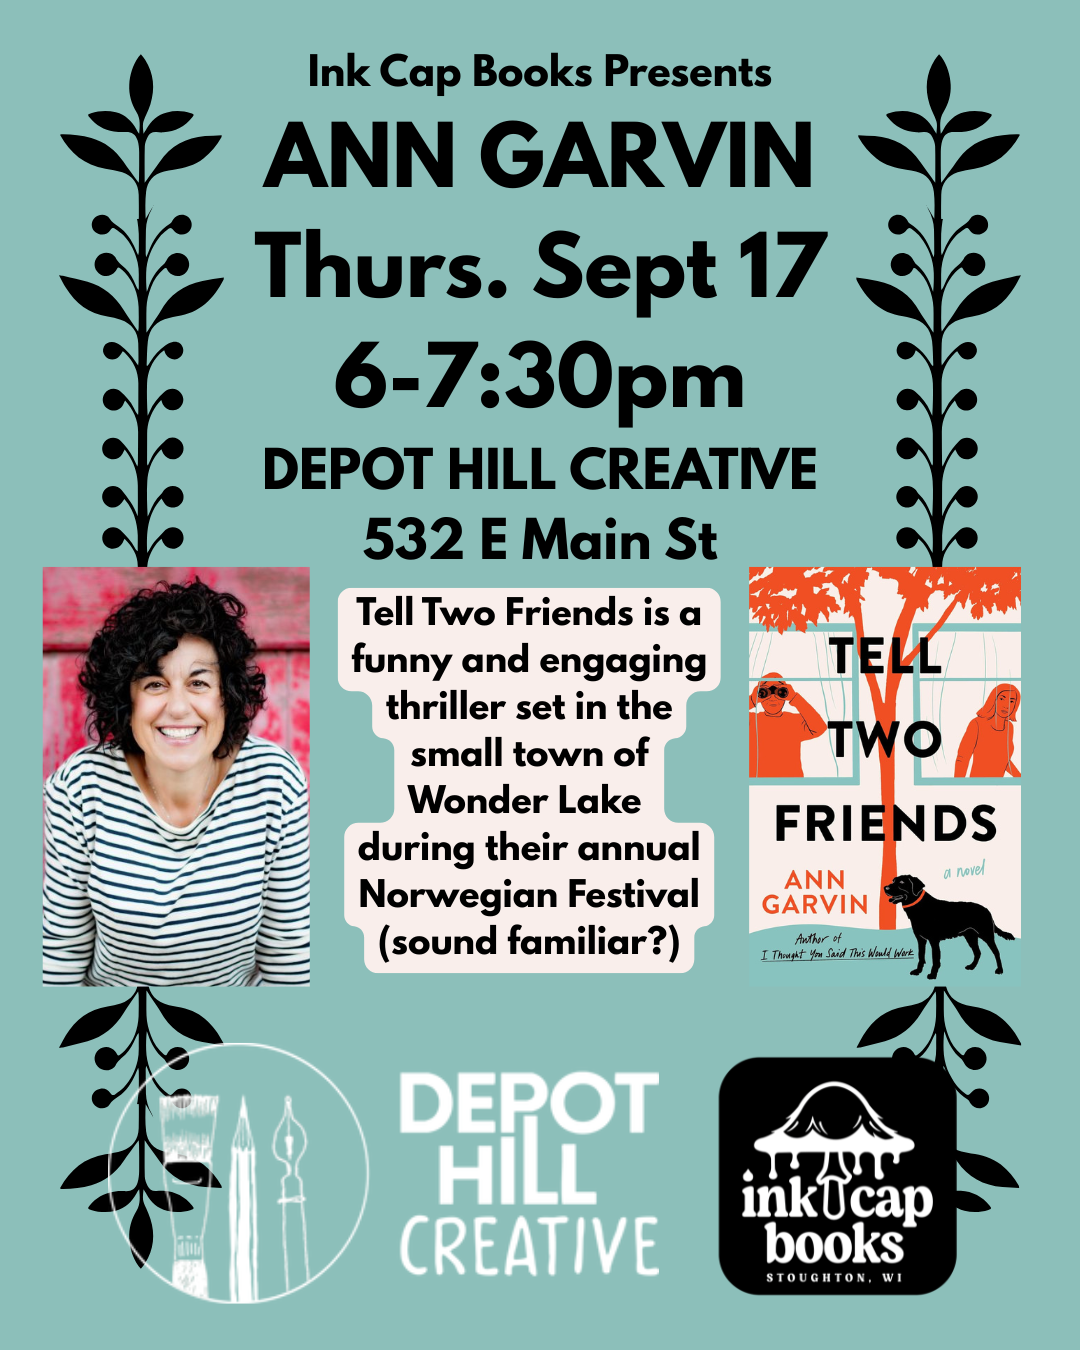
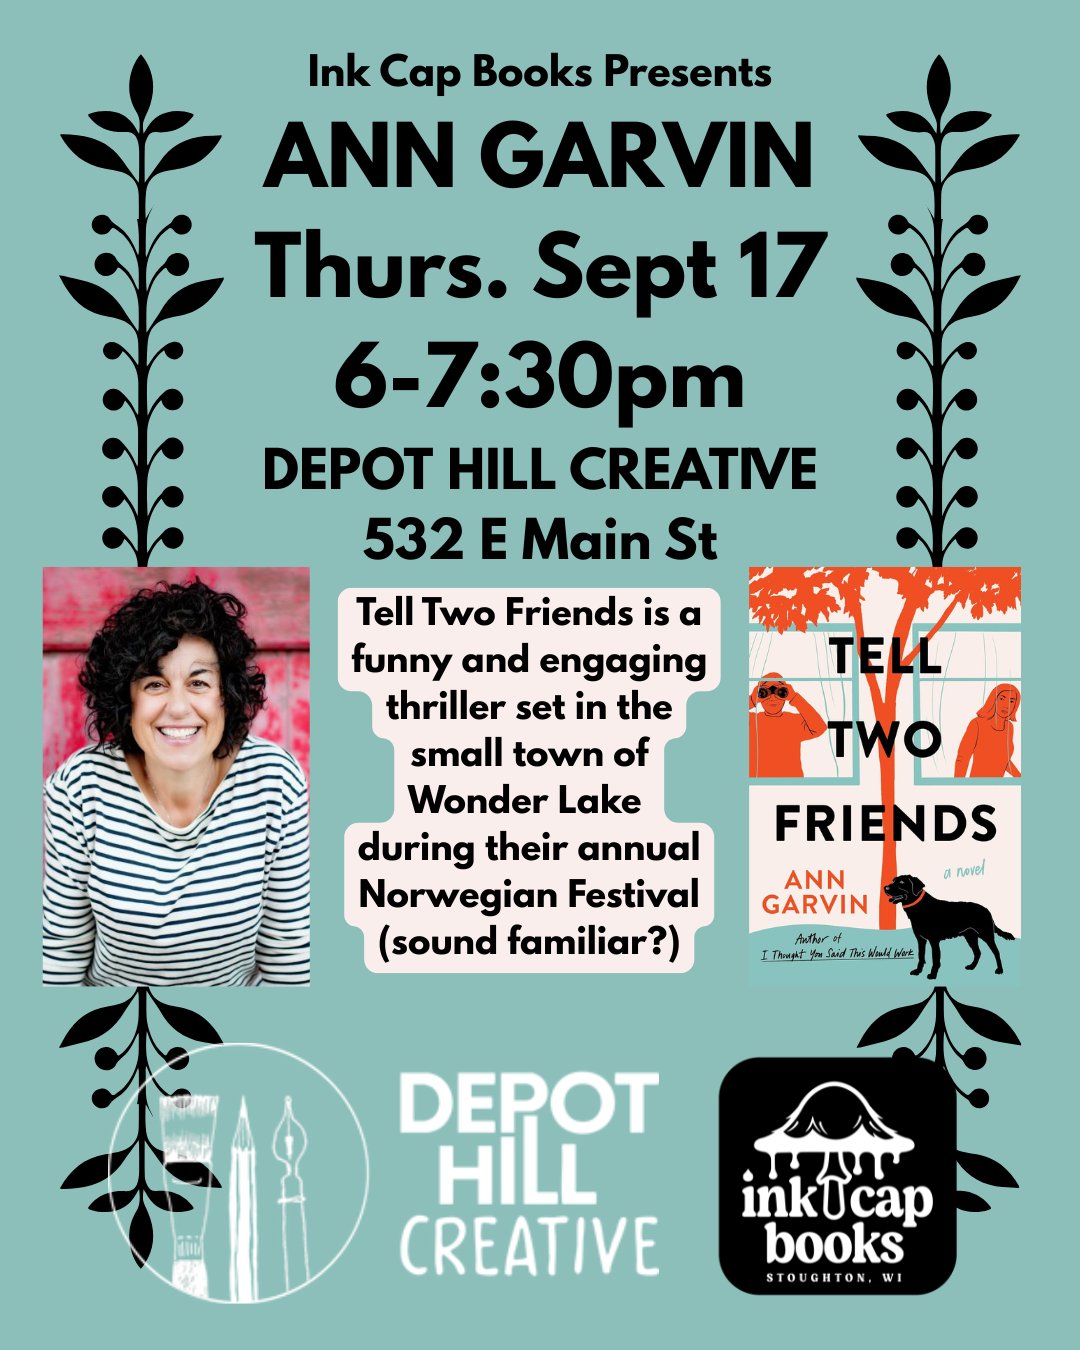
Exploring the Personal Essay

Registration for this class has passed, but browse more classes here.
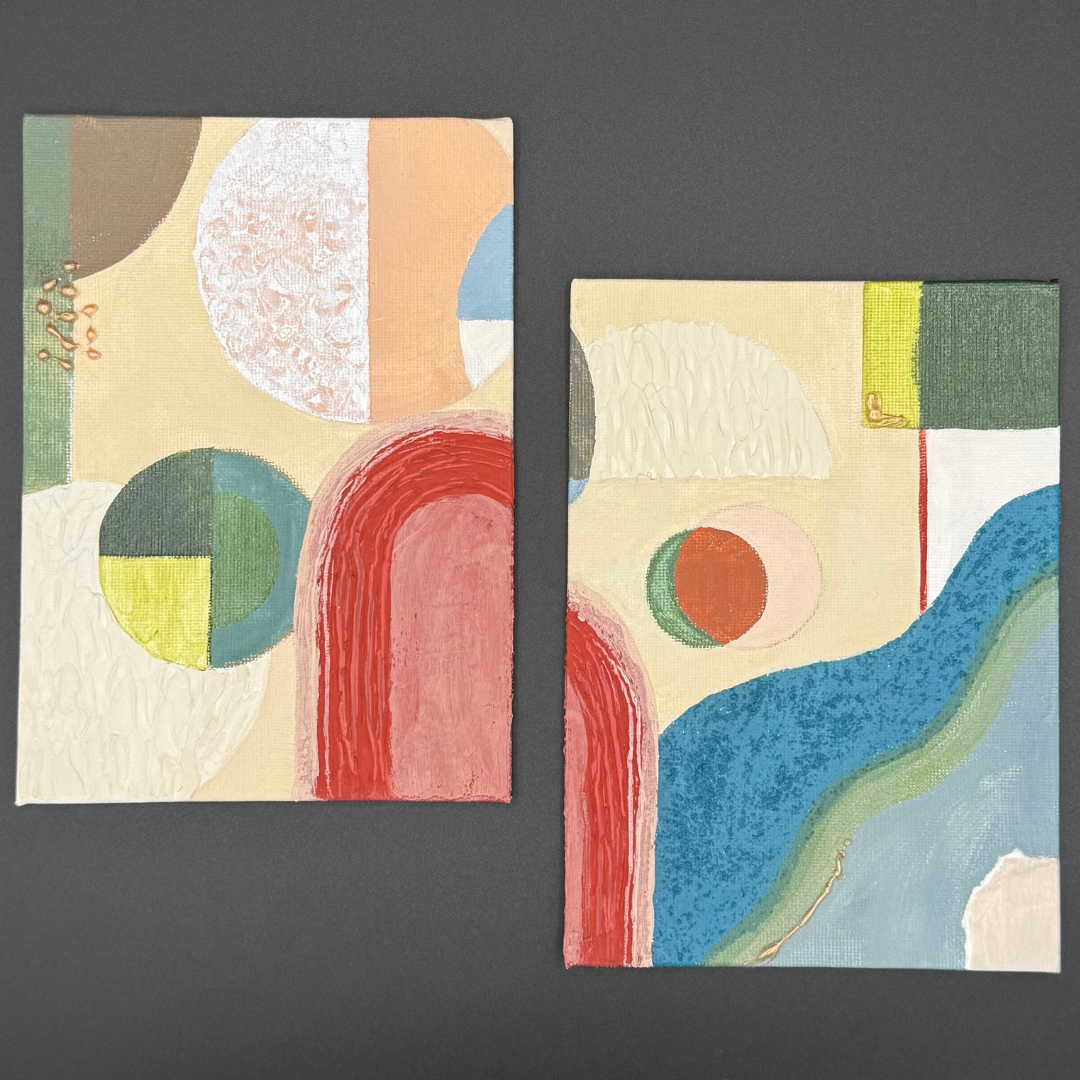
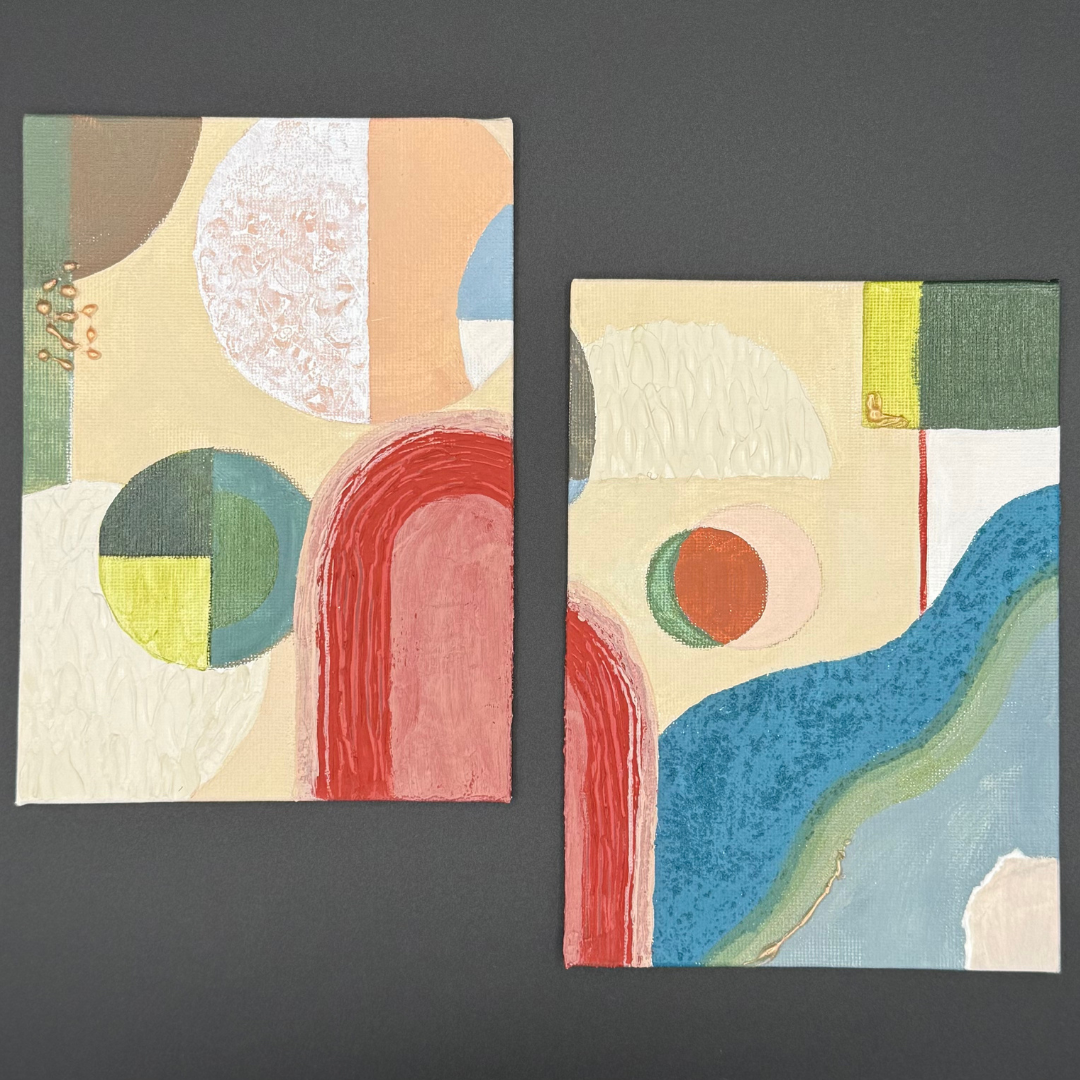
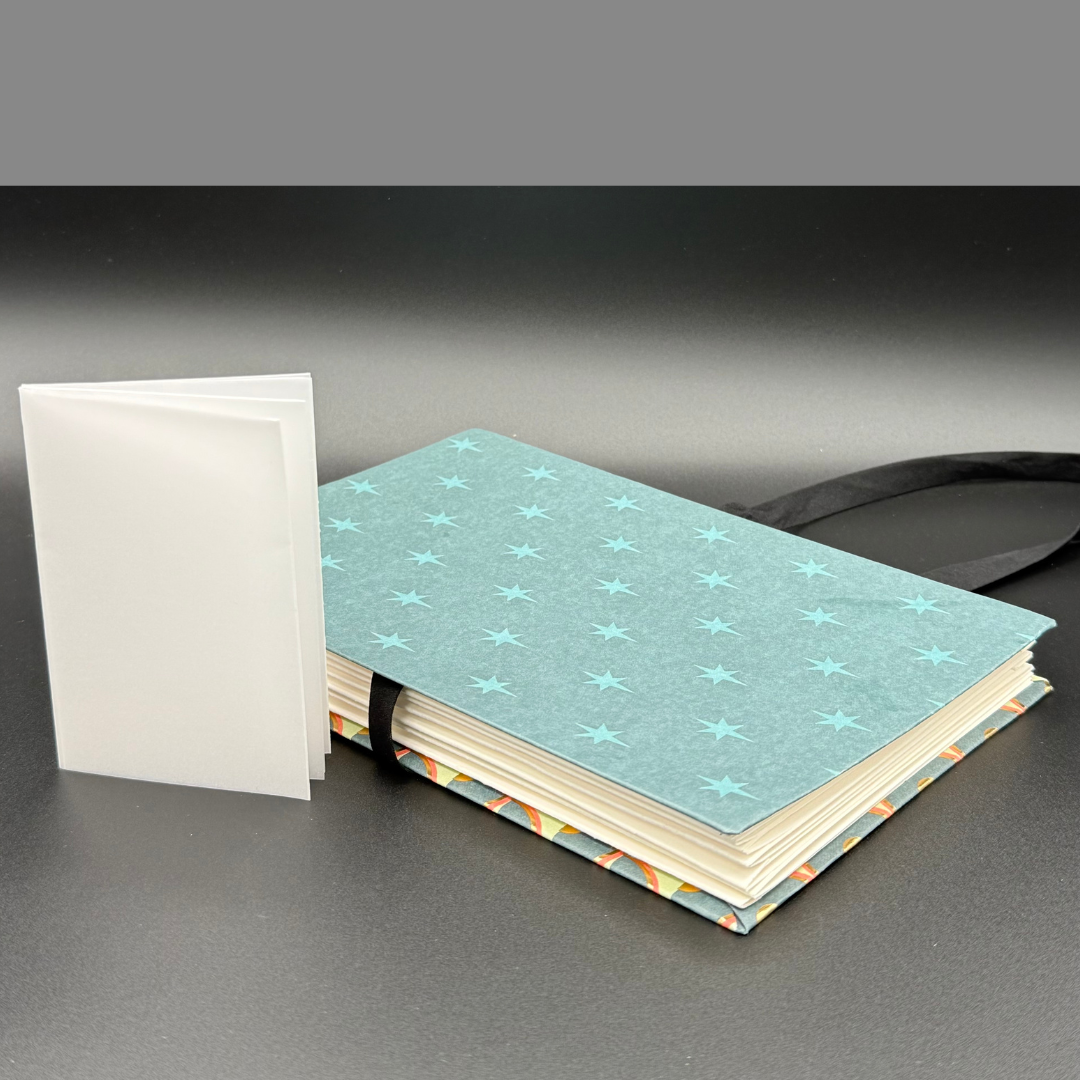
Fold, Layer & Create: Accordion Artist's Book
Registration for this class has passed, but browse more classes here.


Creative Market
Save the date!
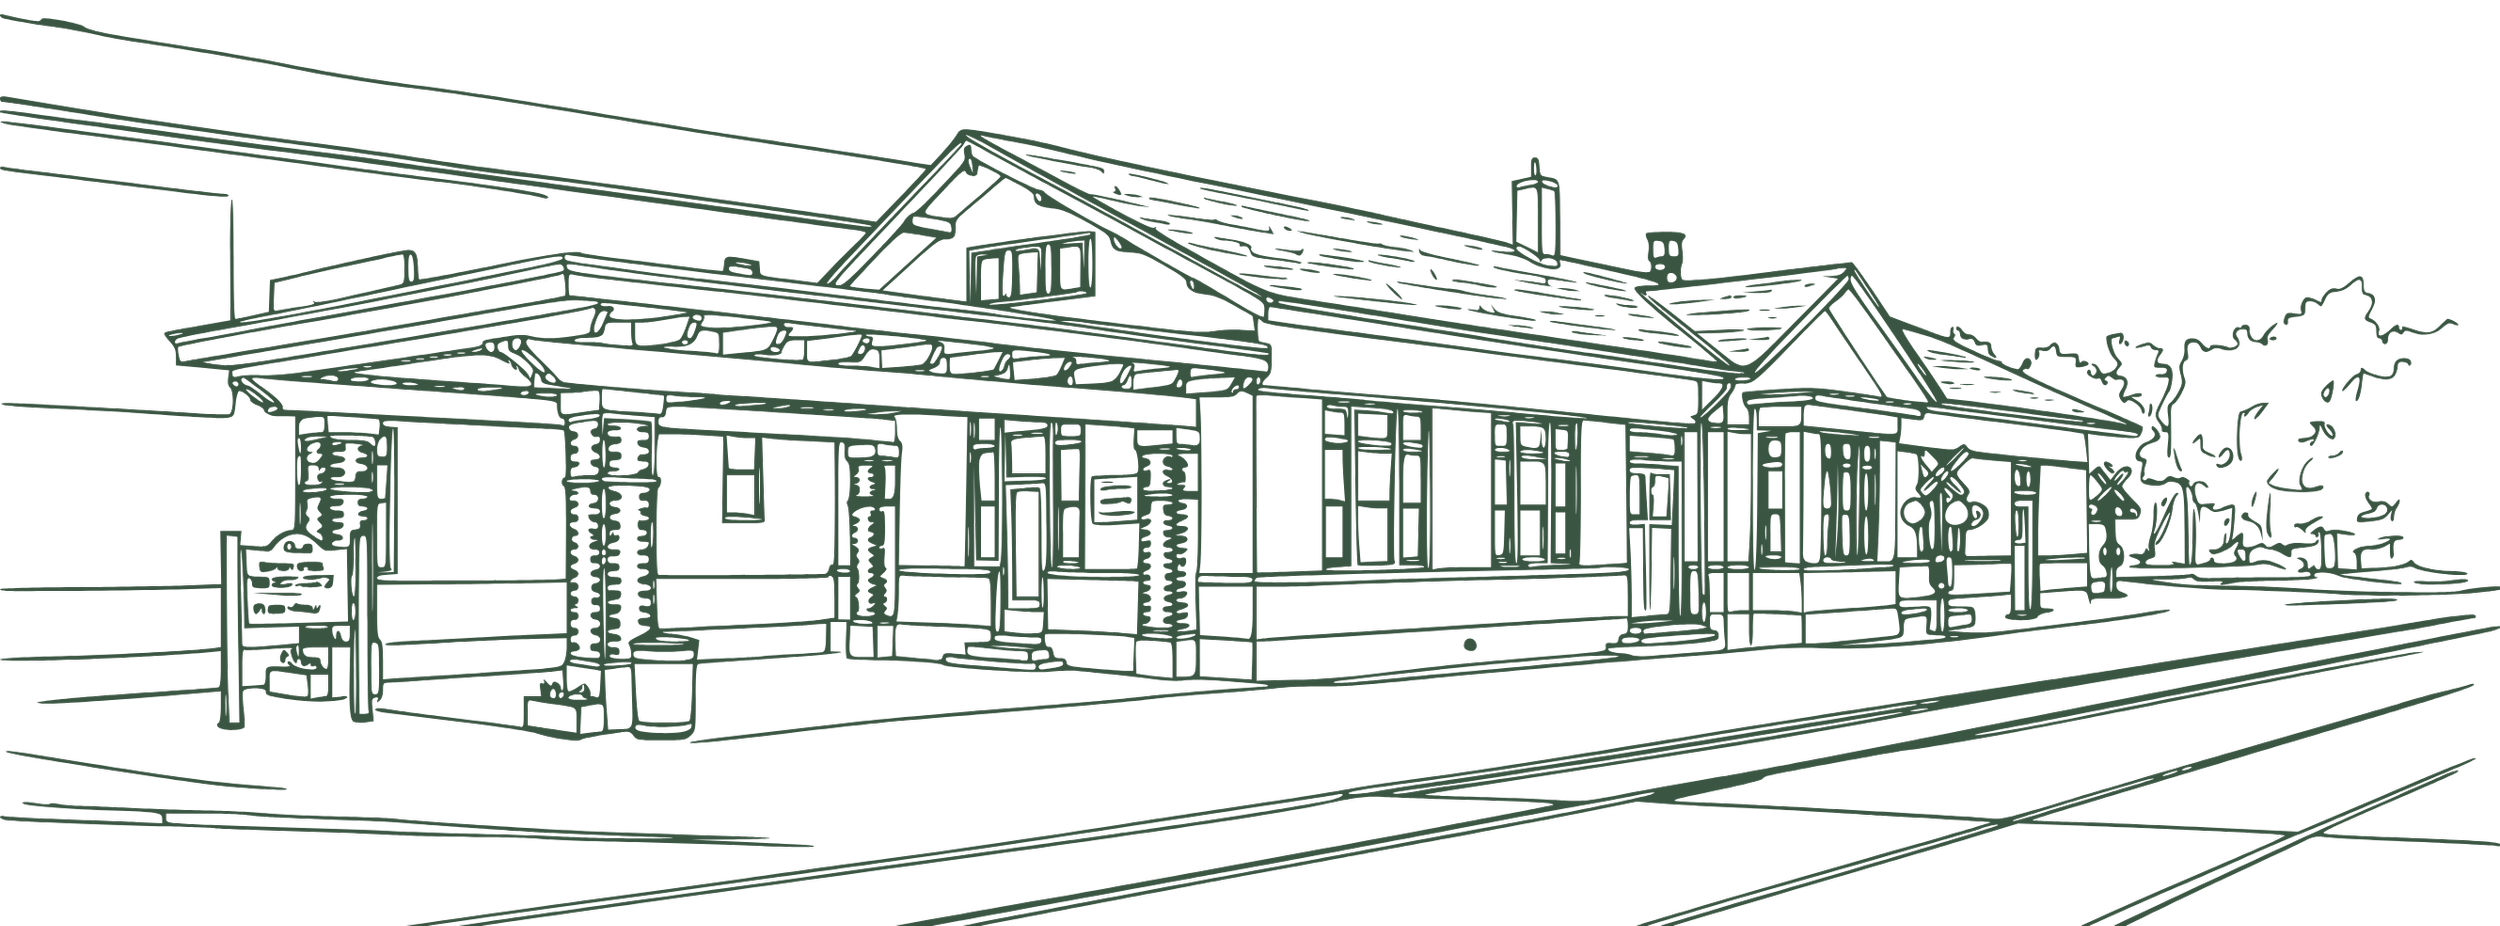
The inaugural Creative Market will include a Maker’s Market at Depot Hill Creative, the Grand Inspired Mug Show, artist demonstrations and activities across participating locations, and food and drinks from neighborhood partners.
Participating locations include Depot Hill Creative, Innovation Center Stoughton, Abel Contemporary Gallery, Grand Inspired, and Wildwood Cafe.
Event hours:
Friday, August 14 — 4:00–8:00 PM
Saturday, August 15 — 10:00 AM–5:00 PM
Macramé Wristlet Workshop
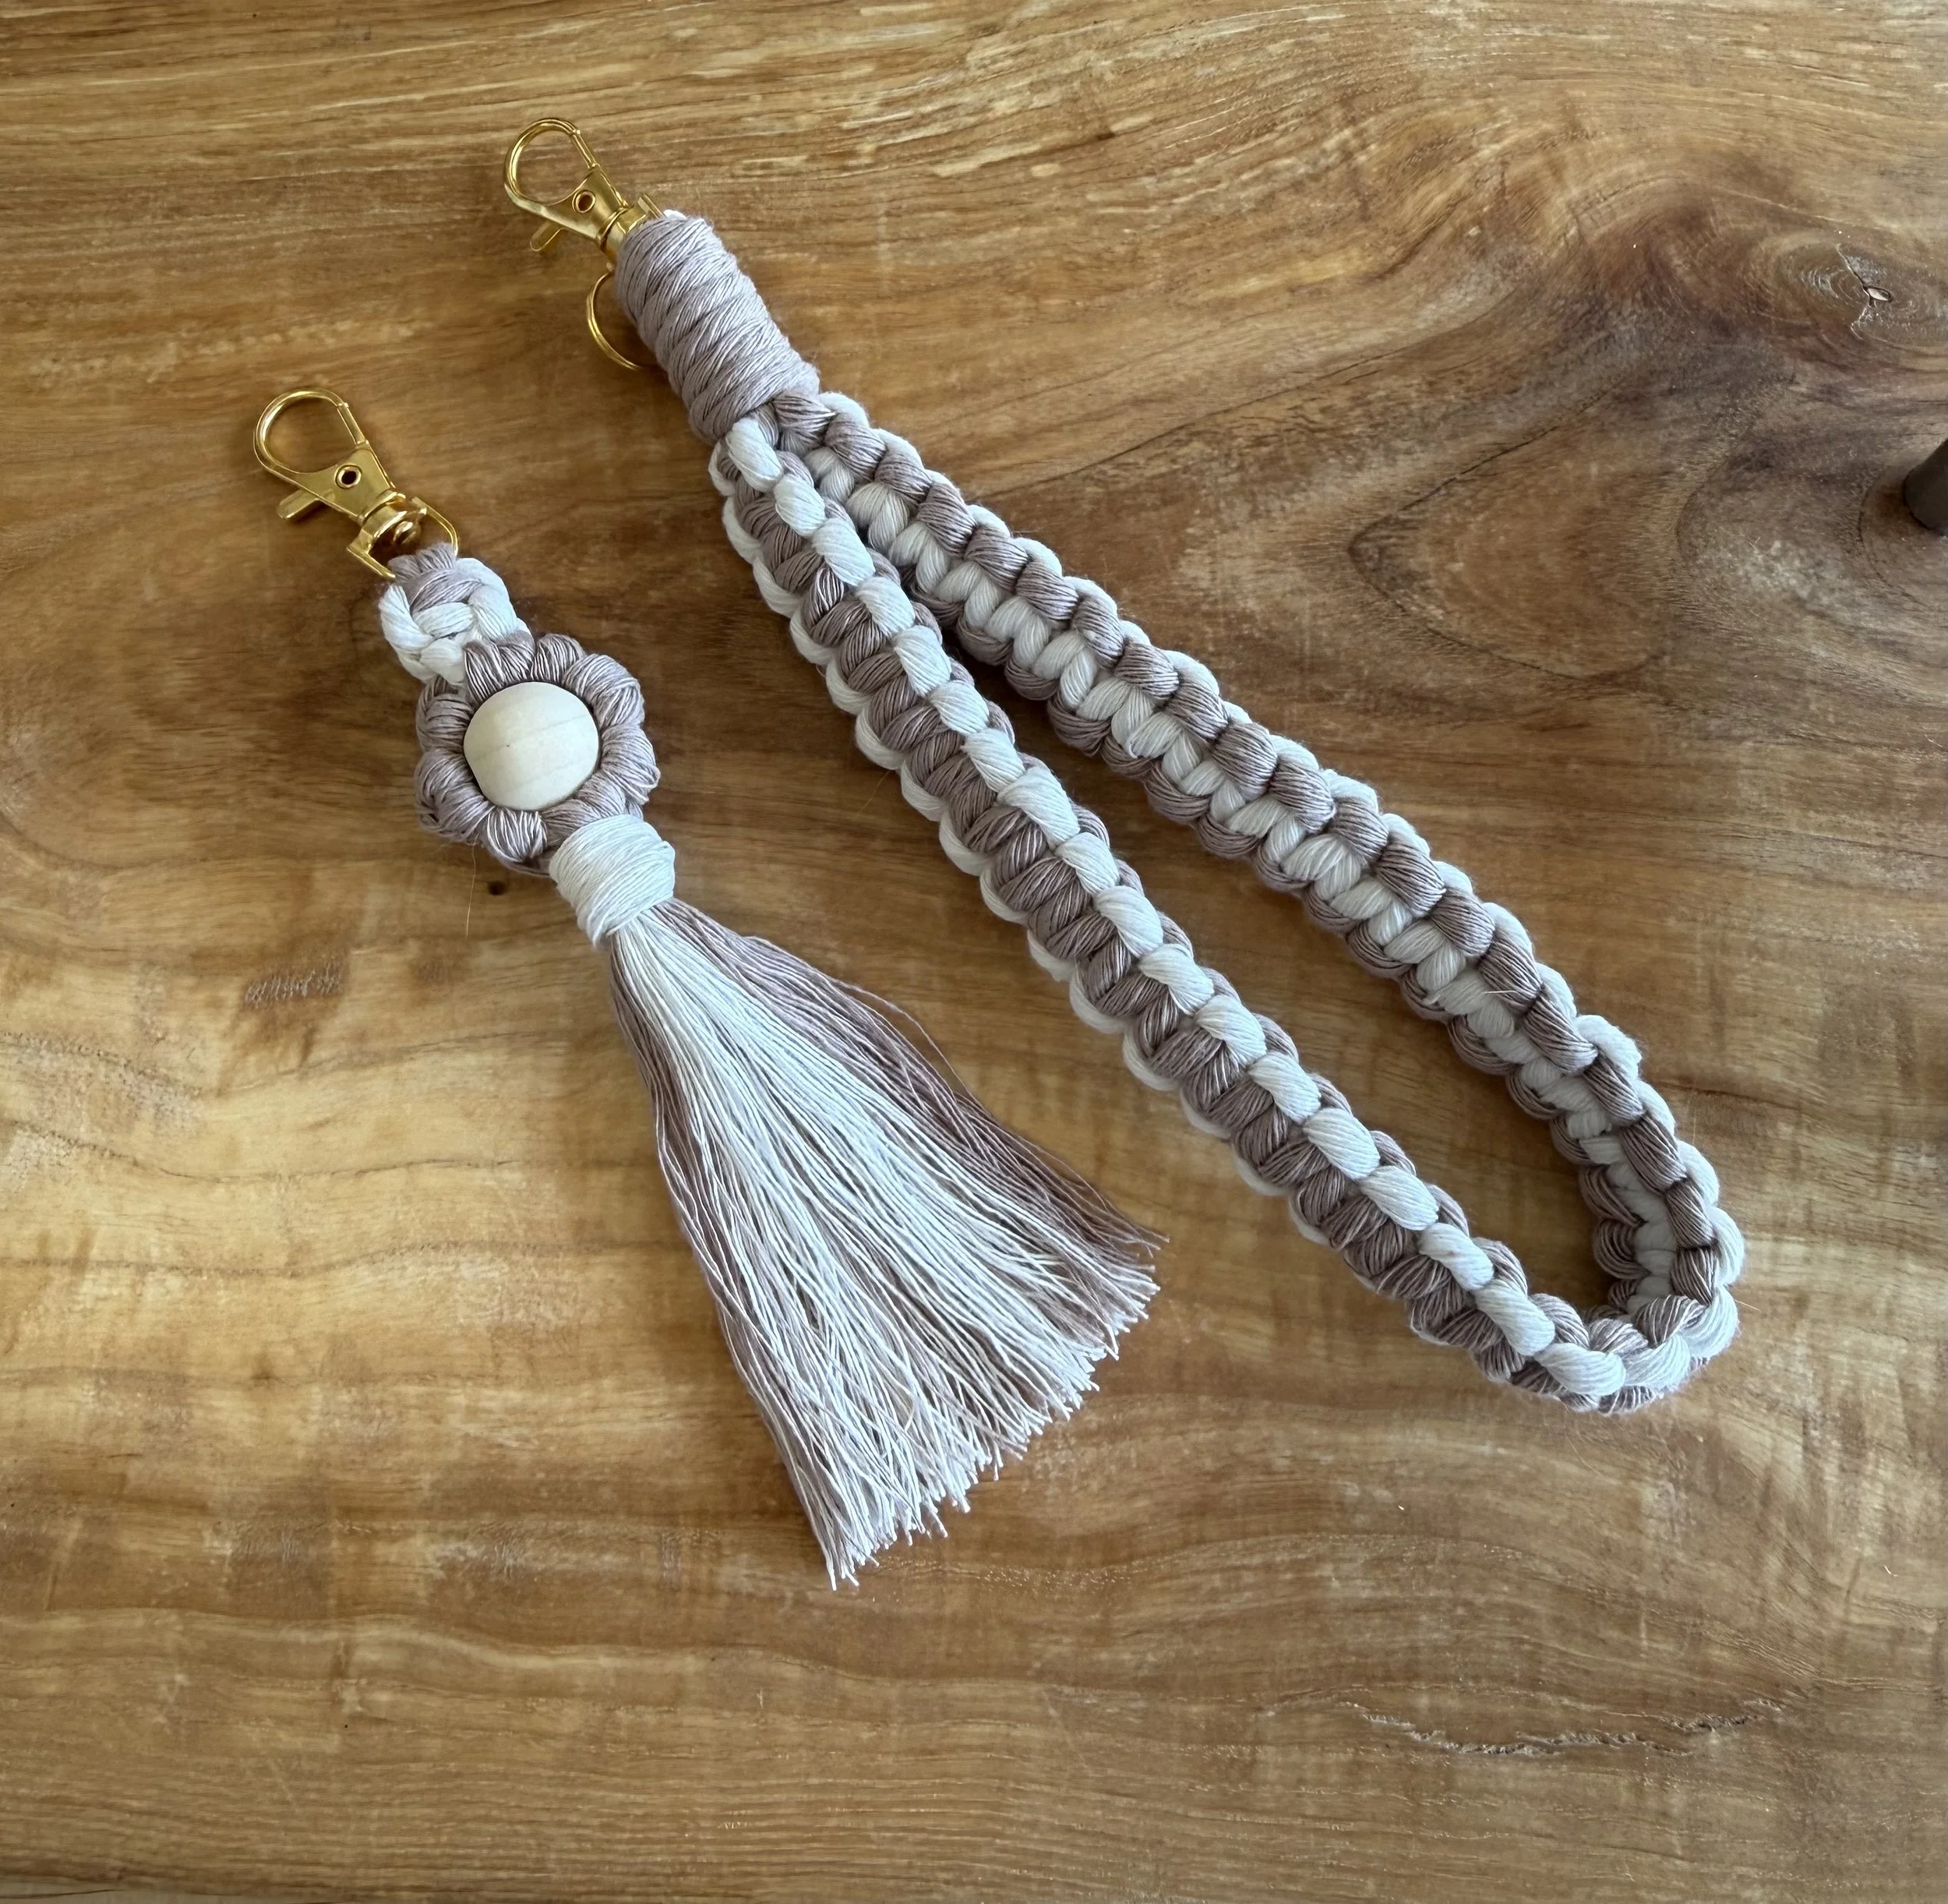
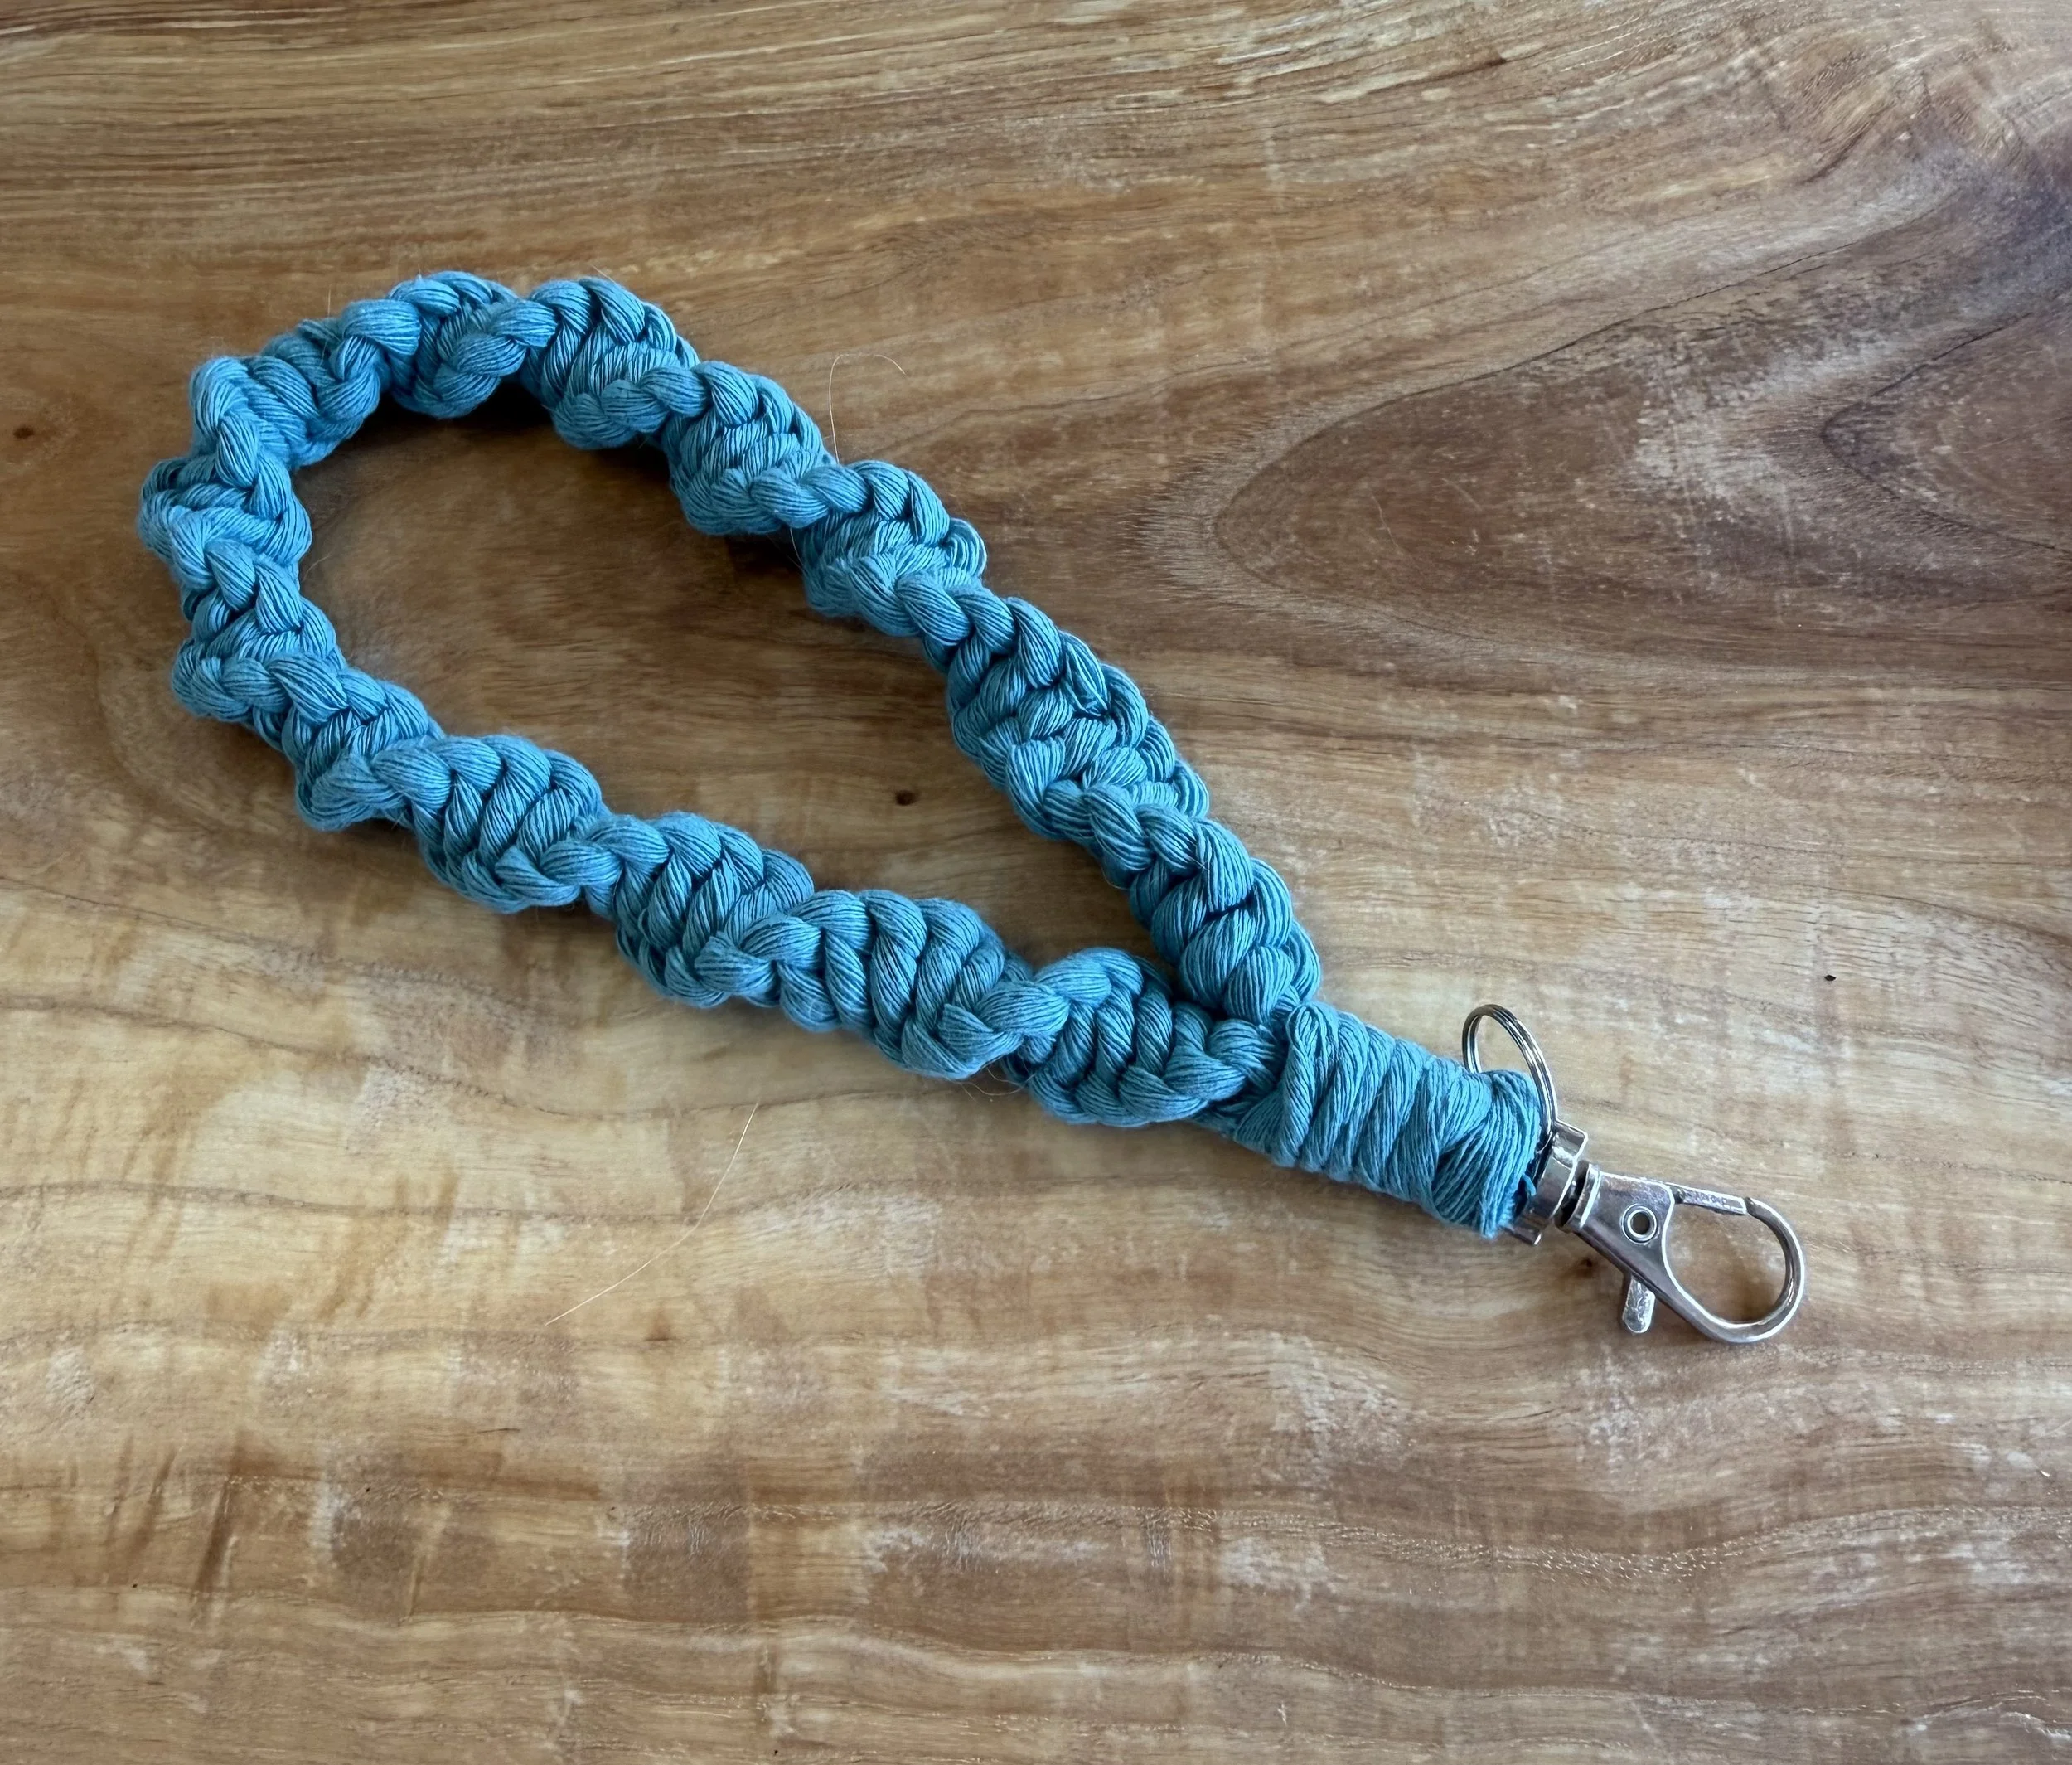
Description: Learn the basics of macramé while creating a beautiful wristlet keychain and coordinating floral charm. In this beginner-friendly workshop, you'll learn foundational knotting techniques and assemble a functional accessory that's perfect for yourself or a gift! Choose from a curated selection of cord colors, hardware finishes, and decorative charms to make your project uniquely yours. No previous macramé experience is necessary. Ages 11-15 are welcome with an accompanying adult.
What You’ll Do:
Learn the basics of modern macramé
Create single or two-tone macramé wristlet keychains
Make coordinating floral charms
Personalize your project by choosing your own color palette, hardware, and decorative charm
Leave with a beautiful handmade accessory ready to use or gift
What You’ll Learn:
How to measure and prepare macramé cord
Lark's Head Knot
Square Knot
Spiral Knot
How to maintain even tension
Finishing techniques for clean, professional results
Tips for creating future macramé projects at home
This Class is great for:
Complete beginners
Anyone who enjoys relaxing, hands-on creative experiences
Makers looking to learn a new fiber art
Friends, moms & daughters
Handmade gift lovers
Instructor: Alison Walker
Schedule: Sunday, August 9, 1-3PM
Cost: $45
What to bring: Just yourself! All supplies and tools are provided. Feel free to bring reading glasses if you typically use them for close-up work.
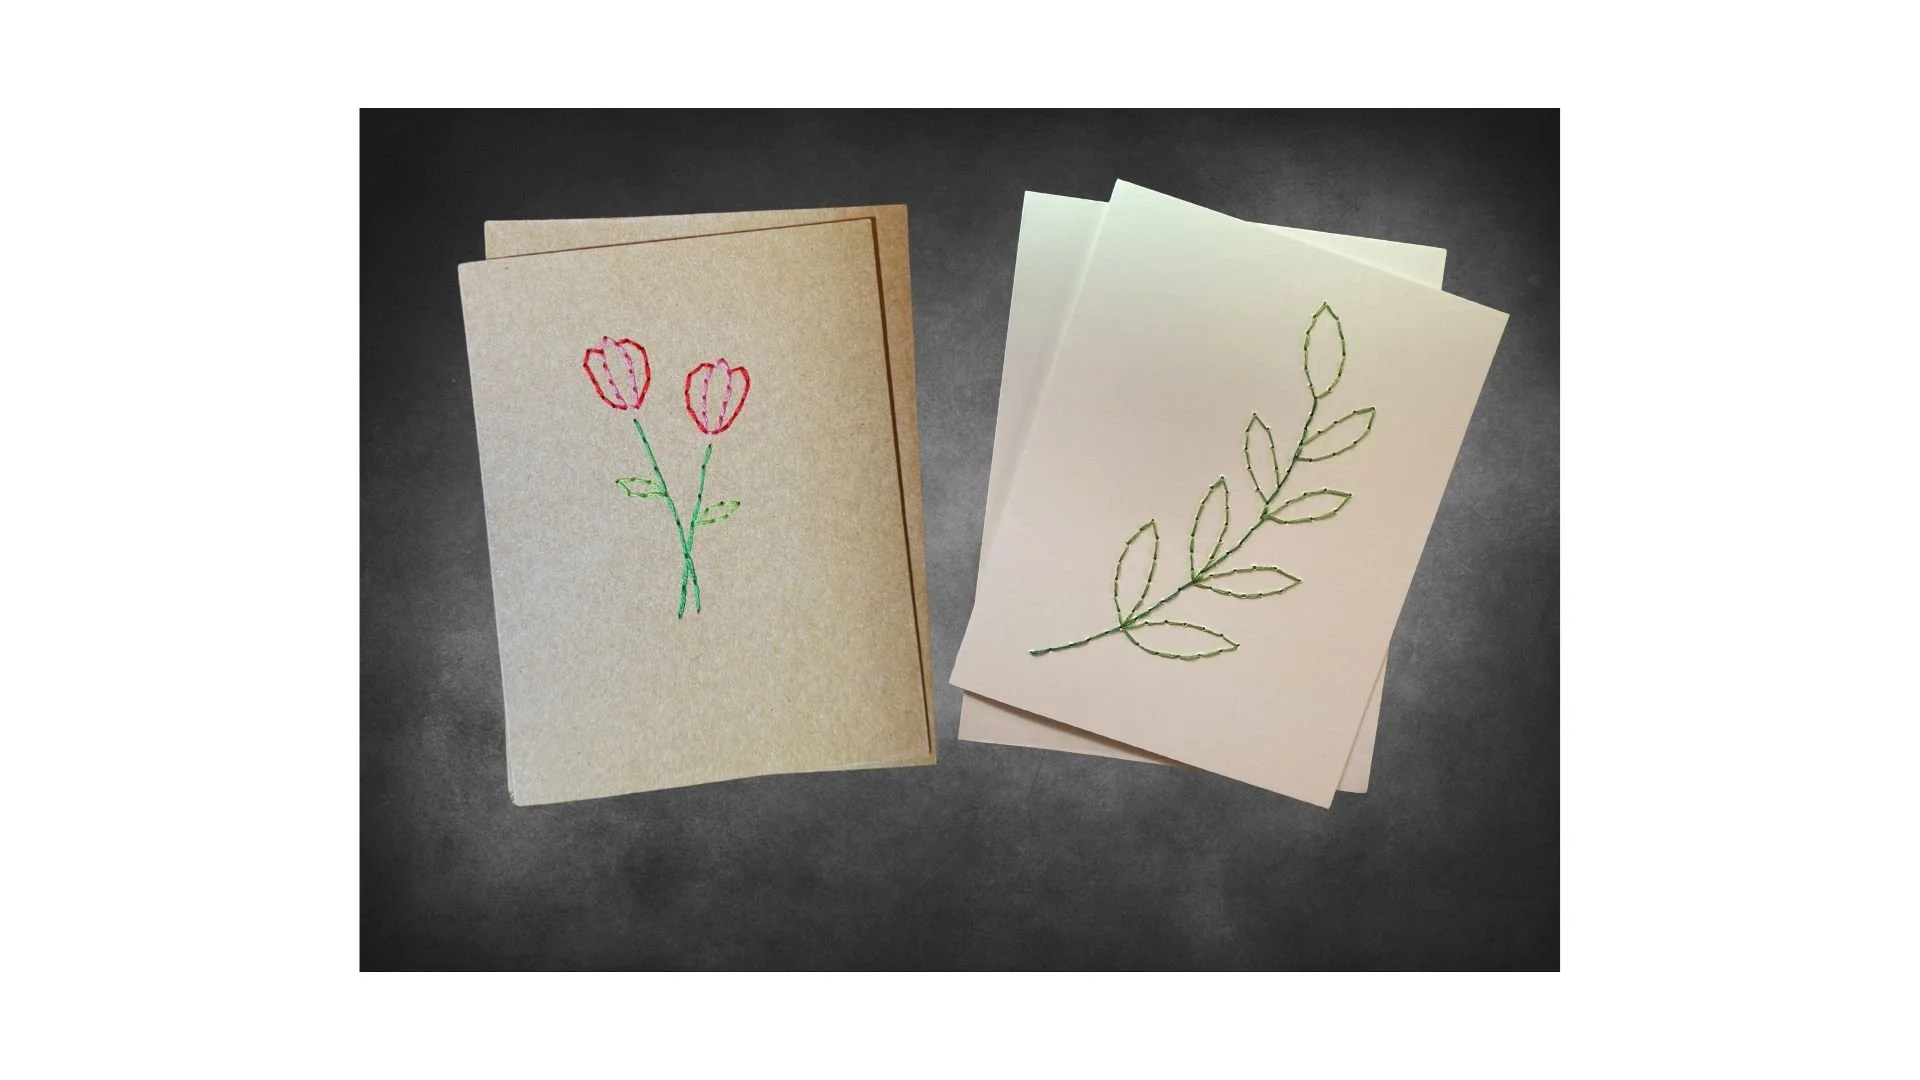
Hand-Stitched Botanical Cards
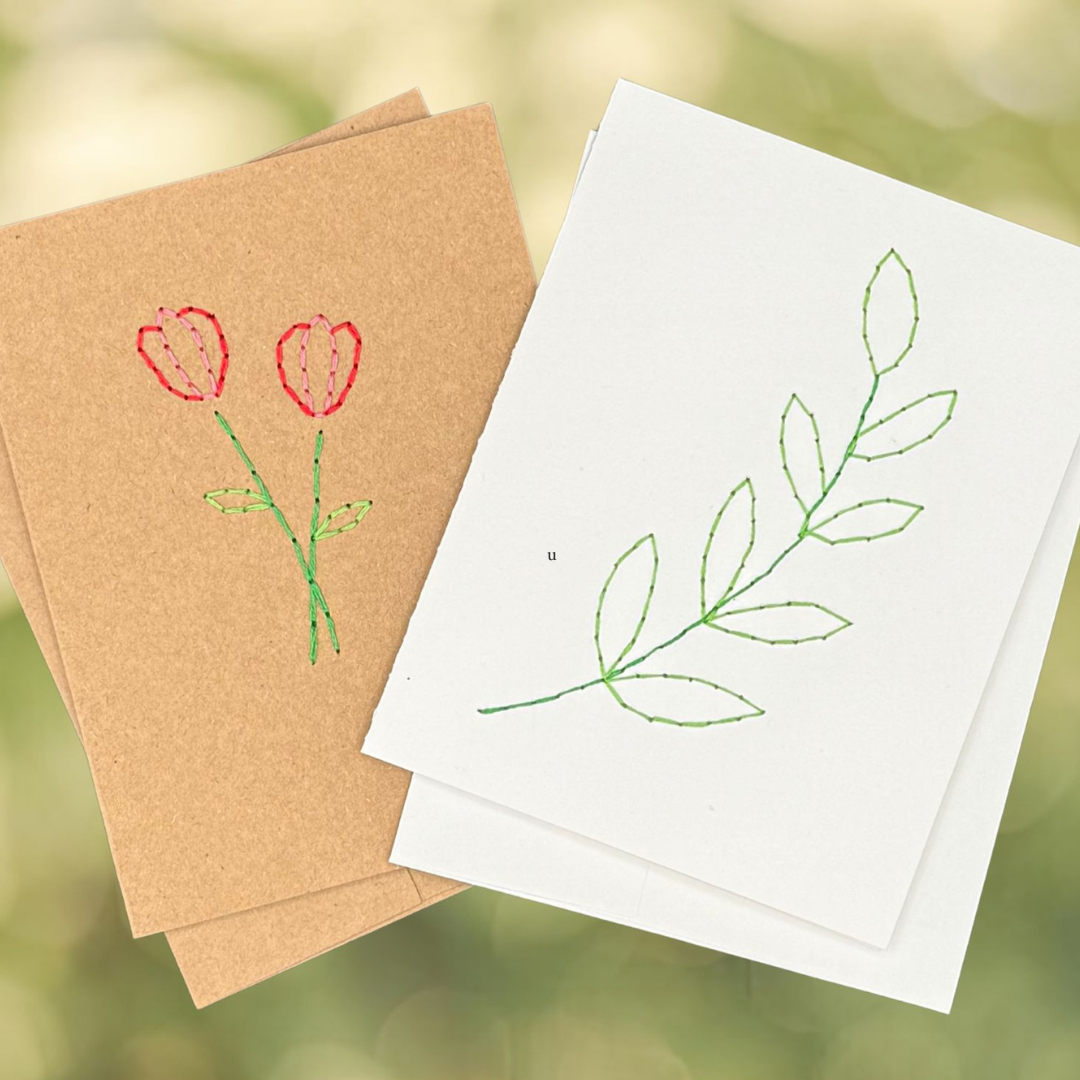
Description: Discover the art of paper stitching in this beginner-friendly workshop. Using embroidery floss, simple hand-stitching techniques, and botanical templates, you'll create a collection of elegant handmade greeting cards. You'll learn how to punch design guides and stitch graceful line-art illustrations while exploring a creative process that's both calming and rewarding.
Choose from a selection of modern botanical designs and thread colors to create cards that are uniquely your own. No previous embroidery or stitching experience is necessary.
What You’ll Do:
Learn the basics of paper embroidery
Transfer a botanical design onto cardstock
Practice hand-stitching techniques using embroidery floss
Create 2 or more handmade greeting cards (depending on your pace)
Finish your cards with coordinating envelopes and professional interior liners
What You’ll Learn:
How to transfer a design using reusable templates
Proper hole spacing and punching techniques
Beginner-friendly stitching techniques
Tips for clean starts, neat finishes, and professional-looking handmade cards
Ideas for continuing paper embroidery projects at home
This Class is great for:
Complete beginners
Paper crafters and card makers
Embroidery enthusiasts looking to try something new
Anyone who enjoys relaxing, mindful creative activities
Handmade gift lovers
Adults and teens (recommended ages 13+ with accompanying adult)
Instructor: Alison Walker
Schedule: Tuesday, August 4, 5:30 - 8:00 pm
Cost: $45
What to bring: Just yourself! All supplies and tools are provided, including cards, envelopes, embroidery floss, needles, templates, and specialty tools. Reading glasses are recommended if you normally use them for close-up work.